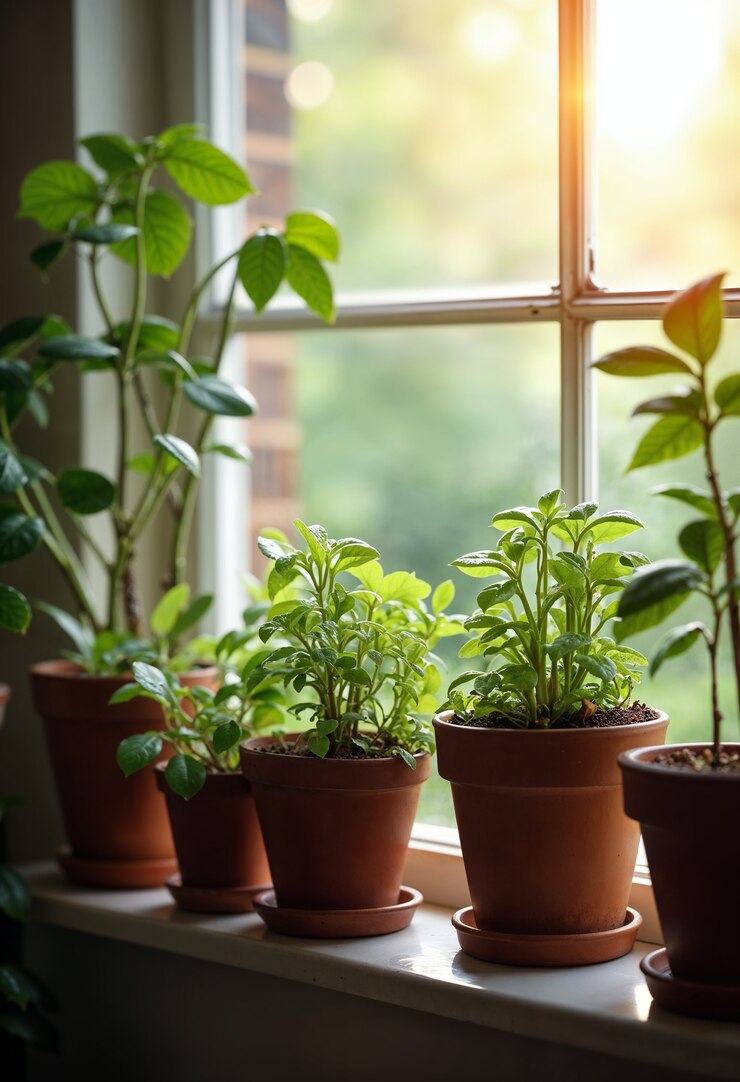
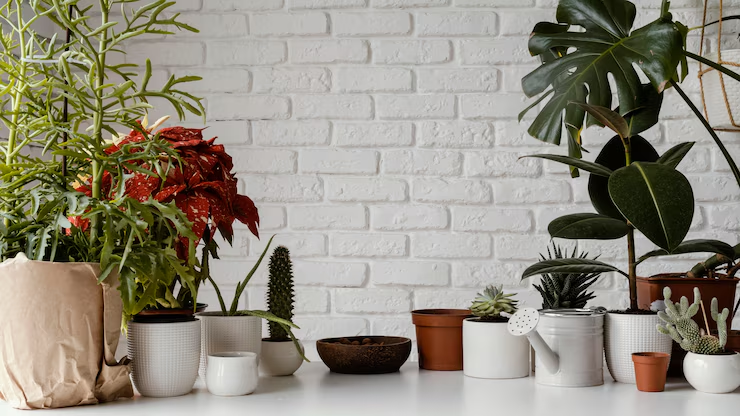
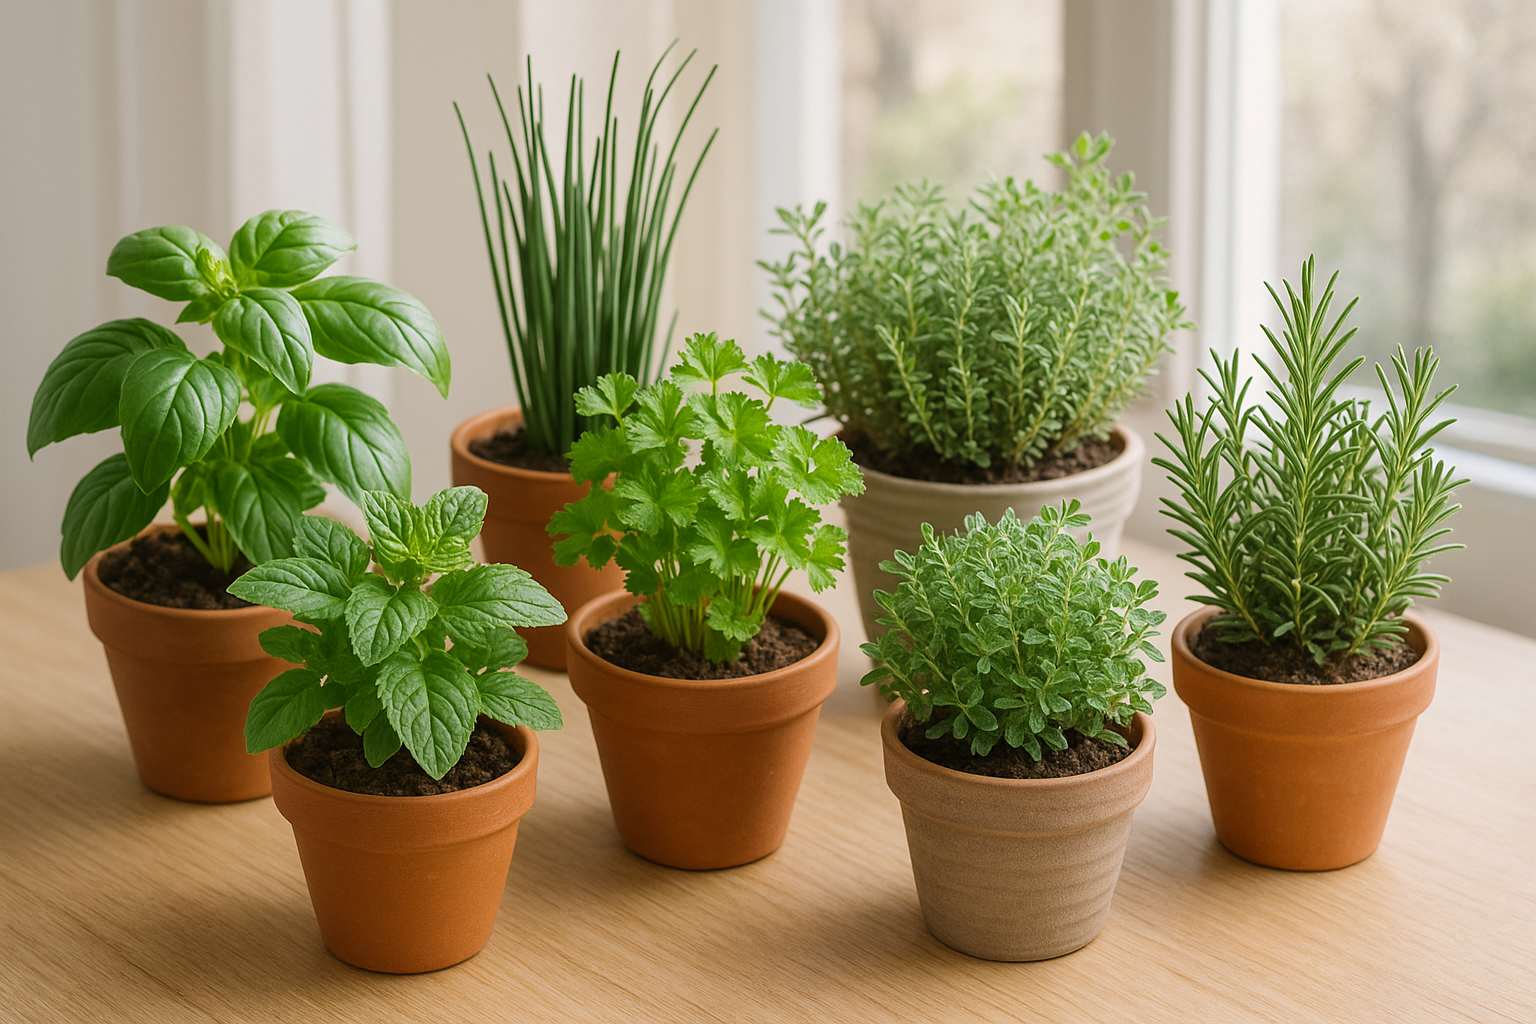
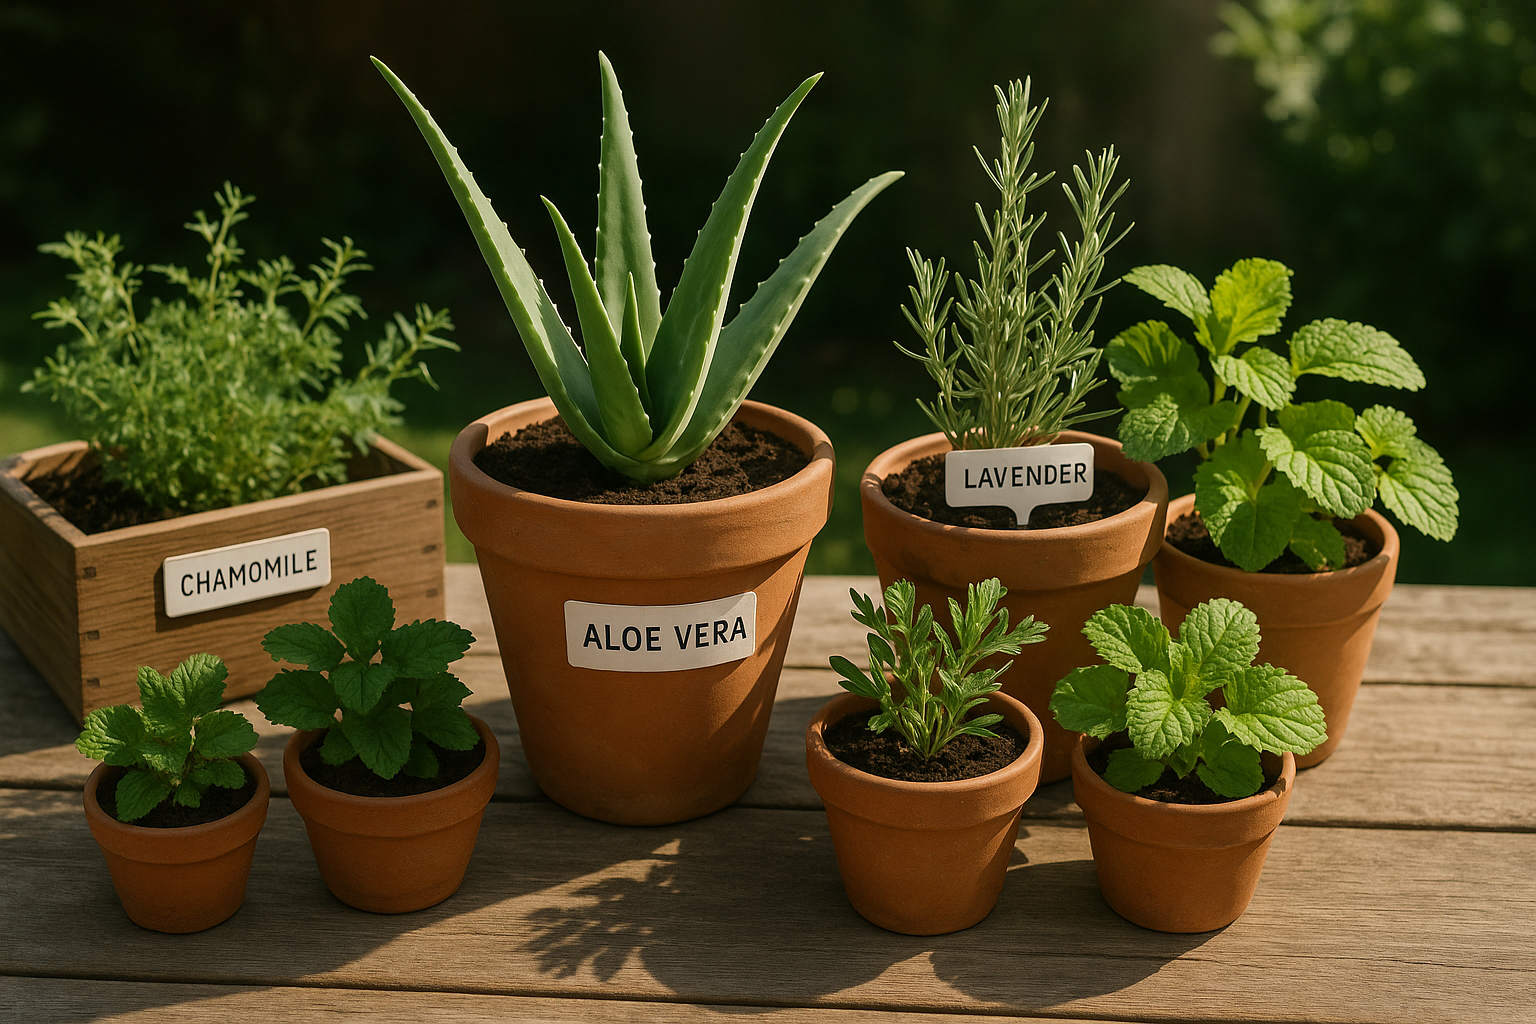
Set Up a Green Corner in Your Apartment

Living in an apartment doesn’t mean you have to give up on your dream of having a garden. In fact, creating a green corner in your apartment is one of the best ways to bring life, color, and calm into your home — no backyard required. Whether you have just a small nook or an entire wall to work with, you can design a cozy indoor jungle that suits your lifestyle and space.

This guide will walk you through every step to set up your perfect indoor green corner — from choosing the right spot and plants to styling and maintenance.

Why Create a Green Corner?

Aside from adding natural beauty to your home, a green corner offers several amazing benefits:

  • Improves indoor air quality
  • Reduces stress and boosts mood
  • Acts as a creative, living décor feature
  • Adds humidity to dry indoor environments
  • Connects you to nature — even in the city

And the best part? You don’t need a huge budget or tons of space to make it happen.

Step 1: Choose the Right Spot

Start by identifying an area in your apartment that could benefit from a little green magic. Some great places include:

  • Next to a bright window (south- or east-facing is ideal)
  • An empty corner of the living room
  • Unused space near your balcony or sliding door
  • Beside your desk or reading chair
  • On top of a console table or floating shelf

Things to consider:

  • Light: Does the space get bright, indirect light? If not, you’ll need shade-tolerant plants or a grow light.
  • Temperature: Avoid areas near AC vents, radiators, or drafty windows.
  • Size: Make sure you have enough room for pots or shelves without crowding the walkway.

Step 2: Pick the Perfect Plants

Choosing the right mix of plants is key to a balanced and healthy green corner. Variety is great, but consider their care needs — it’s best to group plants with similar light and water preferences.

Great plants for green corners:

  • Snake Plant: Tall and sculptural, easy to care for
  • Monstera deliciosa: Big leaves, big personality
  • Pothos: Trailing and fast-growing, perfect for hanging baskets
  • Peace Lily: Elegant and air-purifying
  • ZZ Plant: Drought-tolerant and great for low light
  • Ferns (like Boston Fern): Lush and great for humidity
  • Succulents: Great for sunny shelves or tabletop spots

Tip: Mix tall plants, medium-sized ones, and small trailing ones to create layers and visual interest.

Step 3: Choose the Right Pots and Accessories

Your green corner is more than just plants — it’s a design element. So choose planters and accessories that reflect your style.

Pot Ideas:

  • Terracotta: Breathable and classic
  • Ceramic: Sleek and stylish, with lots of color options
  • Woven baskets: Add warmth and texture
  • Metal planters: Industrial or modern touch
  • Recycled containers: Eco-friendly and creative

Also consider:

  • Plant stands to add height
  • Wall shelves for small pots or trailing vines
  • Macrame hangers for vertical space-saving
  • Pebbles or moss on top of the soil for a polished look

Step 4: Design Your Layout

Creating an eye-catching layout is all about balance, height, and texture. Here’s how to design your corner like a pro:

  • Start with a focal point: A tall plant like a Monstera or Areca palm
  • Layer outward: Add medium plants around the base, then fill gaps with small ones
  • Use vertical space: Add shelves or hanging planters to draw the eye upward
  • Play with color and texture: Combine dark green leaves with variegated ones, smooth pots with rough baskets

Pro Tip: Use odd numbers (3, 5, 7) when grouping plants — it feels more natural to the eye.

Step 5: Make It Functional and Cozy

Your green corner doesn’t have to be just decorative — it can also be a relaxing place to unwind.

Add cozy touches:

  • A small chair or floor cushion for reading
  • A side table for your tea or journal
  • Fairy lights or a soft lamp for evening ambiance
  • A rug or mat to define the space

Now it’s not just a green corner — it’s your personal retreat.

Step 6: Keep It Alive and Thriving

Your green corner is a living space, so don’t forget regular care. Here’s a quick routine:

  • Watering: Check each plant’s needs and avoid overwatering
  • Dusting leaves: Helps them breathe and stay shiny
  • Rotating pots: Promotes even growth
  • Pruning: Keeps plants looking tidy and healthy
  • Fertilizing: Every few weeks during the growing season

Watch for pests like spider mites or fungus gnats — especially in warm, humid corners. Neem oil and sticky traps can help.

Small Space? No Problem!

Even if you’re working with a tiny apartment, you can still enjoy a lush green setup. Try:

  • Floating shelves along a bright wall
  • Corner ladders or tiered plant stands
  • Window planters or suction cup pots
  • Hanging baskets from the ceiling or curtain rods

A few well-placed plants can make a big visual impact, even in the smallest studio.

Your Urban Jungle Starts Here

Creating a green corner in your apartment is more than a design choice — it’s a lifestyle. With just a little planning, the right plants, and a touch of creativity, you can build a beautiful, relaxing space that brings the outside in.

Whether you’re a plant newbie or an indoor jungle pro, there’s always a new leaf to grow.

Bacterial and Viral Diseases in Ornamental Plants: How to Recognize and Manage Them

Bacterial and viral diseases are often misunderstood and difficult to manage in ornamental plants. These diseases can cause serious damage, and unlike fungal infections, they may not always be visible until the plant is already showing significant signs of stress. In this article, we’ll discuss the main bacterial and viral diseases that affect houseplants, how to identify them, and the best practices for treatment and prevention.

1. Bacterial Leaf Spot (Xanthomonas, Pseudomonas)

Cause: Bacteria such as Xanthomonas and Pseudomonas are the primary culprits, typically introduced by water splashing or contaminated tools.

Symptoms:

  • Water-soaked spots on leaves, which turn brown or black.
  • Yellow halos around the lesions.
  • The spread of lesions, leading to leaf drop.

Treatment:

  • Prune affected leaves using sterile scissors or pruning shears.
  • Avoid overhead watering to reduce the spread of bacteria.
  • Disinfect tools after each use (using alcohol or bleach).
  • Apply copper-based bactericides for severe cases.

2. Bacterial Wilt (Ralstonia solanacearum)

Cause: This disease is caused by the Ralstonia solanacearum bacterium, which infects the plant through the roots.

Symptoms:

  • Sudden wilting, even when the soil is moist.
  • Yellowing or browning of leaves.
  • Brown discoloration inside the stem when cut.

Treatment:

  • Cut away infected stems and discard them.
  • Increase air circulation and reduce watering to allow the plant to dry.
  • Disinfect pots and tools before reusing.
  • For persistent cases, discard the plant to prevent the spread to others.

3. Bacterial Soft Rot (Erwinia)

Cause: Erwinia bacteria cause soft rot, particularly in high-moisture conditions.

Symptoms:

  • Soft, mushy, and foul-smelling tissue, usually at the base of the stem or near the roots.
  • Water-soaked lesions that rapidly decay.
  • A strong odor of decay.

Treatment:

  • Remove infected parts immediately, being careful not to spread the bacteria to other plants.
  • Repot the plant in fresh, sterile soil.
  • Use a bactericide containing copper or hydrogen peroxide on the cut areas.
  • Avoid overwatering and ensure proper drainage.

4. Mosaic Virus

Cause: Mosaic viruses, such as the Tobacco Mosaic Virus (TMV) or Cucumber Mosaic Virus (CMV), are transmitted by infected seeds, plant sap, or insects.

Symptoms:

  • Yellow or light green streaks and mosaic patterns on the leaves.
  • Distorted or curled leaves.
  • Reduced growth and vigor.

Treatment:

  • There is no cure for viral infections; removal of infected plants is often necessary.
  • Isolate infected plants to prevent spreading.
  • Disinfect tools and containers to avoid cross-contamination.
  • Consider planting virus-resistant varieties if available.

5. Tomato Spotted Wilt Virus (TSWV)

Cause: Transmitted by thrips, the Tomato Spotted Wilt Virus affects many ornamental plants, including houseplants.

Symptoms:

  • Irregular yellow or brown spots, often surrounded by dark halos.
  • Stunted growth and distorted leaves.
  • Infected areas may show dark, sunken lesions.

Treatment:

  • Control thrips by using insecticides or introducing natural predators (e.g., ladybugs, predatory mites).
  • Remove and discard infected plants to prevent the virus from spreading.
  • Disinfect tools and containers thoroughly.

6. Fungal Bacterial Blight (Xylella fastidiosa)

Cause: This disease is caused by the Xylella fastidiosa bacterium and is spread by insects, particularly sharpshooters.

Symptoms:

  • Brown spots and leaf edge burn.
  • Wilting and yellowing, followed by dieback.
  • A general decline in plant vigor.

Treatment:

  • Prune affected areas and dispose of them carefully.
  • Use systemic bactericides if available and appropriate.
  • Ensure good air circulation to help the plant resist infection.

Prevention and Best Practices

  • Use clean tools: Always sterilize pruning shears, scissors, and other tools after use to prevent cross-contamination.
  • Water carefully: Avoid watering leaves or splashing water onto plants, as this can spread bacteria and viruses.
  • Isolate new plants: Quarantine new plants for a few weeks before introducing them to the rest of your collection.
  • Proper spacing: Space your plants out to ensure good air circulation, which helps reduce the risk of bacterial and viral infections.
  • Dispose of infected plants: In some cases, the best action is to remove and dispose of infected plants to prevent spreading the disease to healthy plants.

Treatment of Bacterial and Viral Infections

Unlike fungal diseases, bacterial and viral infections often have limited treatment options. Here’s a summary of the best practices:

  1. Early detection: Always monitor your plants closely for any unusual symptoms and act quickly at the first sign of trouble.
  2. Proper disposal: If a plant is heavily infected, it’s best to discard it to prevent further contamination.
  3. Disinfection: Thoroughly disinfect your tools, pots, and surfaces that may have come in contact with the infected plant.
  4. Bactericides and fungicides: Some copper-based products can help control bacterial outbreaks, while systemic treatments can offer temporary relief. However, there is no cure for most viral infections.

Home Remedies for Bacterial Infections

  1. Garlic Solution:
    • Crush 3 cloves of garlic and mix them with 1 liter of water.
    • Let it sit for 24 hours, strain, and spray it on the infected areas.
  2. Cinnamon Powder:
    • Cinnamon has natural antifungal and antibacterial properties.
    • Sprinkle it on the base of the plant or on any open cuts or wounds.

Bacterial and viral diseases present a unique challenge for houseplant care. While treatment options are limited for viral infections, bacterial diseases can often be controlled with proper hygiene and timely action. The key to protecting your plants is early detection, proper disposal of infected plants, and strict sanitation practices. By maintaining a clean, well-ventilated environment and monitoring plant health regularly, you can prevent these diseases from spreading and ensure your ornamental plants thrive.

Tips to Water Your Plants Without Overdoing It

Watering might seem like the simplest part of plant care, but it’s actually one of the easiest things to get wrong. Overwatering is the number one reason houseplants die, especially for beginners. And while underwatering can also cause problems, it’s much more forgiving.

In this article, you’ll learn how to water your plants the right way, how to spot signs of too much or too little water, and some practical techniques that keep your green friends thriving — not drowning.

Why Overwatering Is Such a Big Problem

Most indoor plants don’t need as much water as people think. In fact, many houseplants come from tropical or arid environments where rain is sporadic but roots are well-adapted to store and manage moisture.

Overwatering can cause:

  • Root rot
  • Mold and fungus
  • Yellowing leaves
  • Weak growth
  • Leaf drop

The problem usually isn’t too much water in one go — it’s watering too frequently or keeping the soil constantly soggy, which suffocates the roots.

How to Know When Your Plant Needs Water

Instead of watering on a strict schedule (like every Sunday), it’s better to let the plant tell you when it’s thirsty.

Try These Simple Tests:

  • Finger test: Stick your finger about an inch (2–3 cm) into the soil. If it feels dry, it’s time to water. If it’s still moist, wait.
  • Lift the pot: Light pots usually mean dry soil. If it’s heavy, there’s still moisture inside.
  • Look at the leaves: Drooping or wrinkled leaves may mean the plant is dry. Yellowing or mushy leaves may indicate too much water.

Bonus tip: Use a moisture meter if you want extra precision — great for larger or more delicate plants.

Learn Your Plant’s Natural Rhythm

Each plant has its own watering preferences based on its type and native climate.

Here’s a quick cheat sheet:

  • Succulents & Cacti: Water only when soil is fully dry. Often just every 2–3 weeks.
  • Tropical Plants (like Monsteras, Philodendrons): Prefer slightly moist soil but never soggy.
  • Ferns & Calatheas: Like consistent moisture, but still hate sitting in water.
  • Snake Plant & ZZ Plant: Extremely drought-tolerant — water sparingly.

Knowing the plant’s origin can help you mimic its ideal conditions indoors.

Mastering the “Soak and Dry” Method

This is the safest, most effective way to water almost any houseplant:

  1. Water thoroughly until you see it draining from the bottom of the pot.
  2. Let all excess water drain completely.
  3. Don’t water again until the soil is dry.

Why it works: It encourages deep root growth and prevents stagnant water from building up around the roots.

Important: Always use pots with drainage holes. If your pot doesn’t have one, you risk overwatering even if you’re careful.

  • Use room-temperature water: Cold water can shock plant roots, and hot water damages them.
  • Water the soil, not the leaves: This reduces the chance of rot and fungal issues.
  • Avoid letting plants sit in saucers filled with water: Always dump out the excess after watering.
  • Be gentle: A watering can with a narrow spout gives you more control than dumping water from a cup.

For large pots or dense plants, water in a circular motion around the base to evenly reach the root zone.

Signs of Overwatering vs. Underwatering

Overwatering Signs:

  • Yellowing leaves
  • Soft, mushy stems
  • Soil that smells sour or moldy
  • Brown spots or black patches on leaves

Underwatering Signs:

  • Dry, brittle leaves
  • Leaf curl or wilting
  • Soil pulling away from the sides of the pot
  • Slowed or stunted growth

Both can stress the plant, but most can recover quickly with the right adjustments.

Adapting Your Watering to the Season

Plants grow differently in each season, so your watering routine should change too.

  • Spring/Summer: Most houseplants grow actively and need more water.
  • Fall/Winter: Growth slows or stops, and plants need less frequent watering.

Rule of thumb: In colder months, check the soil even more carefully before watering. Your plant might only need water every two or three weeks.

Tools That Make Watering Easier

  • Watering cans with long spouts for precision
  • Moisture meters for accurate readings
  • Misting bottles (but only for plants that like humidity — not succulents!)
  • Self-watering pots for beginners or frequent travelers

These tools can help you avoid guesswork and stick to a healthier routine.

Final Tips to Avoid Overwatering

  • Always choose the right size pot: Too big can hold excess water; too small can dry too fast.
  • Use fast-draining soil, especially for succulents and tropical plants.
  • Empty saucers after watering.
  • Group plants with similar needs together so it’s easier to care for them.
  • Keep a watering journal if you’re just starting out — track what works.

Healthy Plants Start With Smart Watering

Watering might seem basic, but getting it right makes a huge difference. Once you understand your plant’s unique needs, watering becomes a thoughtful rhythm rather than a chore. Healthy plants reward you with lush growth, vibrant leaves, and long life.

So next time you reach for the watering can, remember: less is more — and timing is everything.

Mold, Mildew, and Excess Humidity in Houseplants: How to Prevent and Treat

While we often focus on pests and visible diseases, excess humidity and poor air circulation are silent enemies that can compromise the health of indoor plants. These factors create the perfect environment for mold, mildew, and other fungal issues to thrive. In this article, you’ll learn how to identify these problems, understand their causes, and apply practical, natural solutions to protect your ornamental plants.

1. White Mold on Soil

Cause: Excess organic matter, poor ventilation, and overwatering.

Symptoms:

  • White, fuzzy layer on the surface of the substrate.
  • No strong odor.
  • Often seen in new pots or very humid environments.

Is it dangerous?

  • In most cases, no. It’s a saprophytic fungus (feeds on organic matter, not the plant).
  • But it may indicate excess humidity, which can lead to root rot.

How to treat:

  • Remove the surface layer of the soil and replace it with dry substrate.
  • Improve ventilation and reduce watering frequency.
  • Add cinnamon or charcoal to prevent regrowth.

2. Mildew on Leaves (White or Gray)

Cause: Powdery mildew fungi (Erysiphales), favored by high humidity and poor air circulation.

Symptoms:

  • White or gray powder on the upper leaf surface.
  • Yellowing or deformation of leaves.
  • Premature leaf drop.

Treatment:

  • Remove affected leaves.
  • Spray with a baking soda solution (1 tsp baking soda + 1 L water + drop of soap).
  • Apply sulfur-based fungicides if necessary.

3. Mold on Stems and Pots

Cause: Condensation, standing water in saucers, and lack of sunlight.

Symptoms:

  • Black or green stains on pots and lower stems.
  • Slippery or slimy appearance.
  • May be accompanied by algae growth.

Treatment:

  • Clean affected areas with a cloth and diluted alcohol or vinegar.
  • Move the pot to a drier, more ventilated area.
  • Avoid letting water accumulate in the saucer.

4. Algae and Green Slime

Cause: Constant moisture, light exposure on the substrate, and poor drainage.

Symptoms:

  • Green layer on the soil surface.
  • Sticky texture and smell.
  • Interferes with aeration and plant respiration.

Treatment:

  • Scrape off and replace the top layer of soil.
  • Cover the soil with pine bark, gravel, or dry moss.
  • Reduce watering and avoid direct light on the substrate.

5. Condensation and Excess Humidity in the Environment

Cause: Closed environments with poor air exchange, especially in bathrooms or kitchens.

Symptoms:

  • Constantly damp leaves or substrate.
  • Appearance of mold on walls and furniture.
  • Increased presence of fungi and mites.

Solutions:

  • Improve air circulation (open windows, use fans).
  • Avoid grouping many plants too closely together.
  • Use a dehumidifier if the environment is very humid.
  • Water in the morning to allow drying during the day.

Natural Preventive and Treatment Solutions

  1. Cinnamon powder:
    • Antifungal and bactericidal.
    • Sprinkle a small amount on the soil.
  2. Apple cider vinegar solution:
    • Mix 1 tbsp vinegar in 1 liter of water.
    • Use to clean pots and wipe stems.
  3. Activated charcoal:
    • Absorbs moisture and toxins.
    • Mix into the soil or place a piece at the bottom of the pot.
  4. Essential oils (e.g., tea tree, clove):
    • Antifungal, but must be diluted (2 drops in 1 liter of water).
    • Spray gently on affected areas.

Ideal Environmental Conditions for Indoor Plants

  • Humidity: 40–60% for most plants. Orchids and ferns tolerate more.
  • Ventilation: Essential to prevent fungal development.
  • Light: Indirect sunlight helps keep the substrate dry and healthy.
  • Watering: Only when the soil is dry. Use your finger or a moisture meter.

When to Be Concerned

  • If mold spreads quickly and returns even after cleaning.
  • If leaves begin to rot or develop soft, dark spots.
  • If more than one plant shows symptoms, suggesting an environmental issue.

In these cases, consider repotting the plant entirely and thoroughly sanitizing the pot and location.

How to Clean Molded Soil Without Repotting

  • Remove the surface layer of the substrate.
  • Let the pot dry in a well-lit, ventilated location.
  • Spray with cinnamon tea or vinegar solution.
  • Add a layer of dry mulch to protect the surface.

Managing humidity is crucial for indoor plant health. Although some level of moisture is necessary, excess can open the door to mold, mildew, and rot. By controlling watering, ensuring ventilation, and using natural antifungal agents, you can maintain a healthy, disease-resistant growing environment. Mold and mildew may be common, but with the right care, they are far from unbeatable.

Ideas to Elegantly Decorate the Living Room with Plants

The living room is the heart of the home — it’s where you relax, entertain, and express your style. So it’s only natural that this space deserves thoughtful design. One of the most powerful (and affordable!) ways to elevate your living room is by incorporating indoor plants.

From bold statement pieces to subtle accents, plants can instantly add elegance, texture, and warmth. In this guide, you’ll discover how to decorate your living room with plants in a way that feels intentional, beautiful, and effortlessly chic.

Why Use Plants in Living Room Decor?

Houseplants are more than a trend — they’re a design tool with major benefits:

  • Add life and energy to a space
  • Soften harsh lines in modern interiors
  • Introduce natural textures and calming greens
  • Improve air quality
  • Reflect personality and style

Plus, they’re flexible: you can easily rearrange or replace them as your tastes evolve.

Step 1: Define the Mood and Style

Before picking plants, think about the overall vibe of your living room. Do you prefer something:

  • Modern and minimalist? Opt for sleek pots and architectural plants like snake plants or rubber trees.
  • Boho and eclectic? Mix textures, baskets, hanging plants, and colorful pots.
  • Scandinavian and cozy? Stick to neutral planters and leafy greens like ferns or pothos.
  • Tropical and bold? Bring in large-leaf plants like Monstera or Bird of Paradise.

Knowing your design style will guide your plant and container choices.

Step 2: Choose the Right Plants for the Space

Select plants that will thrive in your living room’s light and temperature conditions, as well as fit the scale of the space.

Best Statement Plants:

  • Fiddle Leaf Fig: Big, glossy leaves and upright form
  • Rubber Plant: Bold and sculptural
  • Areca Palm: Adds height and softness
  • Bird of Paradise: Tropical and eye-catching

Best Accent Plants:

  • Snake Plant: Great for corners and tabletops
  • ZZ Plant: Sleek and hardy
  • Peace Lily: Adds elegance with white blooms
  • Pothos or Philodendron: Beautiful trailing greenery for shelves

Step 3: Think About Placement

Where and how you place your plants can dramatically change the look and feel of your living room.

Corner Focal Points:

  • Use a tall plant in a floor planter to fill an empty corner
  • Add plant stands to bring greenery up to eye level
  • Place a large leafy plant near windows for a natural frame

Coffee Tables & Side Tables:

  • Small, tidy plants like succulents, jade plants, or aloe vera
  • Use ceramic or glass pots for a clean look
  • Keep it minimal — don’t block sight lines

Bookshelves & Wall Units:

  • Let trailing plants like pothos cascade down shelves
  • Mix in small upright plants between books and décor
  • Use plants to break up visual clutter and create rhythm

Hanging Options:

  • Macramé plant hangers add a bohemian vibe
  • Hang small pots near windows to save floor space
  • Consider wall-mounted planters for a vertical green wall

Step 4: Use Planters as Design Elements

Your choice of pot or planter can either blend into your décor or stand out as a design feature.

Ideas by Style:

  • Minimalist: Matte black, white, or gray ceramic pots
  • Boho: Woven baskets, clay pots, or colorful handmade pieces
  • Rustic: Terracotta or aged cement pots
  • Modern: Sleek metal stands, geometric shapes

Tip: Stick to a cohesive color palette to maintain elegance and avoid visual chaos.

Step 5: Layer with Accessories

Make your plant decor feel complete by styling it alongside other living room elements.

  • Pair plants with candles, books, or art on the coffee table
  • Place a mirror behind a tall plant to reflect light and make the room feel larger
  • Use a tray to group small plants and objects for a styled look
  • Add a throw pillow or rug that echoes the natural tones of your greenery

Step 6: Keep It Fresh — Literally and Aesthetically

To maintain that polished, elegant look:

  • Dust leaves regularly so they stay glossy
  • Prune yellowing leaves to keep plants healthy and tidy
  • Repot as needed to prevent root-bound stress
  • Switch things up seasonally — add fresh flowers or rotate in new plants

Live decor evolves — let your green elements grow with your space.

Pro Tips for Elegant Plant Styling

  • Use odd numbers of plants for more dynamic groupings (e.g., 3 or 5)
  • Don’t over-clutter — give each plant space to shine
  • Use varied heights and textures to add depth
  • Invest in a few larger plants rather than many tiny ones if space allows
  • Add a small uplight or floor lamp behind plants for evening ambiance

A Living Room That Breathes Style

Plants are the ultimate styling secret — they instantly upgrade a living room, adding life, comfort, and sophistication. Whether you’re aiming for high-end elegance or relaxed coziness, there’s a plant (or several) that will fit your aesthetic.

The key is intention: choose plants and planters that suit your space, group them with care, and let your personality shine through the leaves.

Identifying and Controlling Root and Soil Problems in Indoor Plants

Root and soil problems are among the most serious and often overlooked issues in ornamental plants. While leaves may show signs of illness, the origin of the problem is frequently hidden beneath the surface. In this article, we’ll explore the main causes of root problems, how to recognize symptoms early, what to do in each case, and how to maintain a healthy soil environment for your indoor plants.

1. Root Rot

Cause: Excessive moisture, poor drainage, and the presence of fungi (e.g., Pythium, Rhizoctonia, Fusarium) are the main causes.

Symptoms:

  • Wilting even with moist soil.
  • Yellowing or drooping leaves.
  • Foul odor from the soil.
  • Roots appear dark, soft, and mushy.

Treatment:

  • Remove the plant from the pot and wash the roots.
  • Cut off all rotten roots with sterile scissors.
  • Let the roots dry for a few hours.
  • Repot in a clean pot with new, well-draining soil.
  • Apply cinnamon or Trichoderma-based fungicide to prevent recurrence.

2. Soil Compaction

Cause: Over time, organic matter breaks down and compresses, reducing aeration and water infiltration.

Symptoms:

  • Water pools on the surface and takes time to absorb.
  • Roots cannot “breathe” properly.
  • Slow or stagnant growth.

Treatment:

  • Loosen the topsoil carefully.
  • Repot using a lighter, more aerated mix (e.g., add perlite, vermiculite, or bark).
  • Consider mixing coarse sand or coconut fiber to improve structure.

3. Accumulation of Salts and Fertilizers

Cause: Frequent use of chemical fertilizers and watering with hard water.

Symptoms:

  • White crust on the soil surface or pot edges.
  • Leaf tips turning brown.
  • Plant becomes more sensitive to pests and diseases.

Treatment:

  • Rinse the soil with abundant water (leaching) once every 2–3 months.
  • Repot every 1–2 years, removing part of the old substrate.
  • Use filtered or rainwater if possible.

4. Soil pH Imbalance

Cause: Inappropriate substrate for the plant species or accumulation of organic matter.

Symptoms:

  • Nutrient deficiencies even with fertilization.
  • Yellowing between leaf veins (chlorosis).
  • Poor root development.

Treatment:

  • Test the pH with a simple soil test kit.
  • For acid-loving plants (e.g., azaleas, gardenias), lower the pH with pine bark or coffee grounds.
  • For plants that prefer neutral to alkaline soil, raise the pH with lime.

5. Poor Drainage

Cause: Pots without drainage holes or substrates that retain too much water.

Symptoms:

  • Waterlogged soil.
  • Smell of rot.
  • High incidence of fungi and root rot.

Treatment:

  • Always use pots with drainage holes.
  • Place a layer of gravel or expanded clay at the bottom of the pot.
  • Use appropriate substrates for the type of plant (succulents, for example, need sandy, quick-draining soil).

6. Nutrient-Poor Soil

Cause: Substrate depletion after months or years without renewal.

Symptoms:

  • Pale or small leaves.
  • Little or no growth.
  • Weak flowering.

Treatment:

  • Replace part or all of the old substrate.
  • Enrich with organic matter (compost, earthworm humus).
  • Begin regular fertilization using organic or mineral products appropriate to the species.

How to Identify Root Problems Without Uprooting the Plant

  • Observe the base of the plant: if the lower stem is dark or mushy, it’s a warning sign.
  • Smell the soil: bad odor indicates anaerobic decomposition.
  • Use a moisture meter to assess if the substrate stays constantly wet.
  • If possible, examine through transparent pots or gently remove the root ball.

Ideal Soil Mixes for Indoor Plants

  • General-purpose plants (peace lily, pothos, philodendron):
    • 50% organic soil + 25% perlite + 25% coconut fiber or pine bark.
  • Succulents and cacti:
    • 40% coarse sand + 40% composted soil + 20% gravel or pumice.
  • Ferns and orchids:
    • 40% pine bark + 30% coconut fiber + 30% sphagnum moss.

Natural Soil Additives

  1. Cinnamon powder:
    • Antifungal and antimicrobial.
    • Use when repotting or treating root wounds.
  2. Charcoal powder:
    • Absorbs toxins and helps with drainage.
    • Mix into substrate for orchids and ferns.
  3. Crushed eggshells:
    • Slowly release calcium.
    • Also help raise pH slightly.
  4. Worm castings:
    • Rich in nutrients and beneficial microorganisms.
    • Strengthens plant immunity.

Maintenance Tips

  • Repot every 12–24 months.
  • Remove 2–3 cm of surface soil every 6 months and replace with fresh soil.
  • Rotate pots to promote even root growth.
  • Avoid excess water, even in hot seasons.

A healthy plant begins with healthy roots, and good roots require suitable, balanced soil. Paying attention to the substrate’s structure, composition, and drainage is just as important as watering or fertilizing. By understanding what’s happening below the surface, you’ll be able to prevent serious problems and keep your ornamental plants strong and beautiful. Root care is an invisible but essential part of plant health.

Plants That Thrive in Low Light

Not every home is blessed with big windows and abundant sunshine — but that doesn’t mean you can’t enjoy lush greenery indoors. Many beautiful and low-maintenance plants are perfectly suited for low-light environments, making them ideal for apartments, offices, shaded corners, and north-facing rooms.

In this guide, we’ll explore some of the best low-light plants, how to care for them, and tips to keep them thriving even in darker spaces.

What Does “Low Light” Actually Mean?

Before jumping into plant picks, let’s define what low light really is.

Low light doesn’t mean no light. Plants still need some access to natural or artificial light to survive. Low-light spaces usually include:

  • Rooms with north-facing windows
  • Areas several feet away from a bright window
  • Basements or hallways with small or frosted windows
  • Corners that are bright during part of the day but receive no direct sunlight

If you can comfortably read a book in a room without turning on a light during the day, most low-light plants will do just fine.

Top Plants That Grow Well in Low Light

1. ZZ Plant (Zamioculcas zamiifolia)

Why it’s great:
Almost indestructible. The ZZ plant tolerates low light, neglect, and even irregular watering.

Care Tips:

  • Water only when soil is fully dry
  • Wipe leaves occasionally for shine
  • Avoid direct sun, which can scorch the foliage

2. Snake Plant (Sansevieria trifasciata)

Why it’s great:
Tolerates both low light and dry conditions. It’s also one of the top air-purifying plants.

Care Tips:

  • Water sparingly — every 2–3 weeks
  • Thrives in any type of light but prefers indirect light
  • Great for bedrooms and hallways

3. Pothos (Epipremnum aureum)

Why it’s great:
Fast-growing, trailing vines that do well in dim spaces and look amazing in hanging baskets.

Care Tips:

  • Let soil dry between waterings
  • Trim vines to encourage fullness
  • Wipe leaves to remove dust

4. Cast Iron Plant (Aspidistra elatior)

Why it’s great:
True to its name, the cast iron plant is incredibly tough and can live in nearly any indoor setting.

Care Tips:

  • Low water needs
  • Tolerates neglect, low humidity, and low light
  • Perfect for people who travel often

5. Peace Lily (Spathiphyllum)

Why it’s great:
This elegant plant blooms even in low light and helps clean indoor air.

Care Tips:

  • Keep soil lightly moist
  • Mist leaves occasionally for humidity
  • Avoid placing in direct sun — it prefers shade

6. Chinese Evergreen (Aglaonema)

Why it’s great:
Available in many leaf colors and patterns, this plant brightens up dark spaces.

Care Tips:

  • Water moderately — don’t let the soil dry out completely
  • Loves warmth and humidity
  • Avoid cold drafts

7. Philodendron

Why it’s great:
Whether upright or vining, philodendrons are excellent low-light options.

Care Tips:

  • Water when topsoil is dry
  • Great in hanging pots or on bookshelves
  • Prune to maintain shape

Caring for Plants in Low Light Conditions

Low-light plants don’t mean no-care. Here are some ways to keep them healthy:

1. Rotate Regularly

Plants will naturally lean toward light sources. Rotate them every week or two for even growth.

2. Avoid Overwatering

Low light slows down growth, so plants use less water. Always check the soil before watering.

3. Keep Leaves Clean

Dust can block what little light your plant receives. Wipe leaves gently with a damp cloth.

4. Use Artificial Light If Needed

LED grow lights are a great way to support low-light plants, especially during winter months.

Styling Ideas for Low-Light Spaces

Just because your room is dim doesn’t mean it can’t look beautiful. Try these styling tips:

  • Place tall plants like ZZ plants in dark corners to fill empty spaces
  • Use Pothos or Philodendron on floating shelves or hanging from the ceiling
  • Add a Peace Lily to your bathroom for elegance and improved air quality
  • Use plant stands and mirrors to reflect light and brighten the space

Bonus Tip: Don’t Be Fooled by Bright-Looking Rooms

Some rooms look well-lit, but the light intensity may still be too low for sun-loving plants. For example, a room with large windows but no direct sunlight in the afternoon can still be considered low light.

The Quiet Beauty of Shade-Tolerant Plants

Low-light plants may not grow as quickly or bloom as often, but they bring a special kind of beauty — calm, steady, and subtle. They’re the quiet achievers of the plant world, thriving where others would struggle.

So if your home doesn’t get much sun, don’t worry — your indoor jungle is still within reach.

The Main Pests in Indoor Ornamental Plants and How to Control Them

Whether you’re a beginner or a plant enthusiast, few things are more frustrating than discovering your beloved decorative plants have been attacked by pests. Small, often invisible to the naked eye, these invaders can compromise plant health and even lead to their death if not treated quickly. In this article, we’ll cover the main types of pests that affect houseplants and the most effective and sustainable ways to control and eliminate them.

1. Aphids

Description: Small, soft-bodied insects (1–3 mm), green, black, or white in color. They usually appear on the undersides of leaves or on new shoots.

Damage caused:

  • Suck plant sap, weakening it.
  • Cause leaf deformation and curling.
  • Excrete a sticky substance (honeydew) that encourages mold growth.

Control and treatment:

  • Spray with a mixture of water + neutral soap or insecticidal soap.
  • Apply neem oil weekly.
  • Attract natural predators (e.g., ladybugs, if using biological control).

2. Mealybugs

Description: White, cottony-looking insects that accumulate at leaf joints and on the undersides.

Damage caused:

  • Suck sap, weakening the plant.
  • Can cause yellowing, mold, and even leaf drop.

Control and treatment:

  • Remove with a cotton swab soaked in alcohol.
  • Spray with neem oil or water and coconut soap.
  • Isolate the plant to prevent the spread.

3. Spider mites (Red mites)

Description: Tiny arachnids that are hard to see without a magnifying glass. Leave silky webs between leaves.

Damage caused:

  • Cause yellow spots and speckling on leaves.
  • Promote leaf drying and fall.
  • Prefer dry, poorly ventilated environments.

Control and treatment:

  • Increase ambient humidity (they hate moisture).
  • Spray with water + neutral soap or neem oil.
  • Introduce beneficial mites (Phytoseiulus) if using biological control.

4. Whiteflies

Description: Tiny white-winged insects that fly off when the plant is shaken.

Damage caused:

  • Suck sap and reduce plant vigor.
  • Excrete honeydew, encouraging mold.
  • Are vectors of viral diseases.

Control and treatment:

  • Use yellow sticky traps.
  • Spray with neem oil or insecticidal soap.
  • Introduce parasitic wasps (Encarsia formosa) in advanced cases.

5. Thrips

Description: Very small, elongated insects (black or brown) that move quickly.

Damage caused:

  • Scratch plant tissue and suck sap.
  • Cause silvery spots and deformed leaves.
  • Transmit viruses.

Control and treatment:

  • Remove heavily affected leaves.
  • Apply neem oil or potassium soap.
  • Use blue sticky traps to monitor/control.

6. Scale insects

Description: Hard-shelled or waxy insects attached to stems and leaves. Look like small brown “bumps”.

Damage caused:

  • Suck sap silently, weakening the plant over time.
  • Often go unnoticed until infestation is severe.

Control and treatment:

  • Remove manually with a brush or swab soaked in alcohol.
  • Use neem oil or citrus oil.
  • Apply mineral oil or specific insecticides in case of resistance.

Prevention tips

The best way to control pests is to prevent them. Here are some key measures:

  • Inspect new plants before bringing them home.
  • Quarantine new acquisitions for 1–2 weeks.
  • Keep the foliage clean and well-ventilated.
  • Avoid overwatering or nutrient imbalances (which attract pests).
  • Disinfect tools before use (scissors, tweezers, etc.).
  • Use natural repellents preventively (neem oil, garlic tea, horsetail infusion).

Natural recipes for homemade insecticides

  1. Garlic and chili tea:
    • Blend 1 clove of garlic + 1 chili pepper in 1 liter of water.
    • Let sit for 24h, strain, and spray on the plant.
  2. Cinnamon water:
    • Helps prevent fungal and pest proliferation.
    • Mix 1 tsp of powdered cinnamon in 500 ml of water.
  3. Neem oil solution:
    • Mix 1 tsp neem oil + 1 drop of neutral soap in 1 liter of water.
    • Shake and spray every 5–7 days.

When to use chemical pesticides?

Use chemical pesticides only as a last resort and with care:

  • Always read the label and follow safety recommendations.
  • Avoid using indoors without proper ventilation.
  • Prefer targeted, low-impact insecticides.

Recovery after the attack

After eliminating the pests:

  • Prune damaged leaves.
  • Gently clean the leaves.
  • Apply a light fertilizer to help the plant regain strength.
  • Keep the plant in a bright and well-ventilated spot, but avoid direct sun immediately after treatment.

Pest infestations are common and can be controlled with observation, timely action, and appropriate methods. Whether through natural treatments or, if necessary, chemical interventions, it is possible to restore health to your ornamental plants and maintain a balanced indoor environment. The key is to act as soon as the first signs appear and make plant care a regular part of your routine.

Common Fungal Diseases in Houseplants and How to Treat Them

Fungi are among the main enemies of ornamental plants, especially in indoor environments where poor ventilation and excessive humidity can create favorable conditions for their development. These diseases often go unnoticed until they cause visible symptoms such as spots, leaf drop, and even root rot. In this article, you’ll learn how to recognize the main fungal diseases that affect houseplants, how to treat them, and how to prevent future outbreaks.

1. Powdery Mildew

Description: Appears as a white, powdery coating on leaves, stems, or flowers. It’s common in warm, humid environments with poor air circulation.

Symptoms:

  • White or grayish powder on the upper side of the leaf.
  • Leaf distortion and yellowing.
  • Premature leaf drop.

Treatment:

  • Remove and discard affected leaves.
  • Improve air circulation around the plant.
  • Apply sulfur-based or potassium bicarbonate fungicides.
  • Use homemade sprays such as milk (1 part milk to 9 parts water).

2. Leaf Spot (Cercospora, Septoria, Alternaria)

Description: Caused by different fungi that create brown, yellow, or black spots on leaves, often with defined borders.

Symptoms:

  • Circular or irregular dark spots.
  • Yellowing of the surrounding area.
  • Early leaf fall in more severe cases.

Treatment:

  • Remove affected leaves.
  • Spray with copper-based or organic fungicides (e.g., neem oil).
  • Avoid wetting the leaves during watering.

3. Root and Stem Rot (Pythium, Rhizoctonia, Fusarium)

Description: One of the most serious fungal problems, often associated with waterlogged soil and poor drainage.

Symptoms:

  • Wilting even when the soil is moist.
  • Bad smell from the roots.
  • Dark and mushy roots.
  • Yellowing and stem base rotting.

Treatment:

  • Remove the plant from the pot and trim off affected roots.
  • Repot using new, well-draining soil.
  • Apply biological fungicides (Trichoderma spp.) or cinnamon powder on the roots.
  • Avoid watering until the substrate dries slightly.

4. Botrytis (Gray Mold)

Description: Common in high humidity, it affects leaves, flowers, and stems with gray, fluffy mold.

Symptoms:

  • Brown, soft spots on leaves and flowers.
  • Rapid decay of flower buds.
  • Appearance of a gray, fuzzy layer.

Treatment:

  • Remove all affected parts.
  • Reduce air humidity and avoid misting.
  • Improve ventilation.
  • Use fungicides containing iprodione or copper.

5. Anthracnose

Description: A disease caused by fungi such as Colletotrichum, it causes necrotic spots and sunken lesions on leaves and stems.

Symptoms:

  • Brown or black spots with defined edges.
  • Leaf tips dry and die.
  • Lesions may spread to stems.

Treatment:

  • Remove infected leaves.
  • Spray with copper-based or sulfur fungicides.
  • Avoid excess moisture on the foliage.

Prevention: The best cure

Preventing fungal problems is easier than treating them. Here are key tips:

  • Ensure good ventilation in the environment.
  • Use well-draining substrates (especially for succulents and orchids).
  • Avoid excessive watering.
  • Don’t mist plants excessively, especially in humid climates.
  • Water in the morning, so leaves dry during the day.
  • Sterilize tools and pots before use.

Homemade antifungal recipes

  1. Cinnamon tea:
    • Boil 1 tbsp of cinnamon powder in 1 liter of water.
    • Let cool and spray on the plant.
  2. Baking soda solution:
    • 1 tsp baking soda + 1 drop of liquid soap + 1 liter of water.
    • Spray once a week to prevent fungi.
  3. Horsetail infusion (rich in silica):
    • Acts as a strengthening and antifungal agent.
    • Boil horsetail in water, let it cool, strain, and spray.

Plant recovery

After treating fungal diseases, it’s important to help the plant regain health:

  • Remove infected parts carefully.
  • Avoid fertilizing immediately after treatment.
  • Let the plant rest in a bright, ventilated area.
  • Resume fertilization gradually after about two weeks, using balanced or organic fertilizers.

Specific cases

  • Peace Lily with brown spots: Could indicate leaf spot or botrytis. Remove the affected leaves and reduce humidity.
  • Succulents with rot at the base: Likely root rot. Cut off the healthy part, let it dry, and try to replant in dry soil.
  • Orchids with leaf spots: Often caused by fungi or bacteria. Improve air circulation and apply sulfur or cinnamon.

When to discard a plant?

If more than 70% of the plant is compromised, with rot spreading to the main stem or roots, it may be better to dispose of it to avoid spreading to others. In these cases, burn or discard the plant in a sealed bag and disinfect all tools and surfaces that came into contact with it.

Fungal diseases are part of the challenges of growing ornamental plants but can be controlled with the right information and good habits. Observing the plant frequently, adjusting watering, and providing the right environment are the keys to a healthy, fungus-free indoor garden. With prevention and proper treatment, your plants can recover and thrive again.

Creating an Aquatic Garden in Your Apartment: A Complete Guide

Aquatic plants are a wonderful way to bring nature into your apartment, offering tranquility, beauty, and a unique atmosphere. Whether you’re creating a small water garden, an aquarium, or a hydroponic plant display, aquatic plants can be a stunning addition to any indoor space. Creating an aquatic garden in your apartment is easier than you might think, and with proper care, your plants can thrive. In this article, we will explore the step-by-step process of setting up an aquatic garden in your apartment, selecting the best plants, designing your garden, and maintaining it to ensure long-term success.

1. Understanding Aquatic Plants: What Makes Them Special?

Aquatic plants are plants that live in or near water, with some of them submerged completely, partially, or floating. These plants have unique adaptations that allow them to survive in water, including specialized roots for anchoring, floating leaves for photosynthesis, and the ability to absorb nutrients directly from the water rather than the soil. Common aquatic plants used for indoor gardening include water lilies, aquatic ferns, floating plants like duckweed, and submerged plants such as Anubias.

Aquatic plants also provide many benefits for your indoor environment, including:

  • Air Purification: Many aquatic plants can help improve the quality of the air in your home by absorbing toxins and releasing oxygen.
  • Humidity Control: The moisture from aquatic plants can help increase humidity in dry indoor environments, which is particularly beneficial in winter months.
  • Aesthetic Appeal: Aquatic gardens can add a calming, natural aesthetic to your space, creating a soothing atmosphere for relaxation or meditation.

2. Selecting the Right Aquatic Plants for Your Apartment

The first step in creating an aquatic garden is selecting the right plants. The choice of plants depends on the space available, the lighting conditions, and the level of maintenance you’re willing to commit to. Here are some of the best options for indoor aquatic plants:

  • Water Lilies (Nymphaea): Known for their large, vibrant flowers and floating leaves, water lilies add a touch of elegance to any indoor aquatic garden. They require large containers with ample space for root growth, and they need at least 4–6 hours of bright, indirect sunlight each day. Water lilies thrive in warm temperatures (around 75°F/24°C) and need a well-maintained water level.
  • Peace Lily (Spathiphyllum): The Peace Lily is an excellent choice for a water garden because it is adaptable to submerged conditions. This plant is not only beautiful, but it also purifies the air by removing toxins such as formaldehyde and benzene. Peace lilies do well in low light and can grow well in a shallow water container or vase.
  • Anubias: Anubias is a hardy and low-maintenance aquatic plant that thrives in both submerged and partially submerged conditions. Its thick, leathery leaves are resistant to damage, and the plant does not require much light. Anubias can be anchored to rocks or driftwood, making it ideal for aquariums or small water garden setups.
  • Hornwort (Ceratophyllum demersum): Hornwort is a fast-growing floating plant that helps keep the water clean by absorbing excess nutrients and preventing algae buildup. It’s perfect for small aquariums or water containers. Hornwort also helps oxygenate the water, providing a healthier environment for any fish or aquatic creatures.
  • Java Fern (Microsorum pteropus): This aquatic fern is perfect for low-light conditions and can be easily attached to rocks or driftwood. Java Fern does not need to be rooted in soil, and it is great for beginners due to its easy care. It thrives in aquariums or containers where it can receive indirect light and moderate water movement.

3. Designing Your Aquatic Garden

Once you’ve chosen your plants, it’s time to think about how to design your aquatic garden. There are several ways to set up your aquatic garden, depending on the space and aesthetic you want to achieve.

  • Container Water Gardens: One of the simplest ways to create an aquatic garden in an apartment is to use a container filled with water. Choose a decorative container or glass bowl that complements your home décor. Large containers work best for plants like water lilies, while smaller glass vases or bowls can house floating plants or smaller species like Anubias.
  • Aquariums: If you prefer a more sophisticated look, you can create an aquatic garden in a glass aquarium. Aquariums offer more space for plants to grow and provide better temperature control for the water. Aquariums also allow you to add fish or aquatic creatures that can coexist with your plants. For an aquarium setup, ensure that the tank has appropriate lighting and filtration to maintain water quality.
  • Terrarium-Style Water Gardens: Another option is to create a terrarium-style water garden. These setups are typically smaller and enclosed in glass, which creates a mini-ecosystem. You can use smaller aquatic plants like Pothos or Peace Lilies in these types of designs. Terrariums also offer a unique look, especially when combined with pebbles or small stones at the bottom of the container.
  • Floating Gardens: Some aquatic plants, such as water hyacinths or floating ferns, thrive on the surface of the water. These plants can be arranged to cover the entire surface of a shallow container or aquarium, creating a lush and tropical aesthetic. Floating plants can also help reduce algae growth by blocking excess sunlight from the water.

4. Caring for Your Aquatic Garden

Aquatic plants may seem like low-maintenance additions to your home, but they still require regular attention to thrive. Here’s how to properly care for your aquatic garden:

  • Water Quality: The water is the foundation of any aquatic garden. Use clean, dechlorinated water for your plants to avoid damaging them. If you’re using tap water, allow it to sit for 24-48 hours to allow chlorine to dissipate. Alternatively, you can use distilled or filtered water. For aquariums or larger setups, consider using a water filter to maintain water quality.
  • Lighting: Aquatic plants require adequate light to perform photosynthesis and grow. Most aquatic plants thrive in bright, indirect light, but the specific needs of your plants will depend on the species. For example, water lilies need direct sunlight for several hours a day, while Peace Lilies can grow well in low light. Use LED grow lights or place your aquatic garden near a window where it can receive filtered sunlight. Avoid placing plants in direct sunlight for extended periods, as this can cause algae growth and stress the plants.
  • Temperature: Aquatic plants typically prefer a temperature range of 65-75°F (18-24°C). Keep your water garden in a stable environment, away from drafts or heat sources like radiators. If you’re using an aquarium, a heater may be necessary to maintain consistent temperatures, especially in colder environments.
  • Water Level Maintenance: Ensure that the water level in your garden stays consistent. Check the water regularly and top it off as needed. You may also need to replace the water every 1-2 weeks to keep it fresh. If you’re using a container water garden, consider adding a small water pump or aerator to ensure proper oxygenation and movement.
  • Fertilization: Aquatic plants benefit from occasional feeding. Use a liquid aquatic plant fertilizer that contains the essential nutrients, such as nitrogen, phosphorus, and potassium. Follow the manufacturer’s instructions for application, as over-fertilizing can lead to algae blooms.

5. Common Problems and Solutions in Aquatic Gardens

Even with the best care, aquatic gardens can face some challenges. Here are a few common problems and solutions:

  • Algae Growth: Algae can grow quickly in the presence of excess light and nutrients. If algae are clogging your water garden or aquarium, reduce the amount of direct sunlight the plants receive and remove any visible algae by hand. Consider using algae-eating snails or fish, like Nerite snails, to help control algae.
  • Root Rot: If your plant’s roots are exposed to stagnant water or poor-quality water for too long, they may begin to rot. If you notice yellowing leaves or a foul smell from the water, check the roots. Trim away any rotting roots, replace the water, and ensure the water is well-oxygenated to prevent future problems.
  • Brown or Yellow Leaves: Leaves turning brown or yellow can be a sign of poor water quality, insufficient light, or nutrient deficiencies. Check the water conditions and adjust as needed. Increase the light if the plant is not receiving enough, and use an aquatic plant fertilizer to address nutrient deficiencies.

Creating an aquatic garden in your apartment can be a rewarding and relaxing experience. With the right choice of plants, careful design, and proper care, your aquatic garden will thrive and provide years of beauty and tranquility. Whether you choose a small container garden or a large aquarium, the key to success lies in providing your plants with the right environment—adequate light, water quality, and temperature control. By troubleshooting common problems like algae growth or root rot and maintaining a regular care routine, your aquatic garden will become a stunning centerpiece in your apartment.