How to Repot a Plant Without Damaging the Roots

Repotting might sound stressful — especially if you’re worried about hurting your plant. But with a little care, the process can be simple, stress-free, and even good for your green buddy.

In this article, you’ll learn how to repot a plant without damaging its roots, the best timing, tools, and techniques, plus how to help your plant thrive after its big move.

Why Repotting Matters

Repotting gives your plant the room and resources it needs to grow.

Key reasons to repot:

  • 🌱 Roots are outgrowing the pot (rootbound)
  • 🌱 Soil has lost nutrients or isn’t draining well
  • 🌱 You want to upgrade the look or size of the planter
  • 🌱 There’s a pest or mold issue in the current soil

Most plants need repotting every 12–24 months, depending on their growth rate and environment.

Signs Your Plant Needs a New Home

Look for these signals:

  • Roots coming out of the drainage hole
  • Water sits on top of the soil without soaking in
  • Soil dries out very quickly
  • Stunted growth or toppling plant
  • You haven’t changed the soil in over 2 years

What You’ll Need

🧰 Supplies checklist:

  • New pot (1–2 inches larger in diameter)
  • Fresh potting mix (choose the right type for your plant)
  • A trowel or spoon
  • Gardening gloves (optional)
  • Scissors or pruners (for trimming roots if necessary)
  • Newspaper or a tarp (to keep things tidy)
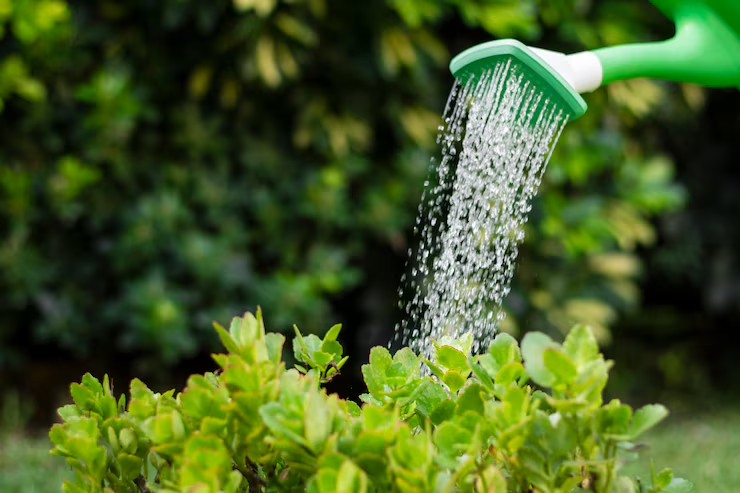
  • Watering can or spray bottle

Step-by-Step: How to Repot Gently

🪴 Step 1: Water the Plant the Day Before

Moist soil makes the roots easier to work with and helps reduce transplant shock.

🪴 Step 2: Choose the Right Pot

Pick a container that’s slightly larger, with proper drainage. Avoid going too big too fast — too much soil can lead to water retention and root rot.

Tip: Use a pot that’s only about 1–2 inches wider than the current one.

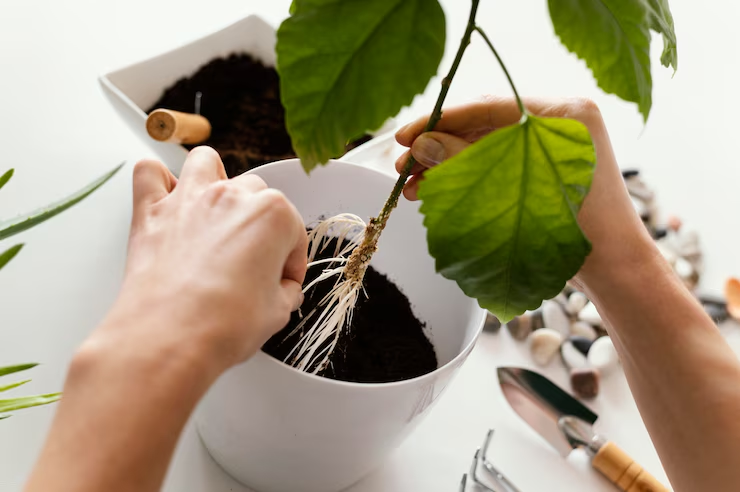
🪴 Step 3: Loosen the Plant Gently

Turn the plant sideways, support the base, and tap or squeeze the pot to loosen the root ball.

If it’s stuck:

  • Run a butter knife around the edges
  • Tap the bottom or roll the pot gently on a hard surface

Be patient — never yank!

🪴 Step 4: Examine and Loosen the Roots

Once out, inspect the root system:

  • White or tan roots = healthy
  • Black, mushy, or smelly roots = rot — trim those away

If the roots are wrapped tightly in circles (rootbound), gently loosen or “tease” them outward with your fingers.

Optional: Trim 10–15% of overly long or circling roots to encourage fresh growth.

🪴 Step 5: Prep the New Pot

Add a layer of fresh soil at the bottom — just enough so the plant sits at the same height as it was in the old pot.

You don’t want it sinking too low or sitting too high.

🪴 Step 6: Place the Plant In

Center the plant in the new pot. Hold it steady as you begin filling soil around the sides. Lightly press the soil down — not too tight — to remove air pockets.

Leave about ½ inch at the top for easy watering.

🪴 Step 7: Water Thoroughly

Give your plant a nice soak to help the soil settle and reduce transplant shock. Wait until excess water drains out the bottom.

If the soil level drops after watering, just top it off lightly.

Aftercare: Helping Your Plant Settle In

Repotting can be a little shocking — but your plant will bounce back with the right care.

✅ Post-repotting tips:

  • Keep the plant in indirect light for a few days (no harsh sun)
  • Avoid fertilizing for 2–4 weeks (let roots adjust)
  • Monitor water needs — repotted soil might hold more moisture
  • Watch for wilting or drooping — this is normal for a few days
  • Be patient — new growth will come!

Special Notes for Sensitive Plants

Some plants handle repotting better than others. Here’s how to approach a few:

Plant TypeRepotting Tip
Succulents & CactiLet roots dry for a day before watering again
FernsAvoid disturbing roots too much — be gentle
OrchidsUse orchid bark, not regular soil, and trim dead roots
Fiddle Leaf FigNeeds stability — stake if top-heavy after repotting
Snake PlantWater very lightly after repotting — prefers dryness

A Fresh Start = Healthy Growth

Repotting might feel intimidating, but it’s one of the best things you can do to rejuvenate and refresh your plant’s life. As long as you’re gentle, patient, and intentional, your plant will not only survive the move — it’ll thrive in its new home.

So go ahead. Give your green friend some fresh space and watch the growth unfold. 🌿💚

How to Clean and Dust Indoor Plant Leaves (And Why It Matters)

You water, you prune, you place your plants in the perfect light — but when was the last time you cleaned their leaves? Just like furniture or countertops, plant leaves collect dust over time. But unlike those objects, dust on plant leaves can actually affect their health.

In this article, we’ll show you why cleaning your plant’s leaves is essential, how often to do it, and the best (and easiest) methods to keep them looking glossy, vibrant, and thriving.

Why Clean Indoor Plant Leaves?

Dust might seem harmless, but for plants, it’s more than a cosmetic issue.

🌿 Here’s what happens when leaves get dirty:

  • Blocked sunlight: Dust interferes with photosynthesis, reducing the plant’s energy production.
  • Attracts pests: Dirty, neglected plants are more appealing to bugs like spider mites and scale.
  • Traps moisture: Debris and grime can lead to mold or mildew on the leaves.
  • Stunts growth: Less light = less food = slower or weaker growth.
  • Looks dull and unhealthy: Shiny, clean leaves make your plant (and space) look fresh and polished.

How Often Should You Clean Plant Leaves?

It depends on your home’s environment. Generally:

  • Once a month for most homes
  • Every 2–3 weeks if you live in a city, dusty climate, or near open windows
  • Every few days for large, broad-leaf plants that show dust easily (like fiddle leaf figs or rubber plants)

A quick dust-check during your watering routine is an easy habit to build.

Best Methods for Cleaning Plant Leaves

There’s no one-size-fits-all method. The best technique depends on the size and type of plant, as well as how dirty it is.

🧼 1. Wipe with a Damp Cloth

Perfect for broad, sturdy leaves (like rubber plants, monstera, or philodendron).

How to do it:

  • Use a soft microfiber cloth or old t-shirt
  • Dampen with lukewarm water (no soap needed)
  • Gently support the leaf with one hand and wipe with the other

Avoid using paper towels — they can leave lint and scratch the surface.

🚿 2. Give Your Plant a Shower

Great for many small- to medium-sized houseplants (especially ferns, palms, or ivy).

How to do it:

  • Place your plant in the sink, bathtub, or shower
  • Use lukewarm water with gentle pressure
  • Let it drain fully after to avoid root rot

Tip: Cover the soil with plastic or foil to avoid washing away nutrients.

💨 3. Use a Soft Brush or Paintbrush

Ideal for delicate or fuzzy-leafed plants like African violets or succulents.

How to do it:

  • Use a small paintbrush or makeup brush
  • Gently sweep away dust in the direction the leaves grow
  • Do this regularly to avoid buildup

Avoid getting fuzzy leaves wet — they can rot easily.

🌱 4. Spray and Wipe

For plants that need a deeper clean (especially if you see residue or buildup).

How to do it:

  • Mix a spray bottle with lukewarm water
  • Optional: Add a drop of mild dish soap (no detergent or chemicals)
  • Spray, wait a few seconds, and wipe with a cloth

Alternative mix: Water + 1 tsp neem oil = clean and pest prevention in one step.

What About Leaf Shine Products?

It’s tempting to use commercial “leaf shine” sprays for that glossy finish — but they’re not recommended for regular use.

Why to avoid them:

  • They can clog leaf pores (called stomata)
  • They may attract dust faster
  • Some include chemicals that harm sensitive plants

Better option: Clean naturally with water or a neem oil solution for safe, subtle shine.

Extra Tips for Leaf Care

Rotate your plants regularly for even growth and light exposure
Trim yellow or damaged leaves as needed
Inspect for pests while cleaning — this is your chance to catch issues early
Check underneath the leaves, too — pests and dust like to hide there
Clean your tools and cloths after each use to prevent spreading pests or fungus

Special Considerations by Plant Type

Plant TypeCleaning Method
Fiddle Leaf FigDamp cloth wipe
Rubber PlantDamp cloth or spray & wipe
PothosShower or wipe
Peace LilyWipe or shower
Spider PlantShower or brush
SucculentsSoft brush only
FernsLight rinse or shower
African VioletBrush only – avoid water on leaves

Clean Leaves = Happy Plants

Keeping your plant’s leaves clean doesn’t just improve their looks — it helps them breathe, grow, and thrive. It’s one of the simplest plant care habits you can build, and it makes a big difference over time.

So next time you’re watering, give those leaves a little love too. Your plants will thank you with lush growth and a fresh, healthy glow.

Creative Ways to Display Plants in Small Spaces

Limited on square footage? That doesn’t mean you have to limit your love for greenery. Whether you live in a cozy apartment, a studio, or just want to avoid clutter, there are countless creative ways to display plants — even when space is tight.

In this article, you’ll discover clever tricks and stylish setups to help you turn walls, ceilings, shelves, and even furniture into lush green displays without sacrificing space or flow.

Why Plants and Small Spaces Work Beautifully

Plants are the ultimate space-savers — they offer style, health benefits, and a calming vibe without taking up much room. Plus, strategically placing them can:

  • Make a room feel larger and more open
  • Soften hard lines in furniture or architecture
  • Act as living decor to complement your aesthetic
  • Create cozy, natural zones in multi-use rooms

1. Go Vertical: Think Up, Not Out

The walls in your space are valuable real estate. Don’t let them go to waste.

🌿 Ideas for vertical plant displays:

  • Wall-mounted planters: Hang single pots or a row of them on a blank wall
  • Pegboard gardens: Customize with hooks and shelves for adjustable displays
  • Hanging wall pockets: Use fabric or felt pockets for herbs or trailing plants
  • Ladder shelves: Lean against a wall for multi-level planting
  • Living wall frames: Turn your plants into living art with a framed grid of greenery

Best plants: Pothos, ferns, peperomia, ivy, succulents

2. Hang Plants from the Ceiling

Ceilings offer prime space to showcase hanging and trailing plants.

🪴 Hanging methods:

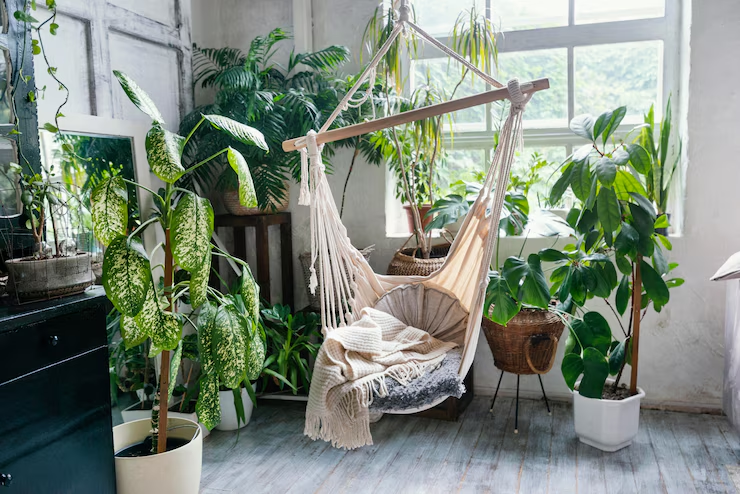
  • Use macramé plant hangers for a boho touch
  • Try ceiling hooks or tension rods in rental-friendly areas
  • Hang plants in front of windows to save sill space
  • Create a floating plant corner using 2–3 staggered hanging pots

Best plants: Spider plant, string of pearls, English ivy, golden pothos

3. Use Windows to Your Advantage

Even if your windowsills are narrow or crowded, there are still ways to add plants without losing sunlight or function.

Creative window displays:

  • Suction cup planters: Stick directly to windows
  • Tension rods: Hang mini baskets across the window frame
  • Floating glass shelves: Add invisible-style shelving for a clean look
  • Tiered stands: Use narrow plant stands that sit in front of the window

Bonus: Your plants will get plenty of natural light in these spots.

4. Stack, Nest, and Layer

Layering your plants adds dimension and helps fit more greenery into a smaller footprint.

Space-saving layering tips:

  • Use plant stands with multiple tiers
  • Place small plants on stools or books
  • Nest small pots around the base of a larger floor plant
  • Combine different shapes and heights for a visually balanced display

Try the “triangle rule” — arrange plants in groups of three at staggered heights for a dynamic look.

5. Combine Plants with Furniture

Multi-functional furniture is key in small spaces — and plants can be part of that too.

Smart plant-furniture pairings:

  • Bookshelves: Add trailing vines or small pots between books
  • Side tables with built-in planters
  • Bar carts: Use the top for drinks, the bottom for a mini jungle
  • Floating nightstands: Add a trailing plant for a relaxing bedside vibe
  • Window bench or ledge: Use for herbs, succulents, or flowering pots

This creates a lived-in, lush feel without taking over your room.

6. Think Mini and Mighty

Tiny plants pack a visual punch and are perfect for tight spots like corners, desktops, or bathroom shelves.

Perfect small-space plants:

  • Succulents
  • Air plants (Tillandsia)
  • Mini cacti
  • Baby ferns
  • String of turtles
  • Haworthia

Tip: Group several small plants in a tray for a styled centerpiece or kitchen display.

7. Utilize Corners and Nooks

Corners are often forgotten — but they can become the greenest part of your home.

How to green up corners:

  • Use a corner plant shelf or stand
  • Place a tall floor plant in a sleek pot
  • Hang a basket from the ceiling with a trailing vine
  • Mount a floating corner shelf with a mix of plants and candles

Make the corner a cozy jungle nook or meditation zone with a rug and warm light.

8. Magnetic and Adhesive Solutions

If you’re renting or avoiding tools, these no-drill options are perfect.

Stick-on solutions:

  • Magnetic planters for fridge, metal cabinets, or doors
  • Command hook hangers for lightweight pots
  • Stick-on ledges or shelves for tiny plants
  • Tension shelf systems that slot between floors and ceilings

Great for herbs, mini trailing plants, and air plants.

Quick Styling Tips for Small Spaces

✅ Stick to a consistent color palette for pots to avoid visual clutter
✅ Use odd numbers of plants in groups for a natural look
✅ Choose a mix of upright and trailing plants for dimension
✅ Let plants frame windows, mirrors, or furniture for flow
✅ Keep floor space clear by going vertical or high-up

Tiny Space, Big Green Impact

No matter how small your space is, there’s room for greenery. With a little imagination, you can transform tight corners, empty walls, and forgotten shelves into lush, functional plant displays that brighten your home and boost your mood.

The best part? Plants don’t just fill space — they fill your life with calm, color, and creativity. 🌿✨

Creative Plant Label Ideas That Are Functional and Stylish

Whether you’re caring for five plants or fifty, plant labels are a game-changer. They help you keep track of species, watering needs, and propagation dates — especially if you’ve got a mix of herbs, houseplants, or baby cuttings. But functional doesn’t mean boring.

In this guide, you’ll discover fun, easy, and aesthetic plant labeling ideas that fit your style, help with plant care, and make your green space even more beautiful.

Why Label Your Plants?

Besides being cute, labels are incredibly useful — especially if:

  • 🌿 You care for multiple similar-looking plants
  • 🌿 You propagate and need to track growth
  • 🌿 You want to remember the Latin or common names
  • 🌿 You’re managing care routines (watering, fertilizing, light)
  • 🌿 You live with roommates or family who also care for the plants

No more “what’s this one again?” moments — just smart, organized plant parenting.

1. Classic Wooden Markers (Rustic & Natural)

What you need:

  • Popsicle sticks, wooden craft tags, or bamboo markers
  • A fine-tip permanent marker or wood-burning tool

Style it up:

  • Paint the tips to match your decor
  • Use a stencil for clean lettering
  • Add symbols like sun, water drops, or fertilizer icons

Best for: Herb gardens, rustic decor, farmhouse-style setups

2. Chalkboard Labels (Reusable & Fun)

What you need:

  • Mini chalkboard stakes or adhesive chalkboard tape
  • Chalk or a white chalk marker

Pros:

  • Easy to change
  • Perfect for temporary labeling (e.g., seedlings or cuttings)
  • Adds a cute vintage vibe

Best for: Propagation trays, rotating collections, or temporary ID tags

3. Painted Rocks or Stones (Earthy & Whimsical)

What you need:

  • Small, smooth river rocks
  • Acrylic paint or paint pens
  • Clear sealant (for long-lasting finish)

Design ideas:

  • Paint the plant name
  • Add little leaf or vine designs
  • Coordinate colors with the plant pot

Best for: Indoor or outdoor planters, kids’ projects, boho or eclectic homes

4. Printable Tags on Toothpicks or Skewers (Minimalist & Budget-Friendly)

What you need:

  • Printable label templates (or create your own)
  • Toothpicks, bamboo skewers, or small dowels
  • Tape, glue, or clear laminate

Tips:

  • Print labels on cardstock or kraft paper
  • Laminate or cover with tape for moisture protection
  • Use iconography for light/watering needs

Best for: Organized indoor gardens, minimal or Scandinavian style

5. Metal Plant Tags (Modern & Sleek)

What you need:

  • Stainless steel or copper tags (you can buy blanks online)
  • Engraver or oil-based paint marker

Bonus:

  • These last forever — ideal for long-living plants
  • Adds a high-end, botanical garden feel
  • Can be bent or shaped to fit around pots

Best for: Statement plants, collector setups, gifting

6. Upcycled Materials (Eco-Friendly & Unique)

Turn old items into functional decor!

Creative ideas:

  • Wine corks on skewers
  • Old spoons with stamped names
  • Plastic cutlery painted and labeled
  • Pill bottle caps glued to sticks and painted
  • Vintage keys or tags tied with twine

Best for: Sustainable homes, DIY lovers, creative plant displays

7. Washi Tape or Adhesive Labels (Quick & Colorful)

What you need:

  • Washi tape or removable label stickers
  • Sharpie or label maker

Stick labels directly to pots — great for renters or shelf gardeners who don’t want stakes.

Best for: Small pots, hydroponics, or grow jars

8. Digital Labels & QR Codes (High-Tech Plant Nerds 💻🌱)

How it works:

  • Create a spreadsheet or use a plant care app
  • Generate a QR code linked to the plant’s care info
  • Print and tape the code to a marker or the pot

Scan the code for:

  • Light/water/fertilizer schedule
  • Last repotting date
  • Scientific name and origin

Best for: Large collections, tech lovers, educational gardens

What to Include on a Plant Label

You can keep it simple or go full detail mode.

Basic:

  • Common name (e.g., “Spider Plant”)
  • Scientific name (e.g., “Chlorophytum comosum”)

Helpful extras:

  • Date planted or acquired
  • Watering frequency
  • Light preference
  • Fertilizer reminders
  • Potting date or propagation origin

Labels That Work and Wow

Labeling your plants is more than practical — it’s a chance to express your style, get organized, and elevate your entire plant space. Whether you go rustic, modern, quirky, or techy, a good label makes caring for your green companions easier and more enjoyable.

So grab your markers, paints, or printer — and let your creativity grow right alongside your plants. 🏷️🌱✨

Perfect Plants for Small Kitchens and How to Style Them

Your kitchen isn’t just a place for cooking — it’s the heart of your home. And just like a good recipe, the best kitchen design includes the right ingredients — including plants. Even in small kitchens, adding greenery can elevate the space, making it more welcoming, stylish, and even functional.

In this article, you’ll discover the best plants for small kitchens, creative ways to style them, and tips to keep them thriving — no matter how compact your space may be.

Why Add Plants to Your Kitchen?

There’s more than one reason to keep plants near where you cook:

  • 🌿 Purify the air: Plants can absorb odors and filter kitchen air
  • 🌿 Improve mood: Greenery brings calm and creativity — great while prepping meals
  • 🌿 Add color and life: Softens hard surfaces like counters and cabinets
  • 🌿 Useful and beautiful: Some kitchen plants can double as herbs for cooking

Best of all? Even the tiniest kitchen can make room for a touch of nature.

Best Plants for Small Kitchens

Look for plants that are compact, low-maintenance, and tolerate kitchen conditions — like heat, occasional humidity, and variable lighting.

🌱 Top Kitchen-Friendly Plants:

1. Pothos (Epipremnum aureum)

  • Thrives in low or bright light
  • Trailing vines look great on shelves or cabinets
  • Very forgiving — perfect for busy cooks

2. Spider Plant (Chlorophytum comosum)

  • Compact and low-maintenance
  • Great in hanging planters near the sink
  • Produces baby plants you can propagate

3. English Ivy (Hedera helix)

  • Looks great trailing from high shelves or hanging pots
  • Helps purify air
  • Likes indirect light and regular moisture

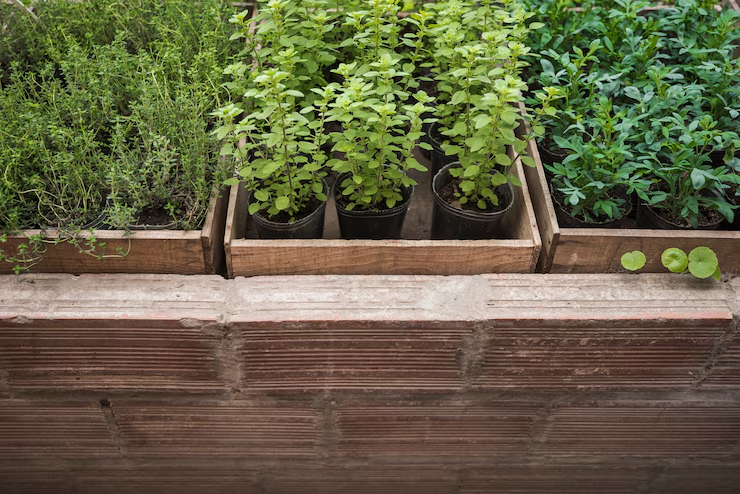
4. Herbs (Basil, Parsley, Mint, Chives)

  • Delicious and decorative
  • Best near a sunny window or under a grow light
  • Snip as needed — they’ll keep growing back

5. Succulents (Echeveria, Haworthia, Jade)

  • Perfect for window sills
  • Require minimal care
  • Add a touch of structure and modern flair

6. Air Plants (Tillandsia)

  • No soil needed!
  • Tuck into jars, bowls, or mounted on walls
  • Mist occasionally and enjoy their sculptural shapes

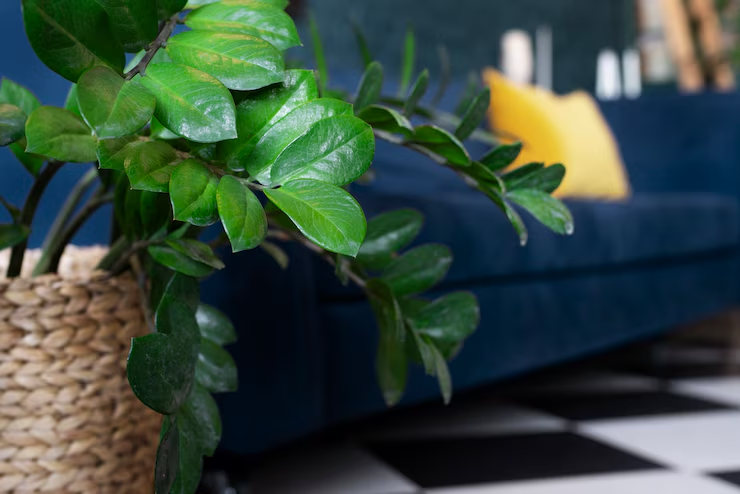
7. ZZ Plant (Zamioculcas zamiifolia)

  • Handles neglect, low light, and warm temperatures
  • Great for darker corners or beside cabinets
  • Shiny leaves add a modern, polished look

Styling Ideas for Small Kitchens

You don’t need a lot of space — just creativity and the right setup. Here are some clever ways to display plants in even the smallest kitchens:

1. Window Sill Garden

If your kitchen has a sunny window, line up small potted herbs, succulents, or a pothos vine. Use matching pots for a clean, curated look.

2. Floating Shelves

Install a shelf just for greenery, or mix small plants with cookbooks, spice jars, and decor. Great for trailing plants or compact pots.

3. Hanging Planters

Use ceiling hooks, curtain rods, or wall mounts to suspend plants like ivy or spider plants. It adds greenery without using counter space.

4. Magnetic or Wall-Mounted Pots

Stick small planters to the fridge or a magnetic board for a vertical herb garden.

5. Countertop Corners

Place one or two plants near the sink, stove, or coffee area to soften edges and add freshness.

6. Tiered Trays or Cake Stands

Use a tiered tray to group a few mini plants or herbs — perfect for countertops or kitchen islands.

7. Glass Jars & Upcycled Containers

Plant herbs or succulents in repurposed mugs, jars, or tins for a rustic or vintage kitchen vibe.

Light and Temperature Considerations

Kitchens often have fluctuating conditions — here’s how to adapt:

Light:

  • South-facing windows: Ideal for most herbs and succulents
  • Low-light kitchens: Use pothos, ZZ plants, or spider plants
  • No windows? Add a grow light under cabinets or shelves

Temperature:

  • Most plants prefer 65–75°F (18–24°C)
  • Keep plants away from hot stovetops, ovens, and heat vents
  • Watch for cold drafts from open windows or doors in winter

Watering and Maintenance Tips

Kitchens can be humid one day and dry the next — so it’s important to stay in tune with your plants’ needs.

  • Check soil moisture with your finger before watering
  • Use drainage trays or liners to protect countertops
  • Wipe leaves monthly to remove cooking residue or dust
  • Snip herbs regularly to encourage bushy growth
  • Remove dead or yellowing leaves to keep things tidy

Bonus tip: Keep a small watering can under the sink for quick, easy hydration sessions.

Plant + Kitchen Decor Combos

Make your kitchen even more beautiful by coordinating plants with your style:

Kitchen StyleBest Plant Look
Modern/MinimalistMonochrome pots, geometric succulents
FarmhouseTerracotta herbs, mason jar planters
BohoHanging pothos, woven baskets
ScandinavianClean white pots, herbs on wooden shelves
IndustrialMetal containers, bold-leaf plants like ZZ

Use your plants as decor pieces — they’re living design elements that adapt with you!

Fresh, Flavorful, and Full of Life

Small kitchens can still have big personality — and nothing brings a space to life like a touch of green. Whether it’s herbs by the sink, a pothos on a shelf, or a succulent on your coffee corner, plants offer style, function, and freshness every day.

So go ahead — add that basil to your pasta and your windowsill. Your kitchen (and your meals) will thank you.

Use Plants to Naturally Freshen the Air in Your Home

Your indoor air might be more polluted than you think — filled with dust, odors, and chemicals from everyday products. But the solution isn’t just a fancy air purifier. Plants can play a powerful role in naturally cleaning the air, adding oxygen, and making your home smell fresh and feel calm.

In this guide, you’ll discover how to use houseplants to purify, scent, and refresh the air in your home — while also boosting mood, style, and well-being.

Why Indoor Air Needs a Refresh

From furniture and flooring to cleaning sprays and candles, your home can release volatile organic compounds (VOCs) — invisible pollutants that affect indoor air quality.

Common indoor air issues:

  • Dust and pet dander
  • Mold spores
  • VOCs from paint, plastic, or cleaners
  • Cooking and bathroom odors
  • Stale, recycled air (especially in winter)

Houseplants act as natural filters, absorbing toxins and releasing clean, oxygen-rich air.

How Plants Clean the Air

Plants improve air quality in a few amazing ways:

  • 🌿 Photosynthesis: They absorb carbon dioxide and release oxygen
  • 🧪 Phytoremediation: Certain species can remove pollutants like formaldehyde, benzene, and xylene
  • 💧 Humidity control: Plants release moisture through transpiration, improving air balance
  • 🧹 Dust trapping: Leaves can catch dust particles, which you can then wipe away

While you’d need a jungle to fully purify a large space, even a few well-chosen plants can make a noticeable difference.

Top Air-Purifying Plants

These plants are known for their ability to cleanse the air and thrive indoors:

🪴 Best all-around:

  • Peace Lily – Absorbs mold spores and VOCs; even blooms indoors
  • Snake Plant – Tough and oxygen-boosting, especially at night
  • Spider Plant – Great for hanging and filters multiple toxins
  • Aloe Vera – Detoxes air and soothes burns
  • Rubber Plant – Absorbs pollutants and increases humidity
  • Areca Palm – Moisturizes the air and removes chemicals
  • Pothos – Hardy and great at filtering formaldehyde
  • Bamboo Palm – Elegant and known for filtering benzene and trichloroethylene
  • English Ivy – Excellent at reducing airborne mold

Tip: Place 1 plant per 100 square feet for optimal effect, according to NASA’s clean air study.

Naturally Scented Plants for Fresh Indoor Aromas

Some plants not only clean the air — they also smell amazing. Use them as natural air fresheners.

🌸 Fragrant picks:

  • Lavender – Relaxing scent; great near beds or windows
  • Mint – Invigorating and fresh, perfect for kitchens
  • Rosemary – Sharp and clean; loves sunlight
  • Lemon Balm – Citrus-scented and calming
  • Jasmine – Sweet and floral; needs bright light
  • Geranium – Beautiful blooms and bold scent

Keep these in warm spots with some airflow to help release their fragrance naturally.

Best Placement for Maximum Freshness

Where you put your plants matters just as much as what you grow.

🌿 Where to place air-freshening plants:

  • Near entryways – First impression = fresh
  • In the bathroom – Remove humidity and odors (peace lily, pothos)
  • By the kitchen window – Filter cooking smells (mint, rosemary)
  • Next to your bed – Snake plant or lavender for nighttime oxygen and relaxation
  • Home office – Boost mood and brainpower with fresh air and greenery

Avoid placing too many plants in dark, poorly ventilated corners — this can encourage mold if the area stays damp.

Maintenance Tips to Maximize Air-Purifying Benefits

Healthy plants = healthy air. Here’s how to keep them at their best:

Dust leaves regularly with a soft cloth
Water only as needed — avoid soggy soil
Wipe planters and trays to prevent mildew
Rotate plants to ensure even light and growth
Use organic potting mix with good drainage
Prune dead leaves to keep plants fresh and active

DIY Natural Air Freshening with Plants

Combine live plants with DIY recipes for next-level freshness:

🌿 Herb simmer pot:

  • Boil rosemary, lemon slices, and mint for a clean, herbal aroma

🌸 Essential oil spray:

  • Mix water, vodka, and drops of lavender or eucalyptus oil
  • Spray around rooms — especially near plant zones

🍋 Citrus + basil bundle:

  • Tie lemon peel and basil stems with string
  • Hang near windows or vents for a breeze-powered scent boost

Breathe Easier, Live Greener

Your home should smell good, feel fresh, and support your well-being — and plants can help you get there naturally. By combining air-purifying species with fragrant favorites and good placement, you can create a space that looks, smells, and feels healthier.

No sprays, no chemicals — just the clean, quiet power of nature. 🌿💨🌼

How to Use Plant Covers in Home Decor

Indoor plants bring freshness, color, and life into your space — but it’s not just the plants themselves that make a visual impact. The containers and covers you choose for them are equally important in defining your style and enhancing your decor.

From minimalist ceramics to boho baskets and modern metallics, the right plant cover (also called cachepot or decorative planter) can turn even the simplest houseplant into a striking design element.

In this article, we’ll explore creative ways to use plant covers to elevate your home decor, help you match covers with interior styles, and share practical tips for choosing the perfect pairing.

What Is a Plant Cover?

A plant cover is a decorative outer pot that holds your potted plant, often without drainage holes. Unlike standard planters, plant covers are used for aesthetic purposes, and your plant usually stays in its grow pot inside the cover.

Why use plant covers?

  • Instantly upgrades the visual appeal of your plant
  • Easy to swap out for seasonal or style changes
  • Helps coordinate plants with your home’s color palette and furniture
  • Keeps mess and water off your furniture (as long as you water correctly)

1. Match the Cover to Your Decor Style

The first step in choosing the right plant cover is understanding your space’s design vibe. Think of your plant cover as you would a throw pillow or piece of art — it’s part of the overall aesthetic.

For a Minimalist Style:

  • Stick with white, black, or neutral-toned ceramics
  • Choose clean lines and matte finishes
  • Go for simple shapes like cylinders or cubes

For a Bohemian or Eclectic Look:

  • Use woven baskets, colorful clay pots, or painted ceramics
  • Layer with macramé plant hangers or wooden stools
  • Mix textures: rattan, jute, leather, and rough terracotta

For a Modern or Industrial Interior:

  • Go for metal covers in brass, copper, or matte black
  • Look for geometric shapes or angular lines
  • Pair with sculptural plants like snake plants or fiddle leaf figs

For a Rustic or Farmhouse Feel:

  • Choose weathered wood boxes, galvanized metal pots, or stone textures
  • Pair with soft, leafy plants like ferns or ivy
  • Consider labels or chalkboard name tags for a charming touch

2. Play With Size and Proportion

Your plant cover should complement the size and shape of your plant, creating a balanced silhouette.

  • For tall, vertical plants (like snake plant or rubber tree), use deep, narrow covers to echo the height.
  • For bushy or trailing plants (like pothos or spider plants), opt for wide, low bowls or open baskets.
  • For tiny plants (like succulents or cacti), get creative with mini covers like teacups, mugs, or candle holders.

Tip: Always make sure your plant fits well — avoid oversized covers that “swallow” the plant or tiny ones that look cramped.

3. Use Covers to Add Color or Texture

Plant covers are an easy way to introduce pops of color or texture into a room without committing to big changes.

  • Use a bold-colored pot (yellow, teal, coral) as a statement piece in a neutral space
  • Add warm textures like woven baskets or bamboo for a cozy touch
  • Try a glossy finish for modern flair or a rough terracotta for earthy balance
  • Mix and match styles for an eclectic look — just stay within a color palette to keep it cohesive

4. Create Visual Flow with Groupings

Grouping multiple plants together in matching or complementary covers creates a more curated and intentional display.

Try this:

  • Use the “rule of three” — group three plants with varying heights and covers for dynamic visual flow
  • Combine different materials (ceramic, metal, basket) in the same color range
  • Line up small pots in identical covers on a shelf or windowsill
  • For plant shelves or stands, use consistent shapes but vary the finishes for interest

Pro Tip: Add in decorative elements like candles, books, or small sculptures to complete the vignette.

5. Seasonal Styling With Plant Covers

One of the best things about using plant covers is how easy it is to change them with the seasons.

Seasonal ideas:

  • Spring: Soft pastels, floral prints, or painted ceramics
  • Summer: Bright colors, tropical prints, or woven textures
  • Autumn: Earth tones, matte finishes, and rustic clay
  • Winter: Metallics, deep jewel tones, or cozy knit wraps around pots

Swapping covers is an effortless way to refresh your space year-round without buying new plants.

6. DIY Plant Covers for a Personal Touch

If you love getting crafty, why not make your own plant covers?

Here are a few DIY ideas:

  • Paint plain terracotta pots with patterns or quotes
  • Wrap old pots with jute rope, twine, or yarn
  • Use fabric scraps to create plant cozies or pot sleeves
  • Repurpose tin cans, baskets, or boxes as covers with a little cleanup and creativity

DIY covers not only save money but also add personality and charm to your plant decor.

7. Tips for Using Plant Covers the Right Way

While plant covers are mostly about aesthetics, there are some practical things to keep in mind:

  • Drainage matters: Since most covers don’t have holes, keep your plant in its nursery pot inside the cover and remove it when watering.
  • Use saucers or liners: To prevent damage to furniture, place a plastic saucer or liner at the bottom of the cover.
  • Allow airflow: Avoid covers that trap too much moisture at the base, especially for plants that like dry soil.
  • Check for buildup: Clean the inside of the cover occasionally to remove mineral buildup or mold.

The Pot Makes the Plant

A plant in a plain plastic pot might look ordinary, but place it in the right cover — and suddenly, it’s a design piece. With just a few thoughtful choices, plant covers allow you to express your style, elevate your décor, and build a space that feels both lively and intentional.

So don’t overlook the power of a beautiful pot. Whether you’re going for cozy, bold, rustic, or refined, your plant cover is more than a container — it’s part of the story your home tells.

Choose the Right Planter for Each Type of Plant

The planter you choose isn’t just about looks — it’s about plant health, root growth, moisture control, and overall success. While stylish pots can transform your space, using the wrong type of container could leave your plant unhappy (or even dying).

In this article, we’ll break down how to choose the right planter for different types of plants, explain the importance of drainage, and help you match pot material, size, and shape to keep your green friends thriving.

Why the Right Planter Matters

Your planter affects your plant more than you think:

  • 🪴 Drainage prevents root rot
  • 📏 Size influences how fast a plant grows
  • 🪨 Material affects soil temperature and moisture retention
  • 🌀 Shape supports root structure and overall stability
  • 🎨 Style complements your décor — but that’s just the cherry on top!

A happy plant starts from the bottom up — literally.

1. Understand Drainage: It’s Non-Negotiable

Drainage holes allow excess water to escape, preventing root rot — one of the most common causes of plant death.

✅ Best practice:

  • Use a pot with at least one drainage hole
  • Place a saucer or tray underneath to protect furniture
  • If using a decorative planter without holes, keep the plant in a nursery pot inside (aka double potting)

🚫 Avoid:

  • Sealed-bottom containers without a proper drainage plan
  • Letting water sit at the bottom of the pot

2. Match the Planter Size to the Plant

Too big = soggy soil
Too small = cramped roots

General sizing tips:

  • Choose a pot 1–2 inches wider than the current root ball
  • For fast-growing plants, size up more — but not too much
  • For succulents or slow growers, tighter pots help prevent overwatering

Warning sign: Roots growing out of the drainage hole? Time to upgrade!

3. Pick the Right Planter Material

Different materials hold water, heat, and air differently. Here’s how to choose:

🟤 Terracotta (Unglazed Clay)

  • Breathable, allows air and water to pass through
  • Great for succulents and cacti that hate soggy soil
  • Dries out quickly — not ideal for moisture-loving plants
  • Earthy, natural aesthetic

⚪ Ceramic (Glazed)

  • Retains moisture well
  • Good for most houseplants (e.g., pothos, philodendron)
  • Heavier and more decorative
  • Often comes without drainage — double-potting may be needed

⚫ Plastic

  • Lightweight and holds moisture longer
  • Ideal for busy people or dry environments
  • Affordable and easy to move
  • Can overheat in direct sun

🔵 Metal

  • Sleek and modern, but can conduct heat quickly
  • Best for indoor decorative use only
  • Always double-pot to protect roots from heat

🟢 Concrete or Cement

  • Heavy and stylish
  • Porous like terracotta — good drainage
  • Best for larger floor plants like rubber plants or fiddle leaf figs
  • May need sealing for indoor use

🟡 Fabric Planters (Grow Bags)

  • Great breathability and root health
  • Good for herbs, edibles, or rotating outdoor/indoor plants
  • Not decorative — but functional and affordable

4. Match Planter Type to the Plant’s Needs

Every plant has different preferences. Let’s match them up:

🌵 Succulents & Cacti

  • Terracotta or unglazed ceramic with drainage
  • Shallow and wide pots
  • Avoid plastic (retains too much moisture)

🌿 Tropical Plants (Monstera, Philodendron, etc.)

  • Ceramic or plastic pots
  • Medium-depth containers with drainage
  • Choose a pot with enough room to grow

🍃 Ferns, Calatheas, & Moisture-Lovers

  • Plastic or glazed ceramic to retain moisture
  • Self-watering pots can work well
  • Avoid terracotta — too dry

🌳 Tall Plants (Fiddle Leaf Fig, Rubber Plant)

  • Concrete or heavy ceramic for stability
  • Tall and deep pots to anchor root systems
  • Consider pot feet or wheels for easy moving

🪴 Trailing Plants (Pothos, Ivy, String of Pearls)

  • Hanging baskets or wall-mounted planters
  • Ensure good drainage
  • Use lightweight materials like plastic or thin ceramic

🌿 Herbs & Edibles (Indoors)

  • Fabric grow bags, ceramic pots, or terracotta
  • Choose individual containers for easy rotation
  • Shallow pots for herbs like basil, parsley, or mint

5. Think About Pot Shape and Depth

Yes, shape matters too — especially for root health.

🪴 Shallow pots:

  • Great for succulents or shallow-rooted plants
  • Dry out quickly

📦 Deep pots:

  • Needed for plants with deep taproots (e.g., ZZ plant, rubber tree)
  • Retain more water — make sure drainage is strong

🍥 Round vs. Square:

  • Round pots are easier for root growth and repotting
  • Square pots fit better in tight corners or grouped arrangements

6. Consider Style (But Don’t Let It Lead)

Of course, you want your pots to look good! Just make sure form doesn’t override function.

Style tips:

  • Stick to a cohesive color palette for a clean look
  • Use neutral planters and let the foliage be the star
  • Mix textures (matte, glossy, woven) to add depth
  • Don’t forget to include plant stands or risers for height variation

Pro Tip: If you love a pot without drainage, just drop a plastic nursery pot inside. Style + safety = win.

A Good Pot Makes a Great Plant

Choosing the right planter is more than a design decision — it’s part of plant care. The right size, material, and drainage setup can make the difference between a struggling plant and one that thrives.

When in doubt, start with a simple pot with drainage, sized just right, and match the material to the plant’s moisture needs. Add your personal flair with colors and textures — and your plant will feel (and look) right at home.

How to Identify and Fix Common Indoor Plant Problems

Your plant was looking great last week… but now the leaves are yellowing, drooping, or spotted. What happened? Don’t panic — plants are resilient, and most issues are fixable with a little observation and care.

This guide will help you quickly identify common signs of plant distress, understand the causes, and give you actionable fixes to bring your green friend back to health.

Why Plants Struggle Indoors

Indoor environments can be tough on plants — even when we try our best.

Common indoor stressors include:

  • Inconsistent light or watering
  • Poor drainage or overwatering
  • Low humidity
  • Pests or fungus
  • Nutrient deficiencies
  • Temperature swings or drafts

The good news? Plants are communicators. Their leaves, stems, and soil tell you everything — you just need to learn their language.

Symptom 1: Yellow Leaves

This is one of the most common issues plant parents face.

Possible causes:

  • Overwatering (most common)
  • Poor drainage or soggy soil
  • Old leaves dying off naturally
  • Low light or lack of nutrients

What to do:

  • Check soil moisture — if it’s soggy, let it dry before watering again
  • Ensure your pot has drainage holes
  • Remove yellow leaves only if they’re fully dead
  • Adjust light exposure — move closer to a window if needed
  • Consider a light dose of fertilizer if it’s a nutrient issue

Symptom 2: Drooping or Wilting Leaves

Limp, lifeless leaves can mean too much or too little water.

What to check:

  • If the soil is dry → Underwatered
  • If the soil is wet → Overwatered
  • If plant was recently moved → Could be transplant shock

Fix:

  • Water thoroughly if dry
  • Let it drain and dry out if soggy
  • Avoid big changes in temperature or location
  • Be patient — plants often bounce back within a few days

Symptom 3: Brown Leaf Tips or Edges

Crispy leaf tips are often a sign of low humidity, especially in tropical plants.

Other causes:

  • Over-fertilizing
  • Too much direct sunlight
  • Watering with tap water high in chlorine or fluoride

Fix:

  • Mist your plant (if it likes humidity) or use a humidifier
  • Use distilled or filtered water
  • Trim brown edges with clean scissors
  • Flush the soil monthly to prevent salt buildup

Symptom 4: Curling Leaves

When leaves curl inward or downward, your plant is protecting itself.

Causes:

  • Underwatering or overwatering
  • Low humidity
  • Too much direct sun
  • Cold drafts or heat stress

Fix:

  • Evaluate watering routine
  • Move out of harsh sunlight
  • Increase humidity
  • Keep away from vents or open windows

Symptom 5: Leaf Drop

Dropping leaves can be alarming, but it’s often the plant’s way of adjusting.

Causes:

  • Environmental change (new location, repotting)
  • Overwatering or underwatering
  • Drastic light or temperature shift
  • Seasonal dormancy

Fix:

  • Stay consistent with care
  • Don’t move your plant around too often
  • Water properly and keep in stable lighting
  • Allow some time for the plant to adapt

Symptom 6: Spots or Discoloration

Brown, black, or yellow spots can signal pests, fungi, or sunburn.

Causes:

  • Overwatering leading to fungal issues
  • Sunburn from direct light
  • Pest damage (check under leaves)
  • Nutrient deficiency

Fix:

  • Cut off affected leaves
  • Avoid misting at night
  • Use a natural fungicide or neem oil spray
  • Fertilize with a balanced formula if needed

Symptom 7: Mold on Soil or Leaves

A fuzzy white coating on top of the soil? That’s mold, often from too much moisture.

Causes:

  • Overwatering
  • Poor air circulation
  • Lack of sunlight

Fix:

  • Scrape off moldy topsoil and replace
  • Let soil dry between waterings
  • Improve airflow or light exposure
  • Water in the morning to allow drying time

Symptom 8: Pest Infestation

Common indoor plant pests include:

PestSignsFix
Spider MitesWebbing, speckled leavesNeem oil or insecticidal soap
MealybugsCottony white clustersRemove with alcohol-soaked cotton swab
Fungus GnatsTiny flies near soilLet soil dry, use sticky traps
AphidsClusters on stems or leavesRinse plant and apply neem oil

Tip: Isolate infested plants immediately to prevent spread!

General Fixes for All Problems

When in doubt, take these universal steps:

Inspect your plant weekly — under leaves, in soil, and at the base
Adjust light and watering based on the season
Use a moisture meter if you’re unsure when to water
Stick to one change at a time — too many adjustments can stress the plant
Be patient — recovery takes days or even weeks

Your Plants Are Speaking — Listen Closely

Every yellow tip, drooping leaf, or curling vine is your plant’s way of asking for help. With a little observation and care, most problems are easy to fix — and your plant will bounce back stronger.

Remember: perfection isn’t the goal. Growth is. And sometimes, the best plant parents are the ones who learn through the leaves.

How to Build a Pet-Friendly Indoor Garden (Safe for Cats and Dogs)

If you love your plants and your pets, you know the struggle — a beautiful indoor jungle can be a tempting playground (or snack) for curious paws. But with the right choices, you can have both: a lush indoor garden that’s safe, stylish, and pet-friendly.

In this guide, you’ll learn how to design a space where your pets and plants can coexist peacefully, which plants are safe (and which to avoid), plus tips to protect your greenery from little troublemakers.

Why Pet Safety Matters in Indoor Gardening

Many common houseplants are toxic to animals and can cause:

  • 🐶 Drooling, vomiting, or diarrhea
  • 🐱 Irritated mouth or skin
  • 😿 Breathing difficulties or lethargy
  • In severe cases, more serious health problems

Since pets explore with their mouths and paws, choosing the right plants is essential.

Step 1: Choose Pet-Safe Plants

These plants are non-toxic to cats and dogs, according to the ASPCA and vet-approved sources.

✅ Pet-safe favorites:

  • Spider Plant – Air-purifying and fun for cats to bat (non-toxic if nibbled)
  • Areca Palm – Elegant, tropical, and totally safe
  • Calathea – Gorgeous leaves and gentle on pets
  • Prayer Plant (Maranta) – Low light and pet-safe
  • Bamboo Palm – Adds height without risk
  • Peperomia – Compact, textured, and chew-safe
  • Baby Rubber Plant (Peperomia obtusifolia) – Not to be confused with toxic ficus varieties
  • Boston Fern – Fluffy and pet-friendly
  • African Violet – Pretty blooms with no danger
  • Herbs like Basil, Thyme, and Parsley – Great for pets and people alike

Step 2: Plants to Avoid Around Pets

These popular plants are toxic and should be kept out of reach — or out of the house altogether if your pet is especially curious.

❌ Common toxic plants:

  • Monstera (Swiss Cheese Plant)
  • Fiddle Leaf Fig
  • Peace Lily
  • Pothos
  • Snake Plant
  • Aloe Vera
  • Dieffenbachia (Dumb Cane)
  • Sago Palm (extremely toxic)
  • English Ivy
  • Rubber Plant (Ficus elastica)

Pro Tip: Always check the ASPCA toxic plant list before buying something new.

Step 3: Design Your Garden with Pets in Mind

🪴 Use height to your advantage:

  • Place plants on floating shelves, wall-mounted planters, or hanging baskets
  • Use tall plant stands to keep greenery out of reach
  • Elevate larger floor plants behind furniture or in corners pets can’t reach

🐾 Create a designated “plant zone”:

  • Use a room divider, baby gate, or shelf wall to separate plants from pet hangout areas
  • Keep trailing plants away from ledges where cats like to jump

Step 4: Use Pet-Proof Containers

Your planter choices can help prevent accidents (and digging disasters).

Best pet-proof container ideas:

  • Heavy ceramic or concrete pots that pets can’t knock over
  • Closed terrariums for humidity-loving plants and zero pet access
  • Self-watering planters with built-in covers
  • Wall planters and vertical gardens for tight spaces

Avoid: Wicker baskets (tempting chew toys) and small, tippy pots

Step 5: Deter Curious Pets (Gently)

Even with safe plants, you may want to discourage chewing, digging, or swatting.

Natural deterrents:

  • Citrus peels near pots (most pets dislike the smell)
  • Pet-safe deterrent sprays from pet stores
  • Double-sided tape around pots temporarily
  • Smooth river stones on top of soil to prevent digging

Behavioral tips:

  • Provide toys or cat grass nearby to redirect attention
  • Use a firm “no” and distraction when pets go after plants
  • Reward pets for ignoring plants — positive reinforcement works!

Step 6: Keep a Clean, Pet-Friendly Routine

✅ Check leaves regularly for chew marks or stress
✅ Clean up any dropped leaves, petals, or soil
✅ Avoid fertilizers or pest sprays that aren’t labeled pet-safe
✅ If you repot, keep curious pets away from the process
✅ Watch for signs of plant munching like drooling or upset stomach

Fun Pet & Plant Pairings

Make your pet feel included in the green lifestyle!

PetPlant PairingWhy It Works
CatCat grass or catnipSafe to chew, fun to nibble
DogBasil or parsleyEdible, easy to grow, good for digestion
Chill petsCalathea or MarantaGreat visual motion (leaves move!)
Energetic petsTall Areca palmLess tempting than low plants

Peace Between Paws and Plants

You don’t have to choose between your furry friends and your plant babies — you can absolutely have both with a little knowledge and setup. Stick to safe species, style smart, and gently train your pets to coexist with greenery.

Soon, you’ll have a home full of fresh air, lush leaves, and happy tails. 🪴🐕🐈