Creative Ways to Display Plants in Small Spaces

Limited on square footage? That doesn’t mean you have to limit your love for greenery. Whether you live in a cozy apartment, a studio, or just want to avoid clutter, there are countless creative ways to display plants — even when space is tight.

In this article, you’ll discover clever tricks and stylish setups to help you turn walls, ceilings, shelves, and even furniture into lush green displays without sacrificing space or flow.

Why Plants and Small Spaces Work Beautifully

Plants are the ultimate space-savers — they offer style, health benefits, and a calming vibe without taking up much room. Plus, strategically placing them can:

  • Make a room feel larger and more open
  • Soften hard lines in furniture or architecture
  • Act as living decor to complement your aesthetic
  • Create cozy, natural zones in multi-use rooms

1. Go Vertical: Think Up, Not Out

The walls in your space are valuable real estate. Don’t let them go to waste.

🌿 Ideas for vertical plant displays:

  • Wall-mounted planters: Hang single pots or a row of them on a blank wall
  • Pegboard gardens: Customize with hooks and shelves for adjustable displays
  • Hanging wall pockets: Use fabric or felt pockets for herbs or trailing plants
  • Ladder shelves: Lean against a wall for multi-level planting
  • Living wall frames: Turn your plants into living art with a framed grid of greenery

Best plants: Pothos, ferns, peperomia, ivy, succulents

2. Hang Plants from the Ceiling

Ceilings offer prime space to showcase hanging and trailing plants.

🪴 Hanging methods:

  • Use macramé plant hangers for a boho touch
  • Try ceiling hooks or tension rods in rental-friendly areas
  • Hang plants in front of windows to save sill space
  • Create a floating plant corner using 2–3 staggered hanging pots

Best plants: Spider plant, string of pearls, English ivy, golden pothos

3. Use Windows to Your Advantage

Even if your windowsills are narrow or crowded, there are still ways to add plants without losing sunlight or function.

Creative window displays:

  • Suction cup planters: Stick directly to windows
  • Tension rods: Hang mini baskets across the window frame
  • Floating glass shelves: Add invisible-style shelving for a clean look
  • Tiered stands: Use narrow plant stands that sit in front of the window

Bonus: Your plants will get plenty of natural light in these spots.

4. Stack, Nest, and Layer

Layering your plants adds dimension and helps fit more greenery into a smaller footprint.

Space-saving layering tips:

  • Use plant stands with multiple tiers
  • Place small plants on stools or books
  • Nest small pots around the base of a larger floor plant
  • Combine different shapes and heights for a visually balanced display

Try the “triangle rule” — arrange plants in groups of three at staggered heights for a dynamic look.

5. Combine Plants with Furniture

Multi-functional furniture is key in small spaces — and plants can be part of that too.

Smart plant-furniture pairings:

  • Bookshelves: Add trailing vines or small pots between books
  • Side tables with built-in planters
  • Bar carts: Use the top for drinks, the bottom for a mini jungle
  • Floating nightstands: Add a trailing plant for a relaxing bedside vibe
  • Window bench or ledge: Use for herbs, succulents, or flowering pots

This creates a lived-in, lush feel without taking over your room.

6. Think Mini and Mighty

Tiny plants pack a visual punch and are perfect for tight spots like corners, desktops, or bathroom shelves.

Perfect small-space plants:

  • Succulents
  • Air plants (Tillandsia)
  • Mini cacti
  • Baby ferns
  • String of turtles
  • Haworthia

Tip: Group several small plants in a tray for a styled centerpiece or kitchen display.

7. Utilize Corners and Nooks

Corners are often forgotten — but they can become the greenest part of your home.

How to green up corners:

  • Use a corner plant shelf or stand
  • Place a tall floor plant in a sleek pot
  • Hang a basket from the ceiling with a trailing vine
  • Mount a floating corner shelf with a mix of plants and candles

Make the corner a cozy jungle nook or meditation zone with a rug and warm light.

8. Magnetic and Adhesive Solutions

If you’re renting or avoiding tools, these no-drill options are perfect.

Stick-on solutions:

  • Magnetic planters for fridge, metal cabinets, or doors
  • Command hook hangers for lightweight pots
  • Stick-on ledges or shelves for tiny plants
  • Tension shelf systems that slot between floors and ceilings

Great for herbs, mini trailing plants, and air plants.

Quick Styling Tips for Small Spaces

✅ Stick to a consistent color palette for pots to avoid visual clutter
✅ Use odd numbers of plants in groups for a natural look
✅ Choose a mix of upright and trailing plants for dimension
✅ Let plants frame windows, mirrors, or furniture for flow
✅ Keep floor space clear by going vertical or high-up

Tiny Space, Big Green Impact

No matter how small your space is, there’s room for greenery. With a little imagination, you can transform tight corners, empty walls, and forgotten shelves into lush, functional plant displays that brighten your home and boost your mood.

The best part? Plants don’t just fill space — they fill your life with calm, color, and creativity. 🌿✨

Step-by-Step Guide to Making a Decorative Terrarium

Terrariums are like tiny gardens trapped in glass — and they’re just as fun to make as they are to admire. Whether you want to bring nature to your desk, coffee table, or bookshelf, a decorative terrarium is a compact, eye-catching way to display plants in style.

This step-by-step guide will walk you through everything you need to build your own beautiful terrarium — from choosing the right plants and containers to layering, planting, and long-term care.

What Is a Terrarium?

A terrarium is a self-contained, often glass-enclosed environment for growing small plants. Think of it as a mini greenhouse that fits on your shelf.

There are two main types:

  • Open Terrariums: Best for succulents, cacti, and plants that prefer dry conditions
  • Closed Terrariums: Ideal for moisture-loving plants like ferns and mosses (with lids or sealed tops)

Both can be decorative centerpieces that bring life and creativity into any room.

What You’ll Need

Before you start building your terrarium, gather the following materials:

🪴 Materials List:

  • Glass container (bowl, jar, vase, lantern — anything clear and open or with a lid)
  • Small plants (based on the terrarium type — more on that soon)
  • Pebbles or small stones (for drainage)
  • Activated charcoal (helps prevent mold and odors)
  • Potting soil (specific to your plant type)
  • Decorative elements (moss, rocks, crystals, mini figurines)
  • Tools: Long tweezers, spoon, paintbrush (optional, but helpful)

Step 1: Choose the Right Container

Almost any clear glass container can work as a terrarium. Choose based on the vibe you want and the plants you plan to use.

Container ideas:

  • Fish bowls
  • Mason jars
  • Wine glasses
  • Lanterns
  • Apothecary jars
  • Geometric glass boxes

Open containers are better for succulents and cacti.
Closed containers create humidity and are better for ferns and mosses.

Step 2: Select Your Plants

The plants should be small, slow-growing, and compatible with each other. Group plants that thrive in the same light and moisture conditions.

Open Terrarium Plants (Dry & Bright):

  • Echeveria
  • Haworthia
  • Jade plant
  • Air plants
  • Mini cacti

Closed Terrarium Plants (Moist & Shaded):

  • Fittonia (nerve plant)
  • Baby ferns
  • Moss
  • Peperomia
  • Pilea

Avoid plants that grow quickly or get too tall. You want to maintain a miniature, balanced ecosystem.

Step 3: Layer Your Base

Layering creates drainage and structure inside your terrarium — it’s essential for plant health and aesthetic appeal.

How to layer:

  1. Pebble layer (1–2 inches): Helps with drainage and prevents root rot.
  2. Activated charcoal (thin layer): Keeps the terrarium fresh and odor-free.
  3. Potting soil (2–3 inches): Use cactus soil for succulents, or general houseplant soil for leafy plants.
  4. Optional moss layer: Helps retain moisture and adds texture.

Smooth each layer with a spoon or small tool before moving to the next.

Step 4: Add the Plants

Now the fun begins! 🌿

How to plant:

  1. Plan your layout before digging. Taller plants go in the back; shorter ones in front.
  2. Use your finger, spoon, or a stick to make small holes in the soil.
  3. Gently remove each plant from its pot, shake off excess soil, and place into the hole.
  4. Press down lightly around the base to anchor it.

Use tweezers or chopsticks for better precision in small containers.

Step 5: Decorate!

Time to personalize your terrarium with decorative extras.

Ideas for decoration:

  • Cover soil with green moss, pebbles, or sand
  • Add small crystals or stones for sparkle
  • Place miniature figurines, fairy garden accents, or driftwood
  • Use colored sand or layered gravel for a bold look

This step is optional, but it makes your terrarium feel like a complete design piece.

Step 6: Water Carefully

Terrariums don’t need much water — especially open ones.

Watering tips:

  • Use a spray bottle or dropper to avoid overwatering
  • For open terrariums: Water sparingly every 2–3 weeks
  • For closed terrariums: Mist lightly once a month — condensation on the glass means the ecosystem is working

Watch the leaves: yellowing or mold = too much moisture. Dry, drooping plants = more water needed.

Step 7: Find the Perfect Spot

Place your terrarium where it will get the right amount of light without harsh direct sun.

  • Bright, indirect light is best
  • Avoid hot windowsills that can cause overheating in glass
  • Rotate occasionally for even growth

A terrarium makes a stunning addition to a:

  • Desk or nightstand
  • Coffee table
  • Bathroom shelf
  • Kitchen counter
  • Bookshelf or entryway table

Ongoing Terrarium Care

Terrariums are low-maintenance, but they still need love. Here’s your care checklist:

  • Wipe the glass inside and out for a clean view
  • Trim plants if they start to outgrow the space
  • Remove dead leaves promptly to prevent decay
  • Check for mold or gnats and adjust watering as needed
  • Replace plants that aren’t thriving — terrariums are easy to replant

A Tiny World of Beauty

Terrariums are more than just decor — they’re miniature living environments that spark joy and bring nature indoors in a compact, artistic way. Whether you build one for yourself or give it as a handmade gift, creating a terrarium is a creative and calming experience that anyone can enjoy.

So grab your glass jar, pick your favorite plants, and design a little green world of your own.

Choose the Right Planter for Each Type of Plant

The planter you choose isn’t just about looks — it’s about plant health, root growth, moisture control, and overall success. While stylish pots can transform your space, using the wrong type of container could leave your plant unhappy (or even dying).

In this article, we’ll break down how to choose the right planter for different types of plants, explain the importance of drainage, and help you match pot material, size, and shape to keep your green friends thriving.

Why the Right Planter Matters

Your planter affects your plant more than you think:

  • 🪴 Drainage prevents root rot
  • 📏 Size influences how fast a plant grows
  • 🪨 Material affects soil temperature and moisture retention
  • 🌀 Shape supports root structure and overall stability
  • 🎨 Style complements your décor — but that’s just the cherry on top!

A happy plant starts from the bottom up — literally.

1. Understand Drainage: It’s Non-Negotiable

Drainage holes allow excess water to escape, preventing root rot — one of the most common causes of plant death.

✅ Best practice:

  • Use a pot with at least one drainage hole
  • Place a saucer or tray underneath to protect furniture
  • If using a decorative planter without holes, keep the plant in a nursery pot inside (aka double potting)

🚫 Avoid:

  • Sealed-bottom containers without a proper drainage plan
  • Letting water sit at the bottom of the pot

2. Match the Planter Size to the Plant

Too big = soggy soil
Too small = cramped roots

General sizing tips:

  • Choose a pot 1–2 inches wider than the current root ball
  • For fast-growing plants, size up more — but not too much
  • For succulents or slow growers, tighter pots help prevent overwatering

Warning sign: Roots growing out of the drainage hole? Time to upgrade!

3. Pick the Right Planter Material

Different materials hold water, heat, and air differently. Here’s how to choose:

🟤 Terracotta (Unglazed Clay)

  • Breathable, allows air and water to pass through
  • Great for succulents and cacti that hate soggy soil
  • Dries out quickly — not ideal for moisture-loving plants
  • Earthy, natural aesthetic

⚪ Ceramic (Glazed)

  • Retains moisture well
  • Good for most houseplants (e.g., pothos, philodendron)
  • Heavier and more decorative
  • Often comes without drainage — double-potting may be needed

⚫ Plastic

  • Lightweight and holds moisture longer
  • Ideal for busy people or dry environments
  • Affordable and easy to move
  • Can overheat in direct sun

🔵 Metal

  • Sleek and modern, but can conduct heat quickly
  • Best for indoor decorative use only
  • Always double-pot to protect roots from heat

🟢 Concrete or Cement

  • Heavy and stylish
  • Porous like terracotta — good drainage
  • Best for larger floor plants like rubber plants or fiddle leaf figs
  • May need sealing for indoor use

🟡 Fabric Planters (Grow Bags)

  • Great breathability and root health
  • Good for herbs, edibles, or rotating outdoor/indoor plants
  • Not decorative — but functional and affordable

4. Match Planter Type to the Plant’s Needs

Every plant has different preferences. Let’s match them up:

🌵 Succulents & Cacti

  • Terracotta or unglazed ceramic with drainage
  • Shallow and wide pots
  • Avoid plastic (retains too much moisture)

🌿 Tropical Plants (Monstera, Philodendron, etc.)

  • Ceramic or plastic pots
  • Medium-depth containers with drainage
  • Choose a pot with enough room to grow

🍃 Ferns, Calatheas, & Moisture-Lovers

  • Plastic or glazed ceramic to retain moisture
  • Self-watering pots can work well
  • Avoid terracotta — too dry

🌳 Tall Plants (Fiddle Leaf Fig, Rubber Plant)

  • Concrete or heavy ceramic for stability
  • Tall and deep pots to anchor root systems
  • Consider pot feet or wheels for easy moving

🪴 Trailing Plants (Pothos, Ivy, String of Pearls)

  • Hanging baskets or wall-mounted planters
  • Ensure good drainage
  • Use lightweight materials like plastic or thin ceramic

🌿 Herbs & Edibles (Indoors)

  • Fabric grow bags, ceramic pots, or terracotta
  • Choose individual containers for easy rotation
  • Shallow pots for herbs like basil, parsley, or mint

5. Think About Pot Shape and Depth

Yes, shape matters too — especially for root health.

🪴 Shallow pots:

  • Great for succulents or shallow-rooted plants
  • Dry out quickly

📦 Deep pots:

  • Needed for plants with deep taproots (e.g., ZZ plant, rubber tree)
  • Retain more water — make sure drainage is strong

🍥 Round vs. Square:

  • Round pots are easier for root growth and repotting
  • Square pots fit better in tight corners or grouped arrangements

6. Consider Style (But Don’t Let It Lead)

Of course, you want your pots to look good! Just make sure form doesn’t override function.

Style tips:

  • Stick to a cohesive color palette for a clean look
  • Use neutral planters and let the foliage be the star
  • Mix textures (matte, glossy, woven) to add depth
  • Don’t forget to include plant stands or risers for height variation

Pro Tip: If you love a pot without drainage, just drop a plastic nursery pot inside. Style + safety = win.

A Good Pot Makes a Great Plant

Choosing the right planter is more than a design decision — it’s part of plant care. The right size, material, and drainage setup can make the difference between a struggling plant and one that thrives.

When in doubt, start with a simple pot with drainage, sized just right, and match the material to the plant’s moisture needs. Add your personal flair with colors and textures — and your plant will feel (and look) right at home.

Keep Your Plants Healthy During Summer

Summer is a time of sunshine, longer days, and booming growth for many indoor plants. But with the heat comes new challenges — from drying soil and intense sunlight to pest infestations and heat stress. While plants may thrive in the summer, they also need a bit of extra care to stay healthy, hydrated, and vibrant during this active season.

In this guide, you’ll learn how to adjust your plant care routine for summer, protect your green companions from heat-related issues, and make the most of the growing season.

Why Summer Can Be Tricky for Houseplants

Although summer means more light and warmth — which plants love — it also brings conditions that can stress indoor plants if not managed properly:

  • Increased sunlight can scorch sensitive leaves
  • Higher temperatures can dry out soil too quickly
  • Air conditioning can cause dry air and cold drafts
  • Pests and fungus are more common in warm, humid conditions
  • More frequent watering is often necessary, but overwatering can still be a risk

The key is observation and adjustment — let your plant’s needs guide you.

1. Watch the Light: Adjust Positioning

With the sun higher and stronger in summer, rooms that were safe in spring may suddenly become too bright for some plants.

What to do:

  • Move plants away from windows if they show signs of leaf burn (brown, crispy edges).
  • Use sheer curtains to filter direct sunlight, especially on west- and south-facing windows.
  • Rotate your plants once a week to ensure even light exposure.
  • For sun-loving plants (like succulents or cacti), summer light is welcome — but still monitor for signs of stress.

Tip: Leaf color fading or spots can indicate too much direct light.

2. Water More Mindfully

Summer heat often means your plants will need more water, but that doesn’t mean you should stick to a strict schedule.

Watering tips:

  • Check the soil daily — water when the top 1–2 inches are dry.
  • Use the “soak and drain” method: water thoroughly, then let the excess drain out.
  • Water early in the morning or evening to reduce evaporation.
  • Use room-temperature water to avoid shocking roots.
  • For hanging baskets or smaller pots, you may need to water every other day.

Warning signs of dehydration:

  • Droopy or wilting leaves
  • Dry, crispy edges
  • Soil pulling away from the pot edges

3. Boost Humidity (Without Overdoing It)

Summer can mean either high outdoor humidity or indoor dryness from AC. Plants like ferns, calatheas, and peace lilies thrive in humidity, while succulents and cacti prefer it dry.

How to increase humidity:

  • Mist your plants in the morning (not at night — it can promote fungus).
  • Place plants on pebble trays with water.
  • Group plants together to create a mini microclimate.
  • Use a humidifier in extra-dry rooms.

If you notice brown leaf tips, your plant may need more humidity.

4. Protect from Heat and Drafts

Indoor plants generally enjoy stable, moderate temperatures — summer extremes can be stressful.

Keep in mind:

  • Avoid placing plants near heat sources, like ovens or sunny window ledges.
  • Keep plants away from AC vents — cold drafts can shock them.
  • Maintain indoor temperatures between 65°F and 80°F (18°C to 27°C).

If you move plants outdoors for the season, acclimate them slowly to sun and wind over several days.

5. Pest-Proof Your Plants

Summer warmth creates the perfect breeding ground for pests like spider mites, aphids, mealybugs, and fungus gnats.

Preventive care:

  • Inspect leaves (top and bottom) weekly for bugs.
  • Use a gentle insecticidal soap or neem oil spray at the first sign of infestation.
  • Keep foliage clean and remove dead leaves promptly.
  • Avoid overwatering, which can attract fungus gnats and mold.

Pro Tip: Place yellow sticky traps in the soil to catch flying insects.

6. Feed Your Plants — Carefully

Most plants experience their active growth period in summer, so this is a great time to support them with nutrients.

Fertilizing guidelines:

  • Use a balanced, diluted liquid fertilizer every 2–4 weeks.
  • Avoid over-fertilizing — more isn’t always better!
  • For flowering plants, use a bloom-boosting formula to encourage more flowers.
  • Don’t fertilize newly repotted or stressed plants — let them settle first.

Signs of over-fertilization:
Brown leaf tips, salt buildup on the soil surface, leaf burn.

7. Repot Only If Needed

Summer is generally a good time for repotting since plants are actively growing, but only do it if necessary.

Repot if:

  • Roots are growing out of the drainage holes
  • Soil isn’t absorbing water
  • The plant seems stunted or top-heavy

When repotting:

  • Use a fresh, well-draining mix appropriate for your plant type
  • Choose a pot one size larger with proper drainage
  • Water after a few days to help the roots adjust

8. Give Your Plants a Summer Spa Day

Summer is the perfect time to show your plants a little extra love. Try this once a month:

  • Rinse leaves in the shower or under a gentle faucet stream
  • Wipe large leaves with a damp cloth to remove dust
  • Trim yellow or leggy growth
  • Rotate the pot for even growth
  • Add a layer of fresh topsoil or decorative stones for a clean look

Common Summer Plant Problems — And Fixes

ProblemCauseSolution
Wilting even after wateringRoot rot or extreme heatCheck drainage; move out of direct sun
Brown, crispy leavesToo much sun or low humidityMove to filtered light; increase humidity
Yellowing leavesOverwatering or poor drainageWater less frequently; check soil quality
PestsHeat and stagnant airIncrease air circulation; use neem oil

Thrive All Summer Long

Summer is a season of growth — and your indoor plants are ready to shine! By adjusting your care routine to meet the needs of the season, you can help your plants flourish, stay hydrated, and look their best all summer long.

Keep your watering can nearby, monitor for subtle changes, and enjoy watching your plants soak up the sunshine (safely!). With a little extra attention, you’ll keep your green friends happy and thriving through the hottest months of the year.

Plants That Help You Sleep Better: Bedroom Ideas

Getting a good night’s sleep is essential for your health and well-being. While comfy pillows and blackout curtains are helpful, there’s a natural, often overlooked way to boost your sleep quality: bedroom plants.

Certain indoor plants don’t just beautify your space — they actually help purify the air, increase humidity, and even release calming scents. In this guide, you’ll discover the best plants to keep in your bedroom for a better night’s sleep, along with styling tips and care advice to turn your room into a tranquil, sleep-friendly oasis.

Can Plants Really Help You Sleep?

Absolutely! Here’s how:

  • Purifying the air: Some plants remove toxins like formaldehyde, benzene, and carbon monoxide — improving air quality while you sleep.
  • Increasing humidity: Dry air can irritate your sinuses and disrupt your sleep. Plants naturally release moisture into the air.
  • Reducing stress and anxiety: Just being around plants has been shown to lower blood pressure and cortisol levels.
  • Producing oxygen: Some plants continue to release oxygen at night, unlike most which only do so during the day.

Top Plants for Better Sleep

1. Snake Plant (Sansevieria trifasciata)

Why it’s great:
One of the few plants that converts CO₂ into oxygen at night, making it ideal for your bedroom.

Care tips:

  • Low-maintenance
  • Water every 2–3 weeks
  • Thrives in low to medium light

Placement idea:
On the floor beside your bed or in a tall planter in a bedroom corner.

2. Lavender (Lavandula)

Why it’s great:
Known for its soothing scent, lavender has been shown to lower heart rate and stress levels — helping you fall asleep faster.

Care tips:

  • Needs lots of light (south-facing window is best)
  • Water when the topsoil feels dry
  • Prune regularly to keep it bushy

Placement idea:
On a nightstand or windowsill near your pillow.

3. Aloe Vera

Why it’s great:
Like the snake plant, aloe releases oxygen at night. It’s also super easy to care for and doubles as a skincare remedy!

Care tips:

  • Loves bright, indirect light
  • Water only when soil is fully dry
  • Use well-draining soil

Placement idea:
In a sunny window or in a small ceramic pot on a dresser.

4. Peace Lily (Spathiphyllum)

Why it’s great:
Peace lilies help filter airborne toxins and increase humidity — both great for respiratory health and sleep quality.

Care tips:

  • Prefers low to medium light
  • Keep soil lightly moist
  • Mist occasionally for humidity

Placement idea:
On a plant stand across from the bed, or in a corner with filtered light.

5. Valerian (Valeriana officinalis)

Why it’s great:
Valerian root is a well-known natural sleep aid — and the plant itself emits a light, calming fragrance.

Care tips:

  • Needs full sun (grow lights can help indoors)
  • Water regularly
  • May need repotting as it grows

Placement idea:
If light allows, keep it near a window with lots of sun exposure.

6. Jasmine (Jasminum)

Why it’s great:
Jasmine flowers give off a soft, sweet aroma that has been linked to lower anxiety and deeper sleep.

Care tips:

  • Bright light is essential
  • Water frequently during blooming
  • Needs good airflow

Placement idea:
In a hanging pot or decorative ceramic container near a bright window.

Tips for Styling Bedroom Plants

You want your bedroom to feel calm, not cluttered — so plant placement matters just as much as plant choice.

Styling ideas:

  • Nightstand greenery: Use small, oxygen-boosting plants like aloe or lavender
  • Corner fillers: Tall plants like snake plant or peace lily in ceramic pots
  • Wall shelves: Hang trailing plants or place small pots to add vertical interest
  • Matching planters: Choose soft-toned or neutral containers for a unified, relaxing look
  • Window beauty: Place sun-loving plants like jasmine or valerian where they’ll thrive and beautify the view

Things to Keep in Mind

  • Avoid strong-smelling or pollen-heavy plants if you have allergies.
  • Don’t overcrowd — one to three well-placed plants is plenty for most bedrooms.
  • Make sure your plants are non-toxic if you have pets.
  • Rotate and clean your plants regularly to keep them healthy and fresh.

Bonus: Aromatherapy + Plants = Dreamy Sleep

Enhance your sleep sanctuary by pairing your plants with natural elements:

  • A lavender essential oil diffuser next to your lavender plant
  • Chamomile tea and a jasmine bloom for calm nighttime rituals
  • A salt lamp or soft ambient lighting to mimic sunset tones
  • Light background music and your green friends for a full sensory wind-down

Sleep Better, Naturally

Adding plants to your bedroom isn’t just a design trend — it’s a science-backed way to improve your sleep, reduce stress, and create a more peaceful home. With the right choices and placements, you can turn your bedroom into a personal retreat that promotes wellness, one leaf at a time.

Sleep tight, breathe deep, and wake up refreshed — your plants will be working all night to help you.

How to Care for Boston Ferns Indoors

Boston ferns (Nephrolepis exaltata) are beloved for their lush, feathery fronds and classic elegance. Whether hanging in a basket, resting on a plant stand, or perched on a shelf, they instantly add a soft, tropical feel to any space. But unlike some of their low-maintenance cousins, Boston ferns require a bit of attention — especially when grown indoors.

In this guide, you’ll learn everything you need to know to keep your Boston fern thriving inside your home, from light and watering needs to humidity, soil, and styling tips.

Why Choose a Boston Fern?

Boston ferns are one of the most popular house ferns for good reason:

  • They’re visually stunning with rich, arching fronds
  • They help purify indoor air
  • They bring a sense of calm and softness to any room
  • They can live for years with proper care
  • They’re pet-safe (non-toxic to cats and dogs)

Light Requirements

Indirect Light Is Key

Boston ferns love bright, indirect sunlight. Too much direct sun can scorch their delicate fronds, while too little light can lead to yellowing or leaf drop.

Best locations:

  • Near an east-facing or north-facing window
  • Several feet from a south-facing window with sheer curtains
  • In a bright bathroom with natural light

Avoid:
Direct sunlight, deep shade, or drafty windows.

Watering: Keep It Consistently Moist

Watering a Boston fern can be a bit of a balancing act. The goal is to keep the soil evenly moist — not soggy, not bone dry.

Watering tips:

  • Check the soil with your finger. If the top inch feels dry, it’s time to water.
  • Water thoroughly, allowing excess water to drain.
  • Never let the pot sit in standing water, or root rot may occur.
  • In warm seasons, your fern may need water 2–3 times per week.
  • In winter, reduce watering but don’t let it dry out completely.

Pro Tip: If the fronds begin turning crispy or dropping suddenly, it may be underwatered or suffering from low humidity.

Humidity: A Must for Fern Happiness

Boston ferns are native to tropical and subtropical climates — they love high humidity and often struggle in dry indoor air, especially in winter.

Ways to increase humidity:

  • Mist the fronds daily (especially in dry climates or during winter)
  • Use a humidifier nearby
  • Place the pot on a tray filled with pebbles and water (just don’t let the pot sit directly in the water)
  • Group with other plants to create a naturally humid microclimate

Best humidity level: 50% or higher

Temperature Preferences

Boston ferns like it comfortable — not too hot, not too cold.

  • Ideal range: 60°F to 75°F (15°C to 24°C)
  • Avoid cold drafts, AC vents, and heaters
  • Never let temperatures drop below 50°F (10°C)

If it gets too cold or too dry, you’ll notice leaf drop and frond browning.

The Right Soil and Potting Setup

Use light, well-draining soil:

  • A peat-based mix with perlite or vermiculite is ideal
  • You can also use a general houseplant mix with extra organic material added

Choose the right pot:

  • Use a pot with drainage holes
  • Consider a hanging basket or ceramic planter with airflow

Repot every 1–2 years in spring if the roots become crowded or the plant seems sluggish.

Fertilizing Boston Ferns

Boston ferns don’t need much fertilizer, but feeding during the growing season helps keep them lush and green.

Fertilizer tips:

  • Use a balanced, water-soluble fertilizer (like 10-10-10 or 20-20-20)
  • Dilute it to half strength
  • Feed once a month during spring and summer
  • Do not fertilize in winter while the plant is resting

Too much fertilizer can burn the roots or cause weak, leggy growth.

Pruning and Maintenance

Pruning helps keep your Boston fern tidy and encourages fresh growth.

  • Trim off brown, crispy, or yellow fronds with clean scissors
  • Remove dead leaves at the base to improve airflow
  • Shake out the plant gently to remove dried-out pieces

Regular grooming keeps the plant looking fresh and prevents fungal issues.

Styling Your Fern Indoors

Boston ferns work in a variety of settings thanks to their graceful shape.

Display ideas:

  • In a hanging basket near a bright window
  • On a plant stand in the corner of a living room
  • On a high shelf with fronds cascading down
  • In a bright bathroom for natural humidity and charm
  • Paired with wood and neutral decor for a soft, classic look

Pro Tip: They look amazing in vintage-inspired ceramic or rattan baskets!

Common Problems and Solutions

ProblemCauseSolution
Yellow leavesOverwatering or poor lightAdjust water and move to brighter indirect light
Crispy frondsDry air or underwateringIncrease humidity and check watering routine
Sudden leaf dropDrafts or temperature dropKeep away from AC, windows, and cold zones
Pests like spider mitesDry air and neglectMist more, isolate, and treat with neem oil

Ferns Done Right

Boston ferns may need a little extra TLC, but the reward is well worth it. With their elegant, arching fronds and air-purifying qualities, they bring a timeless charm to any indoor space. By focusing on light, moisture, and humidity, you can enjoy a healthy, full fern year-round.

Whether hanging in a sunny nook or perched beside your sofa, a Boston fern makes your home feel lush, peaceful, and alive.

Set Up a Green Corner in Your Apartment

Living in an apartment doesn’t mean you have to give up on your dream of having a garden. In fact, creating a green corner in your apartment is one of the best ways to bring life, color, and calm into your home — no backyard required. Whether you have just a small nook or an entire wall to work with, you can design a cozy indoor jungle that suits your lifestyle and space.

This guide will walk you through every step to set up your perfect indoor green corner — from choosing the right spot and plants to styling and maintenance.

Why Create a Green Corner?

Aside from adding natural beauty to your home, a green corner offers several amazing benefits:

  • Improves indoor air quality
  • Reduces stress and boosts mood
  • Acts as a creative, living décor feature
  • Adds humidity to dry indoor environments
  • Connects you to nature — even in the city

And the best part? You don’t need a huge budget or tons of space to make it happen.

Step 1: Choose the Right Spot

Start by identifying an area in your apartment that could benefit from a little green magic. Some great places include:

  • Next to a bright window (south- or east-facing is ideal)
  • An empty corner of the living room
  • Unused space near your balcony or sliding door
  • Beside your desk or reading chair
  • On top of a console table or floating shelf

Things to consider:

  • Light: Does the space get bright, indirect light? If not, you’ll need shade-tolerant plants or a grow light.
  • Temperature: Avoid areas near AC vents, radiators, or drafty windows.
  • Size: Make sure you have enough room for pots or shelves without crowding the walkway.

Step 2: Pick the Perfect Plants

Choosing the right mix of plants is key to a balanced and healthy green corner. Variety is great, but consider their care needs — it’s best to group plants with similar light and water preferences.

Great plants for green corners:

  • Snake Plant: Tall and sculptural, easy to care for
  • Monstera deliciosa: Big leaves, big personality
  • Pothos: Trailing and fast-growing, perfect for hanging baskets
  • Peace Lily: Elegant and air-purifying
  • ZZ Plant: Drought-tolerant and great for low light
  • Ferns (like Boston Fern): Lush and great for humidity
  • Succulents: Great for sunny shelves or tabletop spots

Tip: Mix tall plants, medium-sized ones, and small trailing ones to create layers and visual interest.

Step 3: Choose the Right Pots and Accessories

Your green corner is more than just plants — it’s a design element. So choose planters and accessories that reflect your style.

Pot Ideas:

  • Terracotta: Breathable and classic
  • Ceramic: Sleek and stylish, with lots of color options
  • Woven baskets: Add warmth and texture
  • Metal planters: Industrial or modern touch
  • Recycled containers: Eco-friendly and creative

Also consider:

  • Plant stands to add height
  • Wall shelves for small pots or trailing vines
  • Macrame hangers for vertical space-saving
  • Pebbles or moss on top of the soil for a polished look

Step 4: Design Your Layout

Creating an eye-catching layout is all about balance, height, and texture. Here’s how to design your corner like a pro:

  • Start with a focal point: A tall plant like a Monstera or Areca palm
  • Layer outward: Add medium plants around the base, then fill gaps with small ones
  • Use vertical space: Add shelves or hanging planters to draw the eye upward
  • Play with color and texture: Combine dark green leaves with variegated ones, smooth pots with rough baskets

Pro Tip: Use odd numbers (3, 5, 7) when grouping plants — it feels more natural to the eye.

Step 5: Make It Functional and Cozy

Your green corner doesn’t have to be just decorative — it can also be a relaxing place to unwind.

Add cozy touches:

  • A small chair or floor cushion for reading
  • A side table for your tea or journal
  • Fairy lights or a soft lamp for evening ambiance
  • A rug or mat to define the space

Now it’s not just a green corner — it’s your personal retreat.

Step 6: Keep It Alive and Thriving

Your green corner is a living space, so don’t forget regular care. Here’s a quick routine:

  • Watering: Check each plant’s needs and avoid overwatering
  • Dusting leaves: Helps them breathe and stay shiny
  • Rotating pots: Promotes even growth
  • Pruning: Keeps plants looking tidy and healthy
  • Fertilizing: Every few weeks during the growing season

Watch for pests like spider mites or fungus gnats — especially in warm, humid corners. Neem oil and sticky traps can help.

Small Space? No Problem!

Even if you’re working with a tiny apartment, you can still enjoy a lush green setup. Try:

  • Floating shelves along a bright wall
  • Corner ladders or tiered plant stands
  • Window planters or suction cup pots
  • Hanging baskets from the ceiling or curtain rods

A few well-placed plants can make a big visual impact, even in the smallest studio.

Your Urban Jungle Starts Here

Creating a green corner in your apartment is more than a design choice — it’s a lifestyle. With just a little planning, the right plants, and a touch of creativity, you can build a beautiful, relaxing space that brings the outside in.

Whether you’re a plant newbie or an indoor jungle pro, there’s always a new leaf to grow.

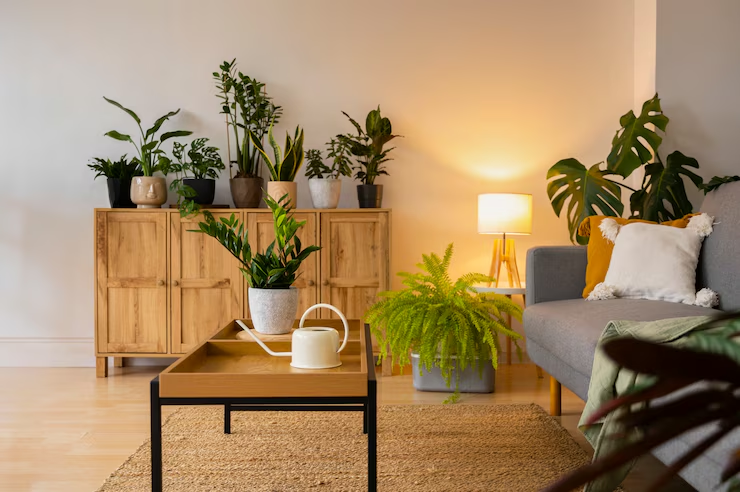
Ideas to Elegantly Decorate the Living Room with Plants

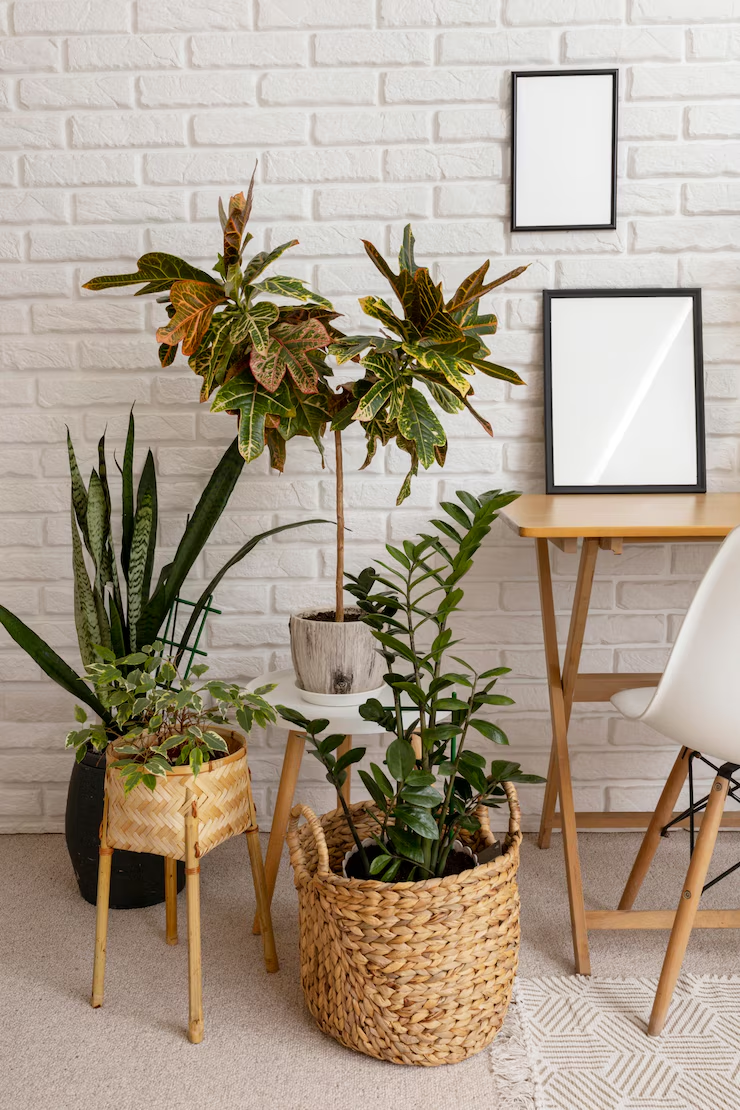
The living room is the heart of the home — it’s where you relax, entertain, and express your style. So it’s only natural that this space deserves thoughtful design. One of the most powerful (and affordable!) ways to elevate your living room is by incorporating indoor plants.

From bold statement pieces to subtle accents, plants can instantly add elegance, texture, and warmth. In this guide, you’ll discover how to decorate your living room with plants in a way that feels intentional, beautiful, and effortlessly chic.

Why Use Plants in Living Room Decor?

Houseplants are more than a trend — they’re a design tool with major benefits:

  • Add life and energy to a space
  • Soften harsh lines in modern interiors
  • Introduce natural textures and calming greens
  • Improve air quality
  • Reflect personality and style

Plus, they’re flexible: you can easily rearrange or replace them as your tastes evolve.

Step 1: Define the Mood and Style

Before picking plants, think about the overall vibe of your living room. Do you prefer something:

  • Modern and minimalist? Opt for sleek pots and architectural plants like snake plants or rubber trees.
  • Boho and eclectic? Mix textures, baskets, hanging plants, and colorful pots.
  • Scandinavian and cozy? Stick to neutral planters and leafy greens like ferns or pothos.
  • Tropical and bold? Bring in large-leaf plants like Monstera or Bird of Paradise.

Knowing your design style will guide your plant and container choices.

Step 2: Choose the Right Plants for the Space

Select plants that will thrive in your living room’s light and temperature conditions, as well as fit the scale of the space.

Best Statement Plants:

  • Fiddle Leaf Fig: Big, glossy leaves and upright form
  • Rubber Plant: Bold and sculptural
  • Areca Palm: Adds height and softness
  • Bird of Paradise: Tropical and eye-catching

Best Accent Plants:

  • Snake Plant: Great for corners and tabletops
  • ZZ Plant: Sleek and hardy
  • Peace Lily: Adds elegance with white blooms
  • Pothos or Philodendron: Beautiful trailing greenery for shelves

Step 3: Think About Placement

Where and how you place your plants can dramatically change the look and feel of your living room.

Corner Focal Points:

  • Use a tall plant in a floor planter to fill an empty corner
  • Add plant stands to bring greenery up to eye level
  • Place a large leafy plant near windows for a natural frame

Coffee Tables & Side Tables:

  • Small, tidy plants like succulents, jade plants, or aloe vera
  • Use ceramic or glass pots for a clean look
  • Keep it minimal — don’t block sight lines

Bookshelves & Wall Units:

  • Let trailing plants like pothos cascade down shelves
  • Mix in small upright plants between books and décor
  • Use plants to break up visual clutter and create rhythm

Hanging Options:

  • Macramé plant hangers add a bohemian vibe
  • Hang small pots near windows to save floor space
  • Consider wall-mounted planters for a vertical green wall

Step 4: Use Planters as Design Elements

Your choice of pot or planter can either blend into your décor or stand out as a design feature.

Ideas by Style:

  • Minimalist: Matte black, white, or gray ceramic pots
  • Boho: Woven baskets, clay pots, or colorful handmade pieces
  • Rustic: Terracotta or aged cement pots
  • Modern: Sleek metal stands, geometric shapes

Tip: Stick to a cohesive color palette to maintain elegance and avoid visual chaos.

Step 5: Layer with Accessories

Make your plant decor feel complete by styling it alongside other living room elements.

  • Pair plants with candles, books, or art on the coffee table
  • Place a mirror behind a tall plant to reflect light and make the room feel larger
  • Use a tray to group small plants and objects for a styled look
  • Add a throw pillow or rug that echoes the natural tones of your greenery

Step 6: Keep It Fresh — Literally and Aesthetically

To maintain that polished, elegant look:

  • Dust leaves regularly so they stay glossy
  • Prune yellowing leaves to keep plants healthy and tidy
  • Repot as needed to prevent root-bound stress
  • Switch things up seasonally — add fresh flowers or rotate in new plants

Live decor evolves — let your green elements grow with your space.

Pro Tips for Elegant Plant Styling

  • Use odd numbers of plants for more dynamic groupings (e.g., 3 or 5)
  • Don’t over-clutter — give each plant space to shine
  • Use varied heights and textures to add depth
  • Invest in a few larger plants rather than many tiny ones if space allows
  • Add a small uplight or floor lamp behind plants for evening ambiance

A Living Room That Breathes Style

Plants are the ultimate styling secret — they instantly upgrade a living room, adding life, comfort, and sophistication. Whether you’re aiming for high-end elegance or relaxed coziness, there’s a plant (or several) that will fit your aesthetic.

The key is intention: choose plants and planters that suit your space, group them with care, and let your personality shine through the leaves.

Choose the Right Plant for Each Room

Decorating your home with plants brings a natural charm that goes beyond aesthetics. Indoor plants help purify the air, reduce stress, and even enhance productivity. But to make the most of these green companions, it’s essential to choose the right plant for each room. Every space in your house has unique lighting, humidity, and temperature conditions that can affect plant health. In this guide, we’ll walk you through how to pick the perfect plant for every room of your home.

The Living Room: The Heart of the Home

The living room is often the largest and most social space in a home. It usually has good natural lighting and offers plenty of room for larger plants.

Best plants for the living room:

  • Fiddle Leaf Fig (Ficus lyrata): A bold and dramatic plant that makes a statement. It loves bright, indirect light and looks amazing in corners.
  • Rubber Plant (Ficus elastica): Low-maintenance and elegant, this plant thrives in moderate to bright light.
  • Monstera deliciosa: Also known as the Swiss cheese plant, it grows fast and brings a tropical vibe.

Tip: Place taller plants in corners and smaller ones on side tables or bookshelves for a balanced look.

The Kitchen: Greenery Meets Functionality

Kitchens often have fluctuating temperatures and humidity levels. But they’re perfect for aromatic and edible plants that you can use while cooking.

Best plants for the kitchen:

  • Herbs like basil, rosemary, and mint: Perfect for windowsills with lots of sunlight.
  • Spider Plant (Chlorophytum comosum): Great for hanging baskets and doesn’t mind the changing kitchen climate.
  • Aloe Vera: Not only does it look stylish, but it’s also useful for burns and minor cuts.

Tip: Group small pots together on a tray to create a mini kitchen garden without cluttering your countertops.

The Bathroom: Humid and Cozy

Bathrooms are typically humid and have less direct sunlight, which makes them ideal for moisture-loving plants.

Best plants for the bathroom:

  • Boston Fern: Loves high humidity and indirect light.
  • Peace Lily (Spathiphyllum): It thrives in low-light and humid conditions.
  • Pothos: Very forgiving, great for hanging or high shelves.

Tip: Place your plants away from strong water splashes but close enough to enjoy the steam from hot showers.

The Bedroom: Calm and Clean

In your bedroom, you want plants that promote relaxation and clean the air while being low-maintenance.

Best plants for the bedroom:

  • Snake Plant (Sansevieria): One of the best air-purifying plants. It even releases oxygen at night!
  • Lavender: Known for its calming scent, it requires sunlight but can be a great choice if your room is bright.
  • ZZ Plant (Zamioculcas zamiifolia): Tolerates low light and infrequent watering—perfect for a peaceful space.

Tip: Avoid overcrowding. A couple of well-placed plants can be more effective and soothing than too many.

The Home Office: Focus and Freshness

Plants in your home office can improve air quality, reduce stress, and increase concentration.

Best plants for the office:

  • English Ivy: Helps reduce mold in the air and adds a classic touch to your desk.
  • Succulents: Require very little care and add a modern, minimalist vibe.
  • Chinese Evergreen: It thrives in low light and adds a professional touch to any workspace.

Tip: Use a small shelf or a window ledge for plants if your desk space is limited.

The Entryway: First Impressions Matter

Your entryway sets the tone for your home. Plants here should be hardy and welcoming.

Best plants for the entryway:

  • Dracaena: With its upright leaves and various color options, it’s a stylish way to greet guests.
  • Philodendron: Adaptable and beautiful, great for limited natural light.
  • Lucky Bamboo: Said to bring good energy, it’s an easy-care option for small spaces.

Tip: Add a mirror behind your plant to reflect light and create an illusion of a greener, more open space.

Things to Consider When Choosing Plants for Each Room

  1. Light Levels: Always assess how much natural light each room gets before picking a plant.
  2. Humidity: Bathrooms and kitchens tend to be more humid; bedrooms and living rooms are drier.
  3. Temperature: Avoid placing plants near air conditioners, heaters, or drafty windows.
  4. Pets and Children: Choose non-toxic plants if you have little ones or furry friends at home.

Boosting the Vibe with the Right Pot and Placement

Choosing the plant is only half the fun—the pot and placement make a huge difference in style and plant health.

  • Go for terracotta pots for breathable material that prevents overwatering.
  • Use plant stands to create vertical interest.
  • Don’t forget drainage—always check if the pot has holes at the bottom.

A Greener Home, One Room at a Time

With the right choices, you can turn your home into a green haven full of life and personality. Remember: every plant has its preferences, and understanding those is the key to long-lasting beauty and health. Whether you’re decorating a minimalist apartment or a cozy family home, there’s always room for a little green.

Lighting in the Garden: How to Enhance Your Outdoor Space

Garden lighting goes far beyond aesthetics. It plays a vital role in transforming outdoor spaces, making them more welcoming, functional, and safe. A well-lit garden not only highlights the beauty of plants and landscaping but also creates inviting environments for socializing and relaxing, even after sunset.

With the right combination of lights and creativity, you can breathe new life into your outdoor space. From illuminating pathways to enhancing natural or decorative elements, lighting helps to elevate your garden and provides a whole new perspective at night. Moreover, modern technologies such as LEDs and solar systems allow for the creation of sustainable and efficient projects.

In this article, we will explore how to plan and implement a garden lighting project, from selecting the right lights to ensuring safe installation and maintenance. You’ll discover how to strategically and creatively light your space, creating an environment that is both functional and charming.

Ready to transform your garden with the magic of light? Let’s begin!

1. Planning is Key: Assessing Your Space’s Needs

Before installing any garden lighting, careful planning is essential. The first step is to assess your space’s needs. Ask yourself about the main goals of the lighting: Do you want to highlight specific elements such as trees or sculptures? Or do you need to make pathways and seating areas safer and more functional?

  • Identify key areas: Divide the garden into zones, such as pathways, seating areas, vegetation, and focal points, to simplify the planning process.
  • Define the purpose of each light: Functional lights for pathways and stairs should differ from decorative ones used for trees or fountains.
  • Consider the natural environment: Take into account the size of the space, the type of vegetation, and the architectural features you want to emphasize.

By understanding your garden’s needs, you can create a more effective project that balances aesthetics and functionality. Proper planning also helps avoid waste and ensures you choose solutions tailored to the space’s characteristics.

2. Types of Outdoor Lighting: Choose What Fits Your Garden

One of the most important steps in planning a lighting project is understanding the different types of lights available and how they can be used to transform your garden. Each type of lighting serves a specific purpose and can be combined to create a harmonious visual effect.

  • Direct Lighting: Ideal for highlighting specific elements such as sculptures, trees, or facades. This type of light is more concentrated and creates dramatic emphasis.
  • Indirect Lighting: Used to create a softer, cozier atmosphere. The light reflects off surfaces like walls or floors before illuminating the area.
  • Diffuse Lighting: Excellent for evenly illuminating larger areas, such as living spaces or decks.
  • Decorative Lighting: Includes ornamental fixtures, pendant lights, or lanterns that add charm and style to the space.

The choice of lighting type should consider the function and style of your garden. For a balanced environment, combine different light types and create layers of lighting that add depth and dimension to the space.

3. Highlight Garden Features with Light

A well-thought-out lighting plan can turn ordinary garden elements into works of art. Using lights to highlight trees, shrubs, water features, and pathways is an effective way to enhance the space and create visual interest.

  • Trees and Shrubs: Use spotlights or directional lights to illuminate the base or canopy of trees. This type of lighting enhances natural textures and creates dramatic shadows.
  • Pathways and Walkways: Install lights along pathways to improve safety and guide visitors through the space. Embedded lanterns or bollard lights are popular choices.
  • Water Features: Illuminate fountains, ponds, or pools with underwater lights. The reflection of light on the water adds movement and elegance to the environment.
  • Decorative Elements: Sculptures, ornamental stones, or walls can be highlighted with accent lighting, creating focal points in the garden.

By strategically positioning lights, you can create a play of light and shadow that makes the garden more dynamic and inviting, even at night.

4. Modern Technologies: LEDs, Solar Energy, and More

Technology plays a crucial role in contemporary lighting projects, making them more efficient and sustainable. Using LEDs and solar systems, for example, can significantly reduce energy costs and your garden’s environmental impact.

  • LED Bulbs: LED lights consume less energy, have longer lifespans, and offer a wide range of colors and intensities. They are ideal for almost all applications, from spotlights to decorative lights.
  • Solar Energy: Solar-powered lights are eco-friendly and easy to install since they don’t require wiring. They are perfect for pathways, small gardens, and areas that receive plenty of sunlight during the day.
  • Smart Systems: Technologies such as remote controls, motion sensors, and timers allow you to customize lighting and save energy. For example, lights that turn on only when someone passes by make the garden functional and secure.

Adopting modern technologies not only enhances project efficiency but also offers flexibility and sustainability for your outdoor lighting.

5. Functional and Safety Lighting

Beyond aesthetics, functional lighting is essential to ensure safety and convenience when using the garden at night. A well-designed lighting plan prevents accidents, provides visual comfort, and ensures spaces are used safely.

  • Paths and Stairs: Use bollards or recessed lights in the ground to illuminate paths and stairs. These lights enhance visual appeal and help prevent trips and falls.
  • Nighttime Areas: Illuminate tables, barbecues, and seating areas with diffused or pendant lights that provide sufficient clarity without glare.
  • Motion Sensors: Install lights with motion sensors at entrances or frequently used pathways. These lights save energy and increase security against intruders.
  • Garages and Gates: Ensure that garage entrances or gates are well-lit to facilitate access and increase visibility.

When planning functional lighting, prioritize safety without compromising the garden’s aesthetic harmony. Balancing beauty and practicality is the key to a well-lit outdoor space.

6. Creating Cozy Atmospheres with Lights

Lighting is a powerful tool for creating different moods in the garden. With the right choice of light colors and intensities, you can transform a regular space into a cozy and inviting environment.

  • Warm Tones: Bulbs with lower color temperatures (yellowish) create a sense of warmth and comfort, perfect for seating and lounging areas.
  • Cool Tones: Whiter lights are ideal for highlighting details and creating a modern, clean look on certain garden elements.
  • String Lights and Lanterns: Add charm with decorative string lights or lanterns on trees, pergolas, or porches. These details bring a touch of magic to the space.
  • Dimmable Lights: Install dimmers to adjust light intensity according to the occasion, ensuring versatility and full control over the garden’s atmosphere.

Creating a cozy atmosphere with lighting involves harmonizing functionality and aesthetics, ensuring the garden is a welcoming refuge at any time of the day or night.

7. Safe Installation and Maintenance of Outdoor Lighting

After planning and choosing the appropriate types of lighting, it’s crucial to ensure that installation is carried out safely and that lights are well-maintained over time. Poorly installed lighting can cause electrical problems, reduce system efficiency, and compromise the safety of the space.

  • Choose Quality Materials: Opt for cables, fixtures, and connections designed for outdoor use, as they are more resistant to weather and wear.
  • Avoid Overloading: Ensure that the garden’s electrical system can handle the load of the installed lights. Consult an electrician to properly size the network if necessary.
  • Protect Connections: Use protective boxes to prevent moisture and dirt from damaging electrical connection points.
  • Regular Maintenance: Clean fixtures to prevent dirt buildup and periodically check cables and bulbs for potential damage or failures.
  • Upgrade Technologies: Replace old bulbs with more efficient models, such as LEDs, and incorporate automation systems or sensors to optimize energy use.

Careful installation and regular maintenance ensure your garden remains safely and efficiently lit, enhancing the space and extending the lighting project’s lifespan.

Light Up Your Garden and Transform Your Nights

Garden lighting has the power to completely transform outdoor spaces, creating a unique environment that combines functionality, safety, and beauty. With careful planning and the right choice of lights, you can highlight the most enchanting elements of your garden, providing pleasant and memorable evenings.

Incorporating modern technologies, such as LEDs and solar energy, not only reduces energy costs but also demonstrates a commitment to sustainability. Additionally, integrating smart systems allows you to personalize lighting, adapting it to each moment’s needs and promoting comfort and practicality.

Taking care of installation and maintenance is essential to ensure that the lighting project remains efficient and safe. Investing in quality materials and conducting periodic inspections ensures your garden is always well-lit and visually impressive.

Now is the time to turn your vision into reality. With the tips presented in this article, you have all the tools to create an outdoor space that is as functional as it is inspiring. Put your ideas into practice, unleash your creativity, and discover how lighting can elevate the charm of your garden.

So don’t wait any longer! Light up your garden and transform your nights into unforgettable experiences of beauty and comfort.