Creating an Aquatic Garden in Your Apartment: A Complete Guide

Aquatic plants are a wonderful way to bring nature into your apartment, offering tranquility, beauty, and a unique atmosphere. Whether you’re creating a small water garden, an aquarium, or a hydroponic plant display, aquatic plants can be a stunning addition to any indoor space. Creating an aquatic garden in your apartment is easier than you might think, and with proper care, your plants can thrive. In this article, we will explore the step-by-step process of setting up an aquatic garden in your apartment, selecting the best plants, designing your garden, and maintaining it to ensure long-term success.

1. Understanding Aquatic Plants: What Makes Them Special?

Aquatic plants are plants that live in or near water, with some of them submerged completely, partially, or floating. These plants have unique adaptations that allow them to survive in water, including specialized roots for anchoring, floating leaves for photosynthesis, and the ability to absorb nutrients directly from the water rather than the soil. Common aquatic plants used for indoor gardening include water lilies, aquatic ferns, floating plants like duckweed, and submerged plants such as Anubias.

Aquatic plants also provide many benefits for your indoor environment, including:

  • Air Purification: Many aquatic plants can help improve the quality of the air in your home by absorbing toxins and releasing oxygen.
  • Humidity Control: The moisture from aquatic plants can help increase humidity in dry indoor environments, which is particularly beneficial in winter months.
  • Aesthetic Appeal: Aquatic gardens can add a calming, natural aesthetic to your space, creating a soothing atmosphere for relaxation or meditation.

2. Selecting the Right Aquatic Plants for Your Apartment

The first step in creating an aquatic garden is selecting the right plants. The choice of plants depends on the space available, the lighting conditions, and the level of maintenance you’re willing to commit to. Here are some of the best options for indoor aquatic plants:

  • Water Lilies (Nymphaea): Known for their large, vibrant flowers and floating leaves, water lilies add a touch of elegance to any indoor aquatic garden. They require large containers with ample space for root growth, and they need at least 4–6 hours of bright, indirect sunlight each day. Water lilies thrive in warm temperatures (around 75°F/24°C) and need a well-maintained water level.
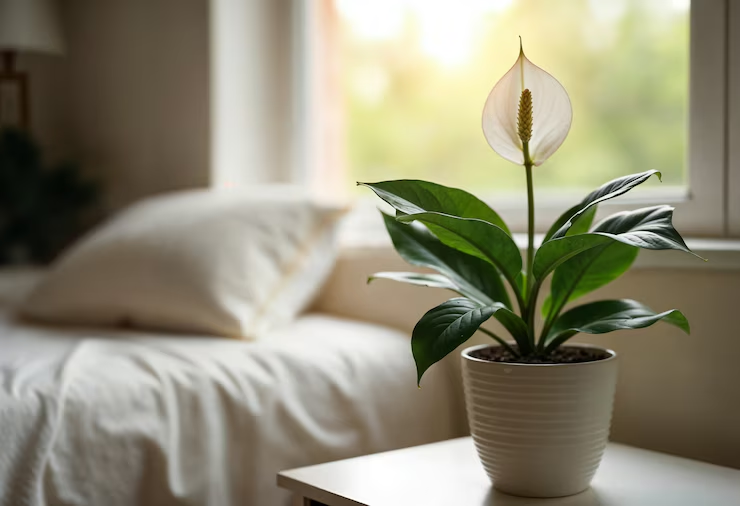
  • Peace Lily (Spathiphyllum): The Peace Lily is an excellent choice for a water garden because it is adaptable to submerged conditions. This plant is not only beautiful, but it also purifies the air by removing toxins such as formaldehyde and benzene. Peace lilies do well in low light and can grow well in a shallow water container or vase.
  • Anubias: Anubias is a hardy and low-maintenance aquatic plant that thrives in both submerged and partially submerged conditions. Its thick, leathery leaves are resistant to damage, and the plant does not require much light. Anubias can be anchored to rocks or driftwood, making it ideal for aquariums or small water garden setups.
  • Hornwort (Ceratophyllum demersum): Hornwort is a fast-growing floating plant that helps keep the water clean by absorbing excess nutrients and preventing algae buildup. It’s perfect for small aquariums or water containers. Hornwort also helps oxygenate the water, providing a healthier environment for any fish or aquatic creatures.
  • Java Fern (Microsorum pteropus): This aquatic fern is perfect for low-light conditions and can be easily attached to rocks or driftwood. Java Fern does not need to be rooted in soil, and it is great for beginners due to its easy care. It thrives in aquariums or containers where it can receive indirect light and moderate water movement.

3. Designing Your Aquatic Garden

Once you’ve chosen your plants, it’s time to think about how to design your aquatic garden. There are several ways to set up your aquatic garden, depending on the space and aesthetic you want to achieve.

  • Container Water Gardens: One of the simplest ways to create an aquatic garden in an apartment is to use a container filled with water. Choose a decorative container or glass bowl that complements your home décor. Large containers work best for plants like water lilies, while smaller glass vases or bowls can house floating plants or smaller species like Anubias.
  • Aquariums: If you prefer a more sophisticated look, you can create an aquatic garden in a glass aquarium. Aquariums offer more space for plants to grow and provide better temperature control for the water. Aquariums also allow you to add fish or aquatic creatures that can coexist with your plants. For an aquarium setup, ensure that the tank has appropriate lighting and filtration to maintain water quality.
  • Terrarium-Style Water Gardens: Another option is to create a terrarium-style water garden. These setups are typically smaller and enclosed in glass, which creates a mini-ecosystem. You can use smaller aquatic plants like Pothos or Peace Lilies in these types of designs. Terrariums also offer a unique look, especially when combined with pebbles or small stones at the bottom of the container.
  • Floating Gardens: Some aquatic plants, such as water hyacinths or floating ferns, thrive on the surface of the water. These plants can be arranged to cover the entire surface of a shallow container or aquarium, creating a lush and tropical aesthetic. Floating plants can also help reduce algae growth by blocking excess sunlight from the water.

4. Caring for Your Aquatic Garden

Aquatic plants may seem like low-maintenance additions to your home, but they still require regular attention to thrive. Here’s how to properly care for your aquatic garden:

  • Water Quality: The water is the foundation of any aquatic garden. Use clean, dechlorinated water for your plants to avoid damaging them. If you’re using tap water, allow it to sit for 24-48 hours to allow chlorine to dissipate. Alternatively, you can use distilled or filtered water. For aquariums or larger setups, consider using a water filter to maintain water quality.
  • Lighting: Aquatic plants require adequate light to perform photosynthesis and grow. Most aquatic plants thrive in bright, indirect light, but the specific needs of your plants will depend on the species. For example, water lilies need direct sunlight for several hours a day, while Peace Lilies can grow well in low light. Use LED grow lights or place your aquatic garden near a window where it can receive filtered sunlight. Avoid placing plants in direct sunlight for extended periods, as this can cause algae growth and stress the plants.
  • Temperature: Aquatic plants typically prefer a temperature range of 65-75°F (18-24°C). Keep your water garden in a stable environment, away from drafts or heat sources like radiators. If you’re using an aquarium, a heater may be necessary to maintain consistent temperatures, especially in colder environments.
  • Water Level Maintenance: Ensure that the water level in your garden stays consistent. Check the water regularly and top it off as needed. You may also need to replace the water every 1-2 weeks to keep it fresh. If you’re using a container water garden, consider adding a small water pump or aerator to ensure proper oxygenation and movement.
  • Fertilization: Aquatic plants benefit from occasional feeding. Use a liquid aquatic plant fertilizer that contains the essential nutrients, such as nitrogen, phosphorus, and potassium. Follow the manufacturer’s instructions for application, as over-fertilizing can lead to algae blooms.

5. Common Problems and Solutions in Aquatic Gardens

Even with the best care, aquatic gardens can face some challenges. Here are a few common problems and solutions:

  • Algae Growth: Algae can grow quickly in the presence of excess light and nutrients. If algae are clogging your water garden or aquarium, reduce the amount of direct sunlight the plants receive and remove any visible algae by hand. Consider using algae-eating snails or fish, like Nerite snails, to help control algae.
  • Root Rot: If your plant’s roots are exposed to stagnant water or poor-quality water for too long, they may begin to rot. If you notice yellowing leaves or a foul smell from the water, check the roots. Trim away any rotting roots, replace the water, and ensure the water is well-oxygenated to prevent future problems.
  • Brown or Yellow Leaves: Leaves turning brown or yellow can be a sign of poor water quality, insufficient light, or nutrient deficiencies. Check the water conditions and adjust as needed. Increase the light if the plant is not receiving enough, and use an aquatic plant fertilizer to address nutrient deficiencies.

Creating an aquatic garden in your apartment can be a rewarding and relaxing experience. With the right choice of plants, careful design, and proper care, your aquatic garden will thrive and provide years of beauty and tranquility. Whether you choose a small container garden or a large aquarium, the key to success lies in providing your plants with the right environment—adequate light, water quality, and temperature control. By troubleshooting common problems like algae growth or root rot and maintaining a regular care routine, your aquatic garden will become a stunning centerpiece in your apartment.

Troubleshooting Common Issues in Aquatic Plant Care in Apartments

Aquatic plants can be a beautiful and calming addition to your apartment, providing natural beauty and improving the indoor environment. However, just like any other type of plant, aquatic plants can face challenges that may affect their health and growth. Understanding common issues that aquatic plants face and knowing how to troubleshoot them can help ensure that your indoor garden thrives.

In this article, we will explore common issues that may arise in aquatic plant care, provide tips on how to prevent these problems, and offer effective solutions to maintain a healthy aquatic garden in your apartment.

1. Algae Overgrowth: Causes and Solutions

Algae are a common nuisance in aquatic gardens, especially in containers exposed to light. Algae thrive on nutrients such as nitrogen and phosphorus found in the water, and they can grow quickly if the conditions are right. This overgrowth can smother your plants, block out light, and result in murky water, which can be unsightly and unhealthy for the plants.

Causes of Algae Overgrowth:

  • Excessive Light: Algae need light to grow, and too much exposure to sunlight can encourage an algae bloom.
  • Nutrient Imbalance: Over-fertilizing or having excess nutrients in the water can fuel algae growth.
  • Poor Water Circulation: Stagnant water provides a perfect environment for algae to thrive.

Solutions for Algae Overgrowth:

  • Reduce Light Exposure: Ensure your aquatic plants are not in direct sunlight for long periods. Place them in a spot with bright, indirect light to reduce algae-promoting sunlight.
  • Regular Water Changes: Perform regular water changes every 1-2 weeks to refresh the water and prevent nutrient build-up. This will also help remove any algae spores from the water.
  • Remove Algae Manually: Scrub the sides of your container or aquarium with a soft sponge to remove algae build-up. Be sure to clean the substrate (bottom of the container) as well.
  • Add Algae-Eating Critters: Consider adding algae-eating snails, such as Nerite snails or Ramshorn snails, or fish like Siamese algae eaters or otocinclus catfish, to help control algae naturally.
  • Use a UV Sterilizer: If the algae problem persists, consider using a UV sterilizer, which helps kill algae spores and maintain clear water in aquariums.

2. Yellowing Leaves: Causes and Remedies

Yellowing leaves are one of the most common signs that something is wrong with your aquatic plants. This problem can arise from several different factors, including poor water quality, inadequate light, or nutrient deficiencies. Yellowing can also indicate that the plant is stressed and unable to perform photosynthesis properly.

Causes of Yellowing Leaves:

  • Nutrient Deficiency: A lack of essential nutrients, such as nitrogen, iron, or magnesium, can cause leaves to yellow.
  • Inconsistent Water Quality: Poor water quality, such as high levels of chlorine, heavy metals, or a build-up of organic waste, can stress your plants and lead to yellowing.
  • Insufficient Light: Aquatic plants require light for photosynthesis. If they’re not getting enough light, their leaves can turn yellow and weak.
  • Overcrowding: If there are too many plants in a confined space, they may compete for light and nutrients, causing stress and yellowing.

Solutions for Yellowing Leaves:

  • Fertilization: If nutrient deficiency is the cause, use a liquid fertilizer designed for aquatic plants. Make sure the fertilizer contains all the essential nutrients your plants need, such as nitrogen, potassium, and trace elements like iron. Avoid over-fertilizing, as too much fertilizer can lead to algae growth.
  • Water Quality Check: Test the water for chlorine, chloramine, ammonia, and other harmful chemicals. If you’re using tap water, let it sit for 24-48 hours to allow chlorine to dissipate, or use a water conditioner to neutralize harmful chemicals.
  • Improve Lighting: If the plants are not getting enough light, move them to a brighter location with indirect sunlight, or use artificial grow lights. For low-light plants, such as Anubias or Java Fern, use a low-wattage LED grow light.
  • Remove Dead Leaves: Regularly prune yellowing or decaying leaves from your plants to prevent them from draining energy from the healthy parts of the plant.
  • Space Out Your Plants: If overcrowding is an issue, thin out the plants by removing some of them to give the remaining ones more room to grow.

3. Root Rot: Causes and Prevention

Root rot is one of the most common and destructive problems in aquatic plant care. It occurs when the roots of the plant are exposed to stagnant water, low oxygen levels, or poor water quality. Root rot can quickly kill your aquatic plants if left unchecked, as it prevents the plant from absorbing nutrients and water properly.

Causes of Root Rot:

  • Stagnant Water: Water that does not circulate well can lead to a lack of oxygen, causing the roots to suffocate and rot.
  • Overwatering: If you keep the water level too high, or if the plant is submerged in water that doesn’t drain properly, it can cause the roots to rot.
  • Poor Water Quality: Contaminants in the water, such as high levels of nitrogen or decaying organic matter, can contribute to root rot.

Solutions for Root Rot:

  • Trim Affected Roots: If you notice black, mushy, or foul-smelling roots, trim them back to healthy tissue using clean scissors or pruning shears. Discard the affected parts of the plant.
  • Change the Water: After trimming the roots, replace the water with fresh, dechlorinated water to prevent further damage. If you have a filtration system, make sure it’s working properly to help maintain water quality.
  • Improve Water Circulation: Use an aquarium pump or aerator to improve water circulation and oxygen levels. This helps prevent stagnant water and reduces the risk of root rot.
  • Increase Drainage: If you’re growing plants in containers, ensure there’s proper drainage to allow excess water to escape. Avoid keeping plants in containers that hold water for too long without oxygen exchange.

4. Brown or Transparent Leaves: Causes and Treatment

Brown or transparent leaves are another common sign of stress in aquatic plants. This issue can stem from several factors, including poor water quality, inadequate light, nutrient deficiencies, or the plant being placed in the wrong type of water.

Causes of Brown or Transparent Leaves:

  • Water Quality Issues: High levels of organic waste, chlorine, or high pH can cause leaves to turn brown or become transparent.
  • Nutrient Imbalance: A lack of nutrients, particularly potassium and magnesium, can cause plants to develop brown or transparent patches on their leaves.
  • Insufficient Light: Inadequate light can cause plants to fail to produce chlorophyll, resulting in weak, brown, or transparent leaves.
  • Exposure to Cold Water: Some aquatic plants are sensitive to temperature fluctuations. If the water is too cold, it can cause tissue damage and lead to browning of the leaves.

Solutions for Brown or Transparent Leaves:

  • Improve Water Quality: Check for contaminants in the water, such as chlorine or ammonia, and treat accordingly. Perform regular water changes to keep the water clean and healthy.
  • Check Nutrient Levels: Add a balanced liquid fertilizer to the water to provide missing nutrients. Be sure to follow the instructions carefully to avoid over-fertilizing, which can cause other problems like algae growth.
  • Provide Adequate Light: Ensure that your plants receive enough light. If they are not getting enough natural sunlight, consider using a grow light. Adjust the intensity and duration of light exposure according to the plant’s needs.
  • Maintain Stable Water Temperature: Keep the water at a consistent temperature within the range suitable for the plant species. Avoid placing the container in areas with fluctuating temperatures.

5. Pests and Insect Infestation

While relatively uncommon, pests can sometimes be a problem in aquatic gardens, especially if you have floating plants or are growing in an aquarium. Common pests include aphids, snails, and aquatic worms, which can damage plants by feeding on them or introducing disease.

Causes of Pest Infestation:

  • Poor Plant Health: Weak or stressed plants are more susceptible to pest infestation.
  • Dirty Water: Contaminated water can attract pests and provide a breeding ground for them.
  • Introducing New Plants: New plants may carry pests or diseases that can spread to your other plants.

Solutions for Pest Infestation:

  • Manual Removal: If you spot pests, remove them by hand. Use a soft cloth or sponge to wipe off any aphids or snails.
  • Use Natural Predators: Introduce natural predators, such as certain fish species (e.g., guppies or goldfish) that can help keep snail populations under control.
  • Aquatic Plant Insecticide: If pest problems persist, use an insecticidal soap or neem oil to treat the affected plants. Be sure to use a product that is safe for aquatic environments.

Aquatic plants can thrive in an apartment with the right care and attention, but they are not immune to challenges. Whether you’re dealing with algae overgrowth, yellowing leaves, root rot, or pests, understanding the underlying causes and implementing effective solutions is key to maintaining a healthy aquatic garden. Regular maintenance, such as water changes, pruning, and checking water quality, will help your aquatic plants thrive for years to come. With the right troubleshooting knowledge, you can create a beautiful and peaceful aquatic garden that enhances the atmosphere of your home.

The Beauty and Benefits of Aquatic Plants in Apartments: How to Care for Them

Aquatic plants bring a unique beauty and serenity to apartment living. These plants can be placed in water-filled containers, offering a peaceful ambiance while improving the indoor environment. Some aquatic plants thrive in apartments and can even purify the air, reduce stress, and add a touch of nature to your space. In this article, we’ll explore the best aquatic plants for apartments, how to care for them, and some common problems and solutions.

1. Best Aquatic Plants for Apartments

Several aquatic plants are well-suited to indoor environments and can be easily maintained in an apartment setting. Here are a few of the most popular ones:

  • Water Lilies (Nymphaea): Water lilies are elegant and easy to care for. They have large, floating leaves and beautiful flowers. These plants do best in large containers with ample space for their roots.
  • Peace Lily (Spathiphyllum): While traditionally a houseplant, the Peace Lily can also grow well in water. It thrives in water and can purify the air around it, making it a great addition to any indoor space.
  • Anubias: A popular aquatic plant in aquariums, Anubias is low-maintenance and can grow submerged or partially submerged in water. It requires low to moderate light and can be anchored to rocks or driftwood.
  • Pothos (Epipremnum aureum): Known for its trailing vines, Pothos can be grown in water and is a great choice for hanging baskets or containers. It’s hardy and easy to care for.
  • Hornwort (Ceratophyllum demersum): A floating plant, Hornwort is an excellent choice for aquariums or containers. It helps filter the water and provides shelter for aquatic creatures.

2. How to Care for Aquatic Plants in Apartments

Taking care of aquatic plants requires some attention to water quality, light, and temperature. Here’s a general guide to ensure your plants thrive:

  • Water Quality: Use clean, non-chlorinated water. Tap water contains chlorine and chloramine, which can harm plants. Let the water sit for 24-48 hours before using it, or use a water conditioner designed to remove chlorine.
  • Light: Most aquatic plants require bright, indirect light. Direct sunlight can cause algae growth, while too little light can slow plant growth. A location near a window with filtered light or a grow light is ideal.
  • Temperature: Most aquatic plants prefer temperatures between 65-75°F (18-24°C). Keep the plants in a location where the temperature remains consistent, away from drafts or extreme heat sources.
  • Water Level: Ensure the water level is stable. Fill your container to the top and maintain it to avoid the plant’s roots drying out. Change the water regularly (every 1-2 weeks) to keep it fresh and clean.
  • Fertilization: Aquatic plants benefit from occasional fertilization. Use a liquid fertilizer designed for aquatic plants to provide essential nutrients. Apply sparingly, as too much fertilizer can lead to algae growth.

3. Common Problems and Solutions

While aquatic plants are relatively easy to care for, they can still encounter issues. Here are some common problems and their solutions:

  • Algae Growth:
    • Problem: Excessive sunlight and nutrients can cause algae to grow in the water, which can suffocate your plants.
    • Solution: Reduce the amount of direct sunlight your plants receive and remove algae manually. Clean your containers and change the water regularly. You can also use algae-eating snails or fish if you’re growing plants in an aquarium.
  • Yellowing Leaves:
    • Problem: Yellowing leaves can be a sign of poor water quality, insufficient light, or nutrient deficiencies.
    • Solution: Ensure your plants are receiving the right amount of light and replace the water regularly. If the plant is still growing poorly, consider adding a water-soluble fertilizer specifically for aquatic plants.
  • Root Rot:
    • Problem: Root rot occurs when the plant’s roots are exposed to stagnant, low-oxygen water or overwatering.
    • Solution: Remove affected plants immediately, trim any rotting roots, and replace the water in the container. Ensure that the plant has proper drainage or oxygenated water to prevent further rot.

Aquatic plants offer an easy way to enhance your apartment’s décor while also bringing nature indoors. With the right care, these plants can thrive in water-filled containers, creating a tranquil and green space. Regular attention to water quality, light, temperature, and occasional fertilization will keep your plants healthy and beautiful. By addressing common issues such as algae growth or root rot promptly, you can enjoy the beauty and benefits of aquatic plants in your home.

Create a DIY Plant Shelf That Doubles as Wall Decor

Want to show off your plant collection while upgrading your interior style? A DIY plant shelf is the perfect project. Not only does it save space and organize your greenery, but it also acts as living wall art — a blend of nature, structure, and design.

Whether you’re working with a big blank wall or a cozy corner, this guide will walk you through how to build a plant display shelf that’s both functional and fabulous.

Why a Plant Shelf Is the Ultimate Decor Hack

Plant shelves are more than just storage — they offer:

  • 🌿 Vertical greenery that saves floor space
  • 🖼️ Design impact that draws the eye and adds depth to any room
  • 🌞 Better light access by elevating plants toward windows
  • 🧹 Tidy organization (no more pots on every surface!)
  • 🎨 A mix of art, decor, and life in one custom feature

Step 1: Choose the Best Location

Before you build, pick a spot that supports both your design and your plants.

📍 Great shelf spots:

  • Above a couch or bed
  • Next to a sunny window
  • In a hallway, stairwell, or reading nook
  • Over a desk, dresser, or sideboard
  • In the kitchen for herbs or trailing vines

Tip: Make sure the spot gets the right amount of natural light — or plan to add a grow light nearby.

Step 2: Pick the Style That Matches Your Space

Your shelf should reflect your home’s vibe.

🧱 Shelf style ideas:

  • Minimalist floating shelves – Clean and modern
  • Rustic wood & metal brackets – Warm and industrial
  • Geometric shapes – Add visual interest
  • Ladder shelf units – Leaning style, great for corners
  • Wall grid systems – Great for mix-and-match plant hangers
  • Hanging shelves – Suspended from rope or chains for a boho look

Choose materials like reclaimed wood, pine, bamboo, or metal, depending on your aesthetic.

Step 3: Gather Your Materials and Tools

You don’t need to be a master carpenter — just a little handy!

🛠️ Basic supply list:

  • Wood planks or pre-made shelves
  • Brackets (L-shaped, floating, or decorative)
  • Screws and wall anchors
  • Level and measuring tape
  • Drill or screwdriver
  • Wall studs (or heavy-duty anchors for drywall)

Optional:

  • Paint or stain
  • Rope (for hanging shelves)
  • Hooks for trailing plants or tools

Step 4: Build and Install Your Shelf

📐 Step-by-step:

  1. Measure the space and mark where the shelves will go
  2. Drill into studs if possible, or use anchors for extra support
  3. Use a level to make sure your shelf isn’t slanted
  4. Screw in brackets, then place and secure the shelf
  5. Repeat for multiple tiers or stack vertically for a wall garden

Always double-check weight limits — plants + pots + soil can get heavy.

Step 5: Choose the Right Plants for Shelves

Shelf plants need to look good and thrive in their environment.

🌱 Ideal shelf plants:

  • Trailing plants: Pothos, string of pearls, ivy
  • Compact plants: Peperomia, succulents, baby rubber plant
  • Air plants: No soil required — tuck them in corners or attach to wood
  • Upright plants: Snake plant (dwarf), prayer plant, ZZ plant
  • Herbs: Basil, mint, oregano (perfect for kitchen shelves)

If your shelf is high and bright, succulents and cacti will love it. If lower or shaded, go for low-light lovers like ZZ or pothos.

Step 6: Style It Like a Pro

Now that it’s built, it’s time to decorate! Mix plants with other elements for a curated, gallery-like effect.

🖼️ Styling ideas:

  • Group in odd numbers (3s and 5s work best)
  • Vary plant heights and textures
  • Add books, candles, stones, or ceramic pieces
  • Use matching or coordinating pots for cohesion
  • Let trailing plants spill down the sides
  • Incorporate string lights or LED grow strips for glow and health

Keep it simple — not every shelf needs to be packed full. Let the greenery breathe.

Step 7: Maintain the Shelf Garden

Even the prettiest setup needs a little upkeep.

✅ Weekly care tips:

  • Rotate plants for even light exposure
  • Check soil and water as needed
  • Dust shelves and leaves
  • Trim dead leaves and overgrowth
  • Switch plants in/out based on seasonal needs

Pro Tip: Place trays or liners under pots to catch moisture and protect your shelf from water damage.

Functional, Beautiful, and Green

A DIY plant shelf is the perfect way to blend style with nature, show off your collection, and turn an ordinary wall into a living work of art. Whether you’re a minimalist or a maximalist, you can create a custom plant display that’s as unique as your space — and your plants will thank you for the sunlight, airflow, and love.

How to Transition Outdoor Plants Indoors for Winter

As temperatures drop and frost starts to threaten, it’s time to bring your outdoor plants inside. But don’t rush it — transitioning from sun and open air to indoor life can shock even the hardiest greenery. With the right prep, though, you can help your plants adjust smoothly, stay healthy, and thrive all winter long.

In this guide, you’ll learn when to bring plants indoors, how to prep them properly, and how to create the right conditions for a stress-free seasonal shift.

Why Plants Need Help Transitioning

Outdoor plants are used to:

  • 🌞 Strong natural light
  • 🌬️ Fresh air and breezes
  • 🌧️ Rain and natural humidity
  • 🐜 Soil microbes and insects

Bringing them inside means less light, drier air, less circulation, and a whole new routine. Without a gentle transition, plants can suffer from leaf drop, wilting, slowed growth, or pests.

Step 1: Know Which Plants to Bring In

Not all outdoor plants need to come indoors. Focus on tender or tropical varieties that can’t handle frost or freezing temps.

🌿 Bring these indoors:

  • Herbs like basil, rosemary, mint
  • Tropical houseplants that spent the summer outside (e.g. monstera, pothos, snake plant)
  • Citrus trees in pots
  • Succulents and cacti (if temps drop below freezing)
  • Flowering plants like begonias, geraniums, coleus

Leave outside or let go:

  • Annuals that won’t survive frost
  • Large plants rooted in the ground (unless potted or worth overwintering indoors)

Step 2: Start the Transition Early

Begin the process 2–3 weeks before your first expected frost.

Gradual acclimation tips:

  • Move plants into partial shade for a few days to reduce light shock
  • Then place them just outside a window or door they’ll soon sit near
  • Water lightly and reduce feeding to prepare for dormancy
  • Avoid bringing them directly from hot sun into a dark corner indoors

This slow shift helps them adjust to lower light and humidity gradually.

Step 3: Inspect for Pests (Don’t Bring in Hitchhikers!)

Before any plant crosses the threshold, give it a thorough inspection.

What to look for:

  • Aphids, spider mites, mealybugs
  • Fungus gnats or ants
  • Eggs on stems or under leaves
  • Mold or mildew on soil surface

Treatment:

  • Rinse leaves with a gentle hose spray
  • Wipe with a damp cloth and mild soapy water
  • Spray with neem oil or a safe insecticidal soap
  • Quarantine indoors for 7–10 days before placing near other plants

Optional: Repot into fresh soil to start with a clean slate, especially if pests are persistent.

Step 4: Choose the Right Spot Indoors

Match each plant to a spot that mimics its outdoor conditions as closely as possible.

Placement tips:

  • Place sun-loving plants (like herbs or citrus) near south-facing windows
  • Shade-tolerant plants (like ferns or pothos) do well in indirect light
  • Avoid drafty doors, radiators, or heat vents
  • Consider a humidity tray or small humidifier in dry rooms

Rotate plants every week or two so they get even light exposure.

Step 5: Adjust Watering and Feeding

Indoor plants use less water in cooler, dimmer conditions — and many go into dormancy.

Cold-weather care:

  • Check soil before watering — let the top inch dry out
  • Use room-temperature water
  • Stop or reduce fertilizing until spring
  • Don’t panic if growth slows — it’s natural this time of year

Pro Tip: Succulents and cacti may only need water every 3–4 weeks indoors during winter.

Step 6: Maintain Humidity and Light Indoors

Dry air and short days are the biggest indoor challenges in winter.

How to help:

  • Use a humidifier near plants that need tropical conditions
  • Group plants together to create a microclimate
  • Use grow lights (full-spectrum bulbs) for plants that struggle in low light
  • Keep lights on for 12–14 hours a day if natural light is minimal

Dust leaves monthly so they can absorb every bit of light and moisture.

Step 7: Monitor and Be Patient

After the move, check your plants regularly for:

  • Wilting, yellowing, or drooping
  • Leaf drop (common with fussy plants like ficus)
  • Soil dryness or mold
  • Signs of pests returning indoors

Be gentle and consistent — it may take a few weeks for your plants to settle into their winter routine.

Overwintering Herbs Indoors

Many herbs can keep producing through winter indoors with the right care:

  • Basil → Needs lots of light and warmth
  • Rosemary → Prefers cooler air, don’t overwater
  • Mint → Can go semi-dormant but bounces back easily
  • Thyme & oregano → Keep near sunny windows, water sparingly

Grow on windowsills or under a kitchen grow light for easy access and better flavor all season.

From Patio to Peaceful Windowsill

Bringing your plants inside for winter doesn’t have to be stressful. With a bit of prep and gentle care, your greenery can ride out the cold months in comfort — and be ready to thrive again come spring.

So grab your gloves, check the weather, and start the transition early. Your plants will thank you with happy leaves and healthy growth, all winter long. ❄️🌿☀️

How to Combine Crystals and Plants for Positive Energy in Your Home

Plants bring life. Crystals bring energy. When combined, they can transform your home into a sanctuary of balance, calm, and vibrant intention. Whether you’re into holistic healing, mindful decor, or just love how they look together, pairing crystals with plants is a beautiful and powerful way to enhance your indoor space.

In this guide, you’ll learn how to choose the right crystals for your plants, where and how to place them, and how to create beautiful crystal-infused plant arrangements for energy, aesthetics, and well-being.

Why Combine Crystals and Plants?

Both plants and crystals are natural elements that carry unique energy signatures. Together, they support:

  • 🌱 Grounded growth and healing
  • Cleansed, positive energy in your home
  • 🧘‍♀️ Mindfulness and intention-setting
  • 🌿 Enhanced plant vitality and spiritual ambiance
  • 💚 A deeper connection to nature and self-care

Whether or not you believe in crystal healing, the ritual of creating a space filled with intention can bring clarity, calm, and beauty into your life.

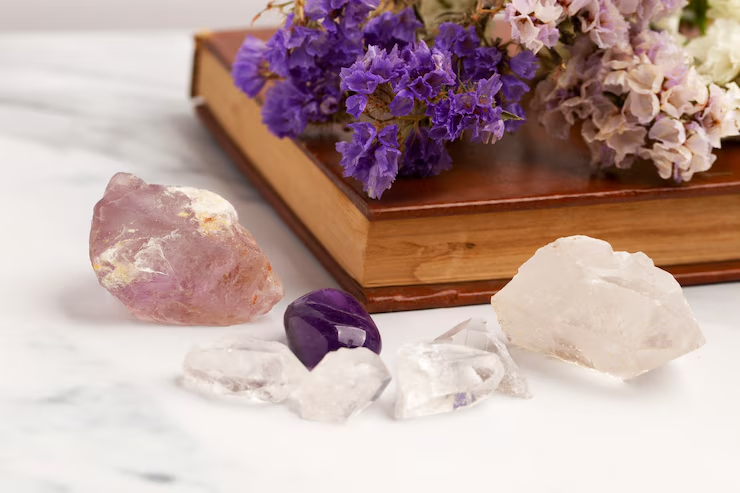
Best Crystals to Pair with Plants

Different crystals support different energies. Here are some top picks for plant harmony and indoor vibes:

🧘‍♀️ Clear Quartz

  • Purpose: Amplifies energy, clarity, healing
  • Use for: Any plant — it boosts overall energy
  • Placement: In soil or beside the pot

💖 Rose Quartz

  • Purpose: Love, softness, harmony
  • Use for: Plants in bedrooms, self-care corners
  • Placement: On trays or near plant groupings

🌈 Amethyst

  • Purpose: Calm, intuition, spiritual growth
  • Use for: Meditation spaces or near ferns and peace lilies
  • Placement: In soil or clustered on nearby shelves

🌍 Black Tourmaline

  • Purpose: Grounding, protection, repels negativity
  • Use for: Entryways, tech-heavy areas, or plants near Wi-Fi/electronics
  • Placement: At the base of large potted plants

🌞 Citrine

  • Purpose: Joy, confidence, abundance
  • Use for: Money trees, succulents, bright rooms
  • Placement: Windowsills or mixed into decorative stones

🌊 Selenite

  • Purpose: Cleansing and purification
  • Use for: Spaces that feel heavy or stagnant
  • Placement: Near plant clusters (keep it dry — not in soil)

How to Place Crystals with Your Plants

There’s no strict rule — it’s about what feels good to you. But here are some practical and aesthetic ways to combine them:

🌿 In the Soil:

  • Gently press small crystals (like tumbled quartz or amethyst) into the top layer of the soil
  • Avoid water-soluble stones like selenite or malachite

🪴 Around the Pot:

  • Create a ring of crystals around the base of the pot
  • Use a tray filled with pebbles and crystals for drainage and energy

🧺 In Decorative Bowls or Trays:

  • Arrange multiple crystals with plants on a tray for an altar-style vibe
  • Great for coffee tables, nightstands, or reading nooks

🧘‍♀️ As a Ritual:

  • Set an intention for the plant and place the crystal nearby
  • Use a short affirmation or gratitude practice while watering

Crystal + Plant Pairing Ideas

PlantCrystalWhy It Works
Snake PlantBlack TourmalineCleanses space, protects against bad energy
Peace LilyAmethystAmplifies calm, clears stress
PothosCitrineEncourages vitality and abundance
Aloe VeraClear QuartzHeals, amplifies both physical and spiritual energy
Spider PlantRose QuartzNurturing, gentle energy — ideal for self-love
FernsSeleniteClears energy and harmonizes air flow

Care Tips When Using Crystals with Plants

While crystals don’t harm plants, you want to keep them clean and energetically active.

🔄 Keep them fresh:

  • Clean crystals monthly with cool water (avoid water-soluble ones!)
  • Charge them in sunlight (for citrine, quartz) or moonlight (for amethyst, rose quartz)
  • Smudge with sage or palo santo to reset their energy if used for protection or emotional work
  • Don’t block drainage holes or bury them too deep in the soil

Create a Plant + Crystal Altar

Want to take it to the next level? Combine your plants and crystals into a sacred space.

🌿🕯️ Altar setup ideas:

  • Choose a low shelf, tray, or windowsill
  • Add: one or two potted plants, 2–3 crystals, a candle, and a meaningful object (photo, journal, feather, etc.)
  • Use this space for journaling, meditation, or quiet reflection

It becomes a daily reminder of growth, peace, and purpose.

Nature, Intention, and Energy

Combining crystals and plants is a beautiful way to connect with your space, your energy, and your intentions. Whether you believe in their metaphysical properties or just love how they look together, the harmony they create is real.

So go ahead — plant with purpose, decorate with intention, and invite nature’s energy into every corner of your home. 🔮🌱💫

Create a Mini Indoor Greenhouse for Year-Round Growing

Want to grow herbs in the middle of winter? Start seeds early for spring? Or care for humidity-loving tropicals? With a mini indoor greenhouse, you can create the perfect environment for plants any time of year, no matter the weather outside.

In this guide, you’ll learn how to build, set up, and use a compact indoor greenhouse to grow healthy plants in even the smallest spaces — from shelves to windowsills to tabletops.

Why Build a Mini Indoor Greenhouse?

A mini indoor greenhouse is like a little plant spa — controlling light, heat, and humidity in one tidy setup.

🌿 Benefits:

  • Grow plants year-round, even in cold climates
  • Start seeds early and safely
  • Boost humidity for tropical plants and cuttings
  • Protect delicate or young plants from drafts and pests
  • Great for small spaces, apartments, and balconies

Whether you DIY it or buy a ready-made unit, it’s a game-changer for indoor gardeners.

Step 1: Choose the Right Greenhouse Style for You

Mini greenhouses come in all shapes and sizes — pick one that fits your space, budget, and needs.

🧱 Types of mini indoor greenhouses:

  • Clear plastic bins with lids — super simple and affordable
  • Plastic or metal shelf units with zippered covers
  • Glass-door cabinets (IKEA hacks!) like the Milsbo or Rudsta
  • Tabletop greenhouses for herbs or seedlings
  • DIY greenhouse boxes with wood and acrylic sheets

Tip: Look for something with good light access, a cover, and enough height for plant growth.

Step 2: Set Up the Environment

💡 Light:

Plants need 12–16 hours of light for healthy growth.

  • Place near a south- or east-facing window, or
  • Use full-spectrum grow lights (LED is best — low heat, energy-efficient)
  • Hang lights above plants and adjust as they grow

🌡️ Temperature:

Keep the space between 65–75°F (18–24°C) for most plants.

  • Use a small space heater or heating mat if needed
  • Avoid placing near vents or cold windows during winter

💧 Humidity:

Boosting humidity is one of the biggest perks of an enclosed setup.

  • Mist plants regularly
  • Add a humidifier or shallow tray with water and pebbles
  • Monitor with a humidity gauge (aim for 50–70% depending on the plant)

Step 3: Choose the Right Plants

Not every plant needs a greenhouse — but many love it.

🌱 Great greenhouse plants:

  • Seedlings and veggie starts (tomatoes, peppers, herbs)
  • Tropical houseplants (calathea, ferns, pothos, orchids)
  • Succulents and cacti (with good airflow and lighting)
  • Cuttings and propagated plants
  • Carnivorous plants (they love humidity!)

Avoid: Plants that prefer dry conditions unless your greenhouse has airflow control.

Step 4: Organize Like a Pro

Layout tips:

  • Place tall plants in the back, shorter in the front
  • Use adjustable shelves or stack pots for height
  • Keep airflow moving — don’t overcrowd
  • Add a small fan for circulation (especially in enclosed setups)

Accessories to include:

  • Thermometer and hygrometer
  • Grow light timers
  • Spray bottle or mister
  • Drip trays or liners to protect surfaces

Step 5: Monitor and Maintain

Your mini greenhouse doesn’t need daily attention — just quick check-ins.

✅ Check temperature and humidity daily
✅ Wipe condensation off walls to prevent mold
✅ Water when the topsoil feels dry
✅ Vent the greenhouse occasionally to refresh air
✅ Clean trays and shelves monthly

Pro Tip: Use sticky traps to catch any unwanted pests early!

Step 6: Use It Year-Round

🌸 Spring:

  • Start seeds indoors before transplanting outdoors
  • Boost growth with controlled warmth and light

☀️ Summer:

  • Grow herbs and tropicals without sunburn or drying out
  • Use the greenhouse as a propagation station

🍂 Fall:

  • Bring sensitive outdoor plants inside
  • Extend your harvest of herbs and greens

❄️ Winter:

  • Keep tropicals happy and green
  • Create a warm space for orchids, succulents, or cuttings

A Garden in Any Season

A mini indoor greenhouse lets you grow smarter, not harder — giving your plants the perfect environment to thrive, no matter the weather or space you have. It’s one of the best investments for anyone serious about indoor gardening.

So whether you want to grow herbs for your kitchen, keep your calathea thriving, or start a tiny indoor jungle — your greenhouse oasis is just a shelf away. 🌿💡🌼

How to Use Indoor Plants to Improve Sleep and Bedroom Air Quality

A good night’s sleep starts with a peaceful environment — and few things calm the body and mind like plants. The right indoor greenery can purify the air, regulate humidity, reduce stress, and even release oxygen at night.

In this guide, you’ll discover which plants are best for the bedroom, how to arrange them, and simple ways to turn your sleep space into a relaxing, plant-filled retreat.

Why Plants Belong in the Bedroom

Beyond just looking good, bedroom plants can help you sleep better in several ways:

🌬️ Improved Air Quality

Some plants absorb carbon dioxide, VOCs (volatile organic compounds), and toxins like formaldehyde or benzene.

🌿 Oxygen Boost

Certain plants (like snake plants) release oxygen at night, unlike most that only do so during the day.

💧 Better Humidity

Plants naturally increase humidity through transpiration, helping prevent dry air from disrupting your sleep.

😌 Stress Relief

Studies show that just being near plants can reduce anxiety, lower heart rate, and promote calm — ideal for unwinding before bed.

Best Bedroom Plants for Sleep and Air Quality

Here are the most effective, low-maintenance options to support better rest:

🌱 Snake Plant (Sansevieria)

  • Releases oxygen at night
  • Filters toxins like formaldehyde and benzene
  • Very hardy and tolerant of low light

🌱 Aloe Vera

  • Nighttime oxygen releaser
  • Heals skin and purifies air
  • Minimal water needs

🌱 Peace Lily

  • Adds humidity to dry air
  • Filters mold spores and VOCs
  • Elegant and calming aesthetic

🌱 Lavender

  • Calming scent proven to promote sleep
  • Needs bright, indirect light
  • Ideal on a nightstand

🌱 English Ivy

  • Reduces airborne mold and allergens
  • Beautiful trailing look
  • Great for hanging baskets

🌱 Areca Palm

  • Excellent air purifier
  • Releases moisture into the air
  • Adds a tropical, soothing vibe

🌱 Valerian (for experienced growers)

  • Natural sleep aid — root used in herbal teas
  • Needs lots of light and care, but worth it for those into herbs

Where to Place Plants in the Bedroom

Smart placement enhances both air quality and sleep benefits.

🌿 Ideal spots:

  • Nightstands: Aloe vera, lavender, or a small pothos
  • Windowsills: Sun-loving plants like rosemary or English ivy
  • Corners: Tall plants like areca palm or snake plant
  • Hanging planters: Ivy or philodendron for a cascading, dreamy effect
  • Shelves or headboards: Mini succulents or trailing vines for visual calm

Avoid crowding the space — your bedroom should feel open and relaxing.

Bedroom Styling Tips with Plants

Create a soothing sanctuary by blending plant life with cozy design.

🛏️ Tips for peaceful vibes:

  • Use neutral pots and soft colors (beige, white, wood, terracotta)
  • Add fairy lights or candles near plants for gentle glow
  • Mix textures: woven baskets, macramé hangers, ceramic pots
  • Keep the plant count minimal for a clean, calm feel

Pair with soft bedding, warm lighting, and calming scents (like lavender or eucalyptus).

Care Tips for Bedroom Plants

Keep your green sleep companions healthy with these essentials:

✅ Water consistently, but don’t overdo it — especially with lower nighttime temps
✅ Dust leaves monthly so they can breathe and “work” better
✅ Rotate every few weeks to prevent uneven growth
✅ Open windows occasionally to refresh airflow
✅ Don’t use chemical sprays — choose organic pest solutions

Bonus tip: Use a moisture meter to take the guesswork out of watering in low-light rooms.

Sleep Deeper, Breathe Easier

Plants are more than decor — they’re natural allies in your wellness routine. By improving air quality, promoting calm, and supporting restful sleep, bedroom plants help create a healing space where your body and mind can recharge.

So pick a few green companions, place them near your bed, and let nature help you rest easy. 😌🪴💤

How to Create a Cozy Reading Nook Surrounded by Plants

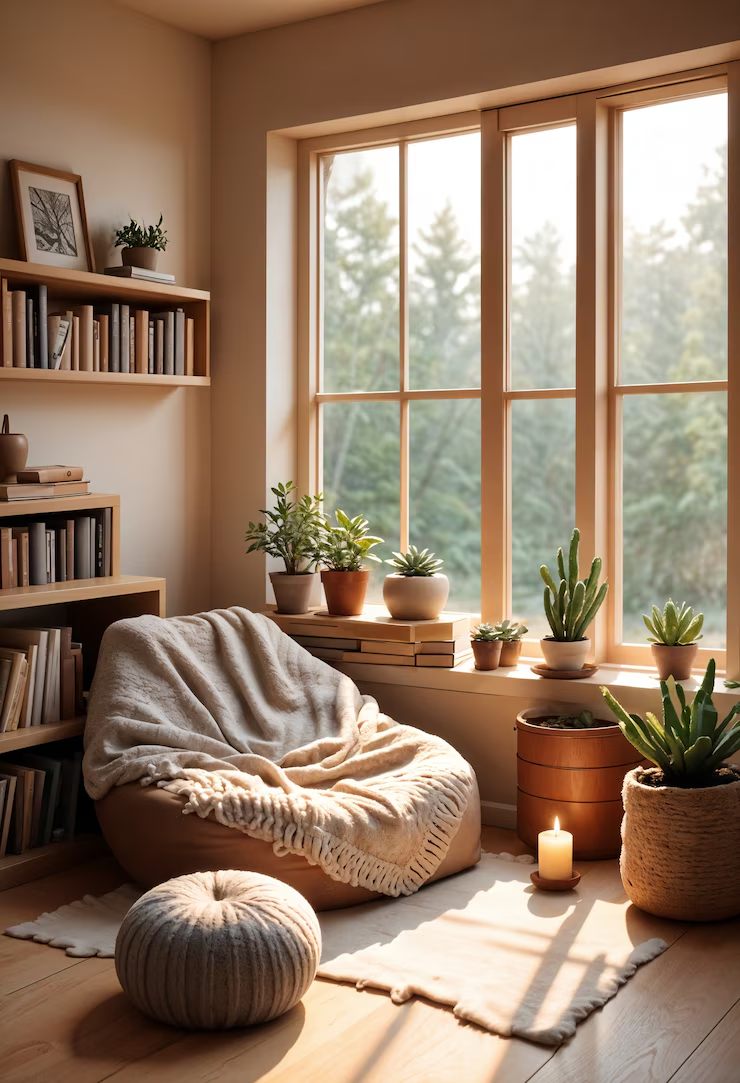
Imagine this: a soft chair, a good book, warm lighting, and lush green plants all around you. Sounds perfect, right? A cozy reading nook isn’t just about books — it’s about creating a calming environment that invites you to pause, relax, and recharge.

In this guide, you’ll learn how to design your own plant-filled reading corner, blending comfort, style, and nature to create your new favorite spot in the house.

Why Mix Plants with Your Reading Nook?

Plants make your reading space feel like a retreat.

🌿 Benefits:

  • Boost concentration and focus
  • Reduce stress and mental fatigue
  • Improve indoor air quality
  • Add beauty, texture, and life to your space
  • Encourage quiet, screen-free time

Even just a few potted plants can turn an ordinary chair into a peaceful escape.

Step 1: Pick the Perfect Spot

You don’t need a lot of space — just a corner you can claim for calm.

📍 Ideal locations:

  • Near a sunny window (bonus: natural light for reading and plants)
  • Bedroom corner with a floor lamp
  • Space beside a bookshelf
  • Cozy nook under the stairs or in an unused corner
  • Near a wall where you can hang trailing plants

Make sure it’s a spot you’ll want to spend time in — quiet, cozy, and away from daily distractions.

Step 2: Choose Comfy, Functional Furniture

Your reading chair should be something you actually want to sit in for hours.

🪑 Key items:

  • Plush armchair or papasan chair
  • Soft throw blanket and supportive pillow
  • Small side table for your tea, book, or plant
  • A lamp with warm light for evening reading
  • Optional: A small bookshelf or basket for your current reads

Keep it minimal but inviting — comfort is king here.

Step 3: Layer In the Plants

Now for the fun part — let’s green it up!

🌱 Where to place your plants:

  • Floor plants beside your chair (like snake plant, rubber tree, or monstera)
  • Hanging plants above or behind (pothos, ivy, string of pearls)
  • Shelf plants on a nearby bookcase or wall shelf (ZZ plant, prayer plant, aloe)
  • Tabletop plants on your side table or stool (peace lily, philodendron, succulent)

Tip: Use plant stands to create height variation and visual flow.

Step 4: Choose Plants That Thrive in Your Space

Pick based on light levels and your care routine.

☀️ Bright light nook:

  • Fiddle leaf fig
  • Succulents
  • Snake plant
  • Cacti
  • Herbs (great for aroma too!)

🌥️ Low-light nook:

  • ZZ plant
  • Pothos
  • Calathea
  • Peace lily
  • Spider plant

Don’t forget to rotate plants occasionally for even growth.

Step 5: Add Cozy Touches

Complete the vibe with layers of warmth and personal charm.

🕯️ Extras to include:

  • A candle or essential oil diffuser (lavender, eucalyptus, or sandalwood = pure calm)
  • Soft rug or plush sheepskin underfoot
  • Fairy lights or a salt lamp for mood lighting
  • A journal or sketchbook for reflection
  • A cozy mug for tea, coffee, or cocoa

This is your space — make it feel like you.

Step 6: Make It a Ritual Space

A reading nook can be more than a place to read — it can be your daily retreat.

📖 Use it for:

  • Morning reading and journaling
  • Unwinding with fiction after work
  • Mindful tea breaks
  • Meditating or intention-setting
  • Flipping through your favorite plant book or zine

Even just 10 minutes a day here can help restore your energy and focus.

Your Plant-Filled Peace Corner

You don’t need a huge room or fancy furniture to create a cozy, meaningful space. With a comfy seat, a few favorite books, and a circle of leafy green friends, your reading nook becomes a retreat — a pocket of peace in the middle of everyday life.

So pick your corner, add your plants, and let the calm begin. 📚🌿🛋️

How to Safely Clean Indoor Plant Leaves (Without Damaging Them)

Dusty leaves aren’t just a visual bummer — they also block light, slow down photosynthesis, and invite pests. Just like windows need cleaning to let in sunshine, so do your plant’s leaves.

In this guide, you’ll learn how to clean your plants the right way — based on their leaf type — using gentle, effective methods that keep them shiny, healthy, and photosynthesizing like pros.

Why Clean Your Plants’ Leaves?

Over time, leaves collect:

  • 🧹 Dust and lint
  • 🕷️ Pests and webbing
  • 🦠 Mold spores
  • 🌫️ Pollution and cooking oils
  • 💧 Water spots and mineral buildup

This buildup blocks light and clogs the plant’s natural pores (stomata), which reduces airflow and hinders healthy growth.

Clean leaves = stronger, happier plants.

How Often Should You Clean Plant Leaves?

Every 2–4 weeks is ideal for most homes
✅ More often if your space is dusty or near a busy road
✅ After pest issues or treatment sprays
✅ Before applying any fertilizer or leaf shine

Make it part of your plant care routine — like a mini wellness check.

Step-by-Step: The Basic Leaf Cleaning Method

🧴 What you’ll need:

  • Soft microfiber cloth or sponge
  • Bowl of lukewarm water
  • Optional: mild natural soap (like castile soap)
  • Spray bottle (for misting)
  • Small soft brush or toothbrush (for textured leaves)
  • Cotton swabs (for hard-to-reach spots)

🍃 1. Dust First

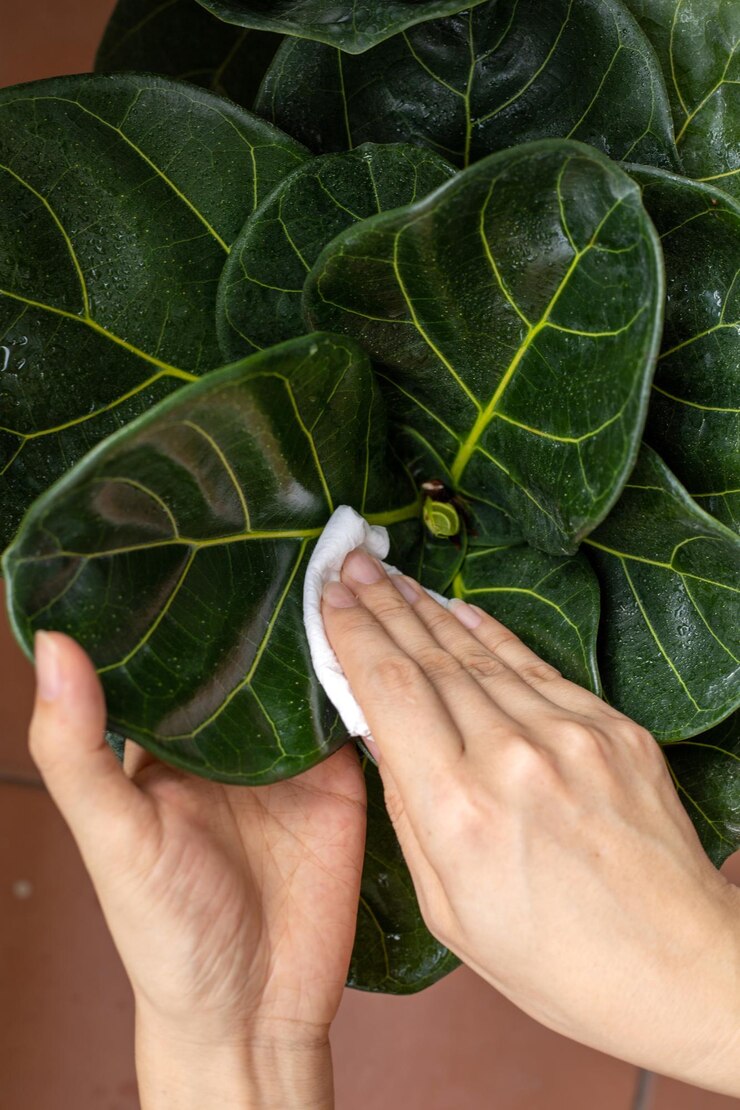
Use a dry microfiber cloth to gently wipe each leaf from base to tip. Always support the back of the leaf with your hand to avoid snapping it.

💦 2. Wipe With Water

Dampen the cloth or sponge and gently wipe both sides of each leaf. For small-leaved plants, use a soft makeup brush or spray-mist and shake gently.

Optional: Add 1–2 drops of mild soap to a liter of water if leaves are sticky or grimy.

🧽 3. Clean the Stems and Pots

Don’t forget the leaf bases, stems, and the outer pot — they collect dust too. Wipe with a damp cloth or brush.

🌬️ 4. Let It Dry

Place the plant in indirect light while drying. Avoid bright sun until the leaves are completely dry to prevent sunburn.

Special Cleaning Methods by Leaf Type

Not all leaves are created equal — here’s how to clean them based on texture and structure:

🌱 Smooth, broad leaves (Monstera, Fiddle Leaf Fig, Peace Lily)

  • Use soft cloth or sponge with water
  • Great candidates for the shower rinse method

🌿 Small or thin leaves (Ferns, Herbs, Spider Plants)

  • Mist with a spray bottle
  • Gently shake to dislodge dust
  • Use soft makeup brush for stubborn particles

🌵 Succulents & Cacti

  • Use a dry soft brush or paintbrush
  • Avoid misting — too much moisture causes rot
  • Gently blow dust away with a puff of air if needed

🌸 Hairy leaves (African Violets, Pilea, Begonias)

  • Do not wipe or get too wet — they’re prone to leaf damage
  • Use a dry, soft brush or cotton swab to dust gently
  • Use lukewarm air (like a hairdryer on cool setting) if needed

Can You Shower Your Plants?

Yes — for most tropicals and big leafy friends!

🚿 How to do it:

  • Use a gentle, lukewarm spray in the sink, tub, or shower
  • Let water run over leaves for 30–60 seconds
  • Let drain completely before returning to the planter spot
  • Avoid doing this too often — every 4–6 weeks is enough

Avoid showering:

  • Cacti and succulents
  • Hairy-leaved plants
  • Anything freshly fertilized or just repotted

Should You Use Leaf Shine Products?

Generally: no.

Leaf shine sprays may look pretty at first, but they often:

  • Block the leaf’s pores
  • Attract dust more quickly
  • Contain chemicals that irritate plants

Better alternatives:

  • Clean water
  • Diluted neem oil (bonus: pest protection!)
  • Aloe vera juice + water spray

Pest Prevention While You Clean

Leaf cleaning is the perfect time to inspect for trouble.

🔍 Check for:

  • Sticky residue (sign of aphids or scale)
  • Webbing (spider mites)
  • Leaf holes or yellowing
  • Mold or mildew around the base

Catch pests early = easier to treat!

Clean Leaves, Clean Vibes

Leaf cleaning is a simple, powerful way to boost your plant’s health, beauty, and energy. It takes just a few minutes — and your plants will reward you with vibrant growth and glossy, happy leaves.

So go ahead: turn on some music, grab a soft cloth, and give your leafy friends a little love. They deserve it. 🍃💧✨