Make Your Own Organic Plant Fertilizer at Home

Want to give your plants a boost without relying on chemical fertilizers? Good news — you probably already have everything you need in your kitchen and garden. Homemade organic fertilizers are not only budget-friendly and eco-conscious, but also packed with nutrients your plants will love.

In this guide, you’ll learn how to make several easy, effective organic fertilizers using food scraps, compost, and DIY techniques that improve soil health, promote strong growth, and support vibrant greenery — all naturally.

Why Choose Organic Fertilizer?

Unlike synthetic fertilizers, organic options work with nature, not against it.

🌿 Benefits of organic fertilizers:

  • Gentle on roots — less risk of burning your plants
  • Improves soil structure and microbial life
  • Slow-release nutrients for steady, long-term growth
  • Reduces waste by reusing kitchen scraps
  • Safe for kids, pets, and the environment

Before You Start: Know What Plants Need

Plants thrive on three main nutrients:

  • Nitrogen (N): For leafy growth
  • Phosphorus (P): For roots and blooms
  • Potassium (K): For strength and disease resistance

Most organic fertilizers offer a mix of all three, plus micronutrients like calcium, magnesium, and sulfur.

1. Banana Peel Fertilizer (Potassium + Phosphorus)

Great for: Flowering plants, tomatoes, peppers, roses

How to make:

  • Chop banana peels into small pieces
  • Bury directly in the soil around the plant OR
  • Blend with water and pour around the base (1 peel per liter)

Bonus: Also provides calcium and magnesium!

2. Eggshell Fertilizer (Calcium Booster)

Great for: Tomatoes, peppers, succulents

How to make:

  • Rinse and dry eggshells
  • Crush into small pieces or powder (use a blender or mortar)
  • Mix into the soil or sprinkle on top as a slow-release supplement

Extra tip: Add to your compost bin to balance nitrogen-heavy scraps.

3. Coffee Grounds Fertilizer (Nitrogen-Rich)

Great for: Acid-loving plants like hydrangeas, blueberries, ferns

How to use:

  • Let used grounds dry
  • Mix into soil (lightly — too much can compact)
  • Or steep 1 tablespoon in 1 liter of water for a mild “coffee tea”

Caution: Don’t overdo it — use as a monthly boost, not daily.

4. Compost Tea (Balanced, Full-Spectrum Fertilizer)

Great for: All-purpose feeding

How to brew:

  • Add 2 cups of finished compost to a bucket with 1 gallon of water
  • Let sit 2–3 days, stirring daily
  • Strain and pour at the base of your plants

Use weekly for vibrant growth and resilient roots.

5. Vegetable Scrap Liquid Fertilizer

Great for: Indoor and outdoor plants

How to make:

  • Collect veggie peels, leafy tops, and bits (no oil or salt)
  • Boil in a pot with water, then let cool
  • Strain and use the “veggie broth” as fertilizer once per week

Note: Avoid onions, garlic, and citrus — they can be too harsh.

6. Epsom Salt Fertilizer (Magnesium + Sulfur)

Great for: Tomatoes, peppers, and leafy greens

How to use:

  • Dissolve 1 tablespoon of Epsom salt in 1 liter of water
  • Use as a foliar spray or soil drench every 3–4 weeks

Helps with chlorophyll production and improves nutrient absorption.

7. Grass Clipping Mulch or Tea

Great for: Nitrogen boost and ground cover

Use two ways:

  • Lay dry grass around the base of plants to retain moisture and add nitrogen slowly
  • Soak fresh clippings in water for 3–5 days, strain, and use as a liquid fertilizer

Caution: Use untreated grass (no pesticides or weed killers!).

8. Molasses Fertilizer (Microbe Booster)

Great for: Houseplants, veggies, and compost tea

How to use:

  • Mix 1 tablespoon of unsulfured molasses into 1 gallon of water
  • Pour into soil monthly to feed beneficial soil microbes

It also adds small amounts of calcium, magnesium, iron, and potassium.

How Often to Use Homemade Fertilizers

Because organic options are slow-release, you can feed your plants every 2–4 weeks, depending on the plant type and growth stage.

General guide:

  • Leafy plants & herbs: Every 2–3 weeks during growing season
  • Flowering or fruiting plants: Weekly during bloom or production
  • Succulents: Once a month or less
  • Dormant plants (winter): Skip fertilizing entirely

Storage & Safety Tips

✅ Label homemade mixes with date and ingredients
✅ Store in airtight containers (especially liquid teas)
✅ Use within 1–2 weeks for best results
✅ Always dilute strong mixes to avoid root burn
✅ Compost any leftovers — nothing wasted!

Feed Your Plants, Feed the Earth

Fertilizing your plants doesn’t have to involve plastic bottles or chemical formulas. With a little creativity and a handful of scraps, you can nourish your greenery naturally, support healthier soil, and reduce household waste at the same time.

So next time you’re about to toss that banana peel or eggshell — stop! Your plants are hungry, and nature already gave you everything they need. 🌿💚♻️

Keep Your Indoor Plants Healthy While You’re on Vacation

Heading out of town? Whether it’s a weekend getaway or a two-week escape, one big question lingers: what about the plants? The good news is, with a little preparation, your indoor jungle can survive (and even thrive) while you’re away.

In this guide, you’ll learn smart, low-stress ways to prep your plants for your absence — from DIY watering hacks to light strategies and plant-sitter tips.

Step 1: Know Your Plants’ Watering Needs

Different plants have different tolerance levels.

🪴 Plants that can go 1–2 weeks without water:

  • Snake Plant
  • ZZ Plant
  • Cacti
  • Succulents
  • Rubber Plant

💦 Plants that may need care every 3–5 days:

  • Peace Lily
  • Calathea
  • Ferns
  • Herbs
  • Spider Plant

Group your plants by need so you can plan the right support system.

Step 2: Water Well Before You Leave

Give your plants a deep drink the day before you leave.

Watering tips:

  • Water until it runs from the drainage hole
  • Let excess water drain completely
  • Avoid overwatering — soggy roots can rot
  • For thirsty plants, place a saucer under the pot to retain some moisture

Pro Tip: Add a layer of mulch, moss, or pebbles on top of the soil to help retain moisture longer.

Step 3: Move Plants Away from Direct Sunlight

Lower light = less evaporation.

  • Shift plants a few feet away from south- or west-facing windows
  • Keep them in bright, indirect light if possible
  • Close sheer curtains to reduce heat and light stress

This helps slow down water loss while you’re away.

Step 4: Create DIY Self-Watering Systems

These easy methods can keep your plants hydrated — no sitter required.

🧵 1. Wick Watering

  • Place one end of a cotton rope or thick string into a jar of water
  • Stick the other end several inches deep into the plant’s soil
  • The wick will draw water gradually

Perfect for medium plants or herbs.

🍼 2. Water Bottle Method

  • Fill a clean plastic bottle with water
  • Quickly flip it and push the neck into the soil (poke a hole in the cap for slower release)
  • Water seeps out slowly over time

Great for larger pots or longer trips.

🧽 3. Water Tray + Towel

  • Line a shallow tray with a folded towel
  • Soak the towel with water
  • Set potted plants on top — water wicks up through the drainage holes

Best for short trips and smaller plants.

🧺 4. Bathtub or Sink Setup

  • Line the tub or sink with a towel
  • Add 1–2 inches of water
  • Place plants with drainage holes on the towel (no standing water touching pots)
  • Cover with a shower curtain or sheet to trap humidity

Only use this for plants that like moisture and won’t get root rot.

Step 5: Boost Humidity Before You Go

Indoor air dries out quickly — especially with heating or AC running.

How to help:

  • Group plants together (they create a shared humid microclimate)
  • Place trays of water nearby
  • Mist the plants just before leaving (for those that like it)
  • Cover very sensitive plants with a clear plastic bag — poke holes for airflow

This works best for ferns, calatheas, and other humidity lovers.

Step 6: Consider a Plant Sitter (If You’ll Be Gone 7+ Days)

If you have high-maintenance or rare plants, a friend or neighbor can be a lifesaver.

Make it easy:

  • Leave written or printed instructions
  • Group plants in one location for convenience
  • Pre-measure water in bottles or cups
  • Offer a thank-you gift — maybe a cutting or plant of their own!

Step 7: Post-Trip Plant Care

Once you’re back:

  1. Check soil moisture — don’t water automatically
  2. Remove any yellow or wilted leaves
  3. Mist or rinse off dusty foliage
  4. Give plants a day or two to re-adjust before fertilizing
  5. Don’t panic if a few leaves dropped — it’s normal after a little stress

Peace of Mind for Plant Parents

Vacations are for relaxing — and with the right prep, you won’t have to worry about coming home to wilted, sad plants. From DIY water hacks to helpful sitters, your plant family can stay safe and green while you enjoy your time away.

Just a little planning = a happy reunion when you return. 🌿🧳✨

How to Identify and Fix Common Indoor Plant Problems

Your plant was looking great last week… but now the leaves are yellowing, drooping, or spotted. What happened? Don’t panic — plants are resilient, and most issues are fixable with a little observation and care.

This guide will help you quickly identify common signs of plant distress, understand the causes, and give you actionable fixes to bring your green friend back to health.

Why Plants Struggle Indoors

Indoor environments can be tough on plants — even when we try our best.

Common indoor stressors include:

  • Inconsistent light or watering
  • Poor drainage or overwatering
  • Low humidity
  • Pests or fungus
  • Nutrient deficiencies
  • Temperature swings or drafts

The good news? Plants are communicators. Their leaves, stems, and soil tell you everything — you just need to learn their language.

Symptom 1: Yellow Leaves

This is one of the most common issues plant parents face.

Possible causes:

  • Overwatering (most common)
  • Poor drainage or soggy soil
  • Old leaves dying off naturally
  • Low light or lack of nutrients

What to do:

  • Check soil moisture — if it’s soggy, let it dry before watering again
  • Ensure your pot has drainage holes
  • Remove yellow leaves only if they’re fully dead
  • Adjust light exposure — move closer to a window if needed
  • Consider a light dose of fertilizer if it’s a nutrient issue

Symptom 2: Drooping or Wilting Leaves

Limp, lifeless leaves can mean too much or too little water.

What to check:

  • If the soil is dry → Underwatered
  • If the soil is wet → Overwatered
  • If plant was recently moved → Could be transplant shock

Fix:

  • Water thoroughly if dry
  • Let it drain and dry out if soggy
  • Avoid big changes in temperature or location
  • Be patient — plants often bounce back within a few days

Symptom 3: Brown Leaf Tips or Edges

Crispy leaf tips are often a sign of low humidity, especially in tropical plants.

Other causes:

  • Over-fertilizing
  • Too much direct sunlight
  • Watering with tap water high in chlorine or fluoride

Fix:

  • Mist your plant (if it likes humidity) or use a humidifier
  • Use distilled or filtered water
  • Trim brown edges with clean scissors
  • Flush the soil monthly to prevent salt buildup

Symptom 4: Curling Leaves

When leaves curl inward or downward, your plant is protecting itself.

Causes:

  • Underwatering or overwatering
  • Low humidity
  • Too much direct sun
  • Cold drafts or heat stress

Fix:

  • Evaluate watering routine
  • Move out of harsh sunlight
  • Increase humidity
  • Keep away from vents or open windows

Symptom 5: Leaf Drop

Dropping leaves can be alarming, but it’s often the plant’s way of adjusting.

Causes:

  • Environmental change (new location, repotting)
  • Overwatering or underwatering
  • Drastic light or temperature shift
  • Seasonal dormancy

Fix:

  • Stay consistent with care
  • Don’t move your plant around too often
  • Water properly and keep in stable lighting
  • Allow some time for the plant to adapt

Symptom 6: Spots or Discoloration

Brown, black, or yellow spots can signal pests, fungi, or sunburn.

Causes:

  • Overwatering leading to fungal issues
  • Sunburn from direct light
  • Pest damage (check under leaves)
  • Nutrient deficiency

Fix:

  • Cut off affected leaves
  • Avoid misting at night
  • Use a natural fungicide or neem oil spray
  • Fertilize with a balanced formula if needed

Symptom 7: Mold on Soil or Leaves

A fuzzy white coating on top of the soil? That’s mold, often from too much moisture.

Causes:

  • Overwatering
  • Poor air circulation
  • Lack of sunlight

Fix:

  • Scrape off moldy topsoil and replace
  • Let soil dry between waterings
  • Improve airflow or light exposure
  • Water in the morning to allow drying time

Symptom 8: Pest Infestation

Common indoor plant pests include:

PestSignsFix
Spider MitesWebbing, speckled leavesNeem oil or insecticidal soap
MealybugsCottony white clustersRemove with alcohol-soaked cotton swab
Fungus GnatsTiny flies near soilLet soil dry, use sticky traps
AphidsClusters on stems or leavesRinse plant and apply neem oil

Tip: Isolate infested plants immediately to prevent spread!

General Fixes for All Problems

When in doubt, take these universal steps:

Inspect your plant weekly — under leaves, in soil, and at the base
Adjust light and watering based on the season
Use a moisture meter if you’re unsure when to water
Stick to one change at a time — too many adjustments can stress the plant
Be patient — recovery takes days or even weeks

Your Plants Are Speaking — Listen Closely

Every yellow tip, drooping leaf, or curling vine is your plant’s way of asking for help. With a little observation and care, most problems are easy to fix — and your plant will bounce back stronger.

Remember: perfection isn’t the goal. Growth is. And sometimes, the best plant parents are the ones who learn through the leaves.

7 Tips to Keep Your Garden Always Green

Having a garden that stays green year-round is the dream of many nature lovers. A vibrant space full of life and color not only enhances the environment but also provides well-being and a deep connection with the natural world. However, maintaining a garden in pristine condition requires dedication, planning, and knowledge.

Among the most common challenges are climate changes, excessive water usage, pests, and soil degradation. But with the right techniques and a sustainable approach, these challenges can become opportunities to create a green space that remains healthy all year long.

In this article, we will explore seven essential tips to help you keep your garden always green. From selecting the ideal plants to efficient watering practices and regular fertilization, you will discover practical and accessible solutions to care for your garden effectively. Now is the time to revitalize your green space and ensure it remains a constant source of beauty and inspiration.

Ready to get your hands dirty and transform your garden? Let’s begin!

1. Choose the Right Plants: The Foundation for a Green Garden

Choosing the right plants is one of the first and most important steps in ensuring a garden that stays green. Opting for species that adapt well to your region’s climate and soil conditions significantly reduces the need for constant maintenance and additional resources like water and fertilizers.

  • Native Plants: These species are naturally suited to the local ecosystem, making them more resistant to pests and climatic variations. Additionally, they help promote biodiversity.
  • Perennial Plants: Unlike annuals, which need to be replanted each cycle, perennials provide constant greenery and require less intervention.
  • Drought-Resistant Species: For areas with water limitations, succulents, cacti, and other drought-tolerant plants are ideal choices.

Investing time in selecting the right plants not only simplifies future care but also ensures a healthier and visually appealing garden.

2. Water Wisely: The Art of Efficient Water Use

Efficient watering is essential to keeping your garden green, especially during periods of intense heat or drought. Using water responsibly not only preserves this precious resource but also prevents issues like root rot or fungal proliferation.

  • Water at the Right Time: Prefer watering early in the morning or late in the afternoon when evaporation is lower, and plants can absorb water more efficiently.
  • Use Irrigation Systems: Methods like drip irrigation deliver water directly to the roots, reducing waste and ensuring uniform hydration.
  • Harvest Rainwater: Install barrels or cisterns to collect rainwater, which can be sustainably reused in the garden.

Watering wisely ensures your plants receive the right amount of water, keeping them healthy while reducing unnecessary consumption.

3. Regular Fertilization: Nutrition for Healthy Growth

Proper fertilization is essential to maintaining a vibrant and healthy garden. Plants depend on specific nutrients to grow, bloom, and resist diseases. Regular replenishment of these nutrients ensures the soil remains fertile and productive.

  • Organic Fertilizers: Examples include homemade compost (fruit and vegetable scraps and peels), animal manure (chicken or cow), and vermicompost, which improve soil quality and stimulate healthy plant growth.
  • Chemical Fertilizers: When necessary, choose fertilizers specific to the plant type or growth stage, such as nitrogen-rich formulas for foliage or phosphorus for flowering and fruiting.
  • Alternative Natural Fertilizers: Bone meal, castor bean meal, and rock dust are eco-friendly alternatives rich in soil nutrients.
  • Seasonal Fertilization: Plan fertilizer applications according to the seasons and plant needs. In spring, for example, nitrogen is essential to promote early growth.
  • Avoid Overfertilization: Overdoing fertilization can cause nutritional imbalances and harm plants. Follow application recommendations to avoid problems.

With regular and balanced fertilization, you create the ideal conditions for your garden to thrive throughout the year.

4. Care for the Soil: A Green Garden Starts from Below

Soil is the foundation of any healthy garden. Ensuring it is well-cared-for is essential for plants to grow strong and green. Nutrient-rich and well-structured soil provides the necessary conditions for root development and efficient absorption of water and nutrients.

  • Aeration: Use tools like forks and aerators to loosen compacted soil, allowing air to circulate and roots to breathe better.
  • Mulching: Add layers of straw, dry leaves, or bark to the soil. This helps retain moisture, regulate soil temperature, and reduce weed growth.
  • Composting: Enriching soil with organic compost is an effective way to improve its quality. Food scraps, prunings, and decomposed organic materials provide essential nutrients and boost soil fertility.
  • Soil Testing: Before planting, analyze the soil to identify deficiencies and adjust nutrient levels with fertilizers or amendments.

Maintaining healthy soil not only promotes a green and vibrant garden but also reduces the need for chemical products and other artificial interventions, creating a balanced and sustainable ecosystem.

5. Sustainable Pest Control

A healthy garden attracts insects and small animals, but not all of them are beneficial. Controlling pests sustainably is essential to protect your plants without disrupting the ecosystem’s balance.

  • Repellent Plants: Certain species like citronella, basil, and rosemary naturally repel pests.
  • Garlic Spray: Prepare a natural insecticide by boiling two chopped garlic cloves in a liter of water. After cooling, strain the liquid and add a few drops of biodegradable detergent. Spray this solution on affected plants to deter aphids, mealybugs, and other pests.
  • Natural Predators: Encourage the presence of ladybugs, frogs, and birds in the garden, as they feed on pests like aphids and caterpillars. Create natural shelters like shrubs and small water features to attract them.
  • Crop Rotation: Alternate the species planted each season. For example, plant legumes in one area one year and grasses the next. This prevents specific pests from establishing and reduces soil nutrient depletion.
  • Additional Homemade Solutions: Beyond garlic spray, use mixtures made with chili or diluted neutral soap for targeted pest control.

With sustainable practices and some creativity, you protect your plants while contributing to a more balanced and healthy environment.

6. Strategic Pruning: The Key to Continuous Renewal

Pruning is an essential practice for keeping plants healthy, stimulating growth, and ensuring the garden remains visually appealing. Done strategically, pruning also helps prevent diseases and improve air circulation among plants.

  • Remove Dead and Diseased Branches: Regularly inspect plants and remove parts showing signs of disease or damage. This prevents problems from spreading.
  • Training Prunes: Shape young trees and shrubs to encourage balanced and structurally sound growth.
  • Deadheading: Remove spent flowers to stimulate continuous blooming and maintain the garden’s vibrant appearance.
  • Sharp and Clean Tools: Use sharp and sterilized pruning shears to avoid injuring plants and reduce the risk of infection.

Strategic pruning is a powerful tool for continuously renewing your garden, keeping it green and full of life.

7. Embrace Sustainability: Best Practices to Conserve Resources

Sustainable gardening goes beyond plant care; it involves conscious practices that benefit the environment and reduce natural resource waste.

  • Reuse Materials: Repurpose old containers as pots, turn used tires into creative planters, and reuse wood scraps to define garden areas.
  • Rainwater Harvesting: Install systems to collect rainwater, reducing dependence on treated water.
  • Minimize Chemical Use: Opt for natural fertilizers and pest control solutions to minimize impacts on soil and local fauna.
  • Layered Planting: Use layered planting methods to optimize space and create microclimates that benefit various species.
  • Support Biodiversity: Plant trees, shrubs, and flowers that provide shelter and food for pollinators, birds, and small animals.

By integrating sustainable practices into your garden, you contribute to the planet’s health while creating a more harmonious, efficient, and inspiring space.

Cultivate a Connection with Nature

Gardening is much more than a practical activity; it is a way to reconnect with nature and an invitation to balance between humans and the environment. By following the tips presented in this article, you can transform any green space into an oasis of beauty, sustainability, and harmony.

When you care for your garden, you also care for the planet. Choosing suitable plants, adopting sustainable practices, and promoting biodiversity are actions that make a difference not only in your backyard but also in the broader ecosystem. Every choice counts and contributes to a greener future.

In addition to environmental benefits, cultivating a garden brings emotional well-being. Contact with the earth, the pleasure of seeing plants flourish, and the time dedicated to this activity are powerful ways to reduce stress and increase personal satisfaction.

Now that you know the strategies to keep your garden green year-round, it’s time to act. Start small, try new techniques, and observe the positive impact these changes bring to your life and the environment.

So, roll up your sleeves, unleash your creativity, and get inspired to cultivate a space that serves as both a sanctuary and a celebration of nature. Your garden can be the first step toward a more sustainable world.

How to Care for Succulents Indoors

Succulents have taken the interior design world by storm, and it’s easy to see why. With their sculptural shapes, wide variety of colors, and effortless charm, these compact plants bring life to any space. Best of all? They’re some of the easiest plants to care for — if you know what they like.

In this complete guide, you’ll learn how to successfully grow and care for succulents indoors, no matter your experience level.

Why Succulents Are Great for Indoor Spaces

Succulents are native to dry, arid climates and have evolved to store water in their thick, fleshy leaves. This makes them well-suited to indoor conditions, especially for busy plant parents or those new to plant care.

Here’s what makes succulents ideal for homes:

  • Low water needs — perfect for people who forget to water
  • Compact size — fits on desks, windowsills, and shelves
  • Variety of textures and colors — adds visual interest
  • Slow-growing — low-maintenance and neat

Choosing the Right Succulent for Indoors

Not all succulents thrive equally indoors. While many love the sun, some are more adaptable to lower light. Here are a few tried-and-true indoor-friendly varieties:

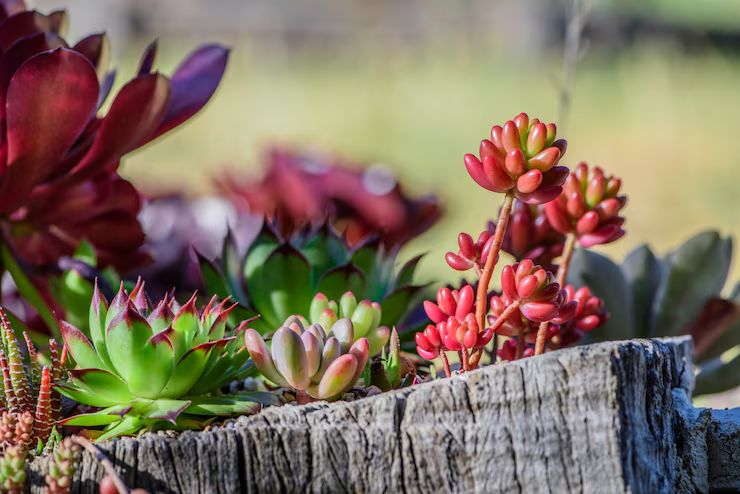
  • Echeveria: Rosette-shaped, pastel-colored, and elegant
  • Haworthia: Small, spiky, and great for low light conditions
  • Jade Plant (Crassula ovata): A symbol of prosperity, with thick, tree-like growth
  • Aloe Vera: A dual-purpose plant with skin-healing properties
  • Zebra Plant (Haworthiopsis fasciata): Compact with white stripes — ideal for small spaces

Light: The #1 Factor for Succulent Success

Succulents crave light — and lots of it. But when grown indoors, they often don’t get enough, which leads to a process called “stretching” (etiolation), where the plant grows tall and leggy in search of more light.

What to do:

  • Place your succulents near a south- or east-facing window for the best results.
  • If natural light is limited, consider using a grow light — especially during the winter months.
  • Rotate the pot regularly to ensure even light exposure.

Pro Tip: A healthy succulent is compact and symmetrical. If yours is stretching, it needs more light!

Watering Succulents Indoors: Less Is More

Overwatering is the number one killer of indoor succulents. Because their roots are adapted for drought, too much moisture leads to rot.

How to water properly:

  • Use the “soak and dry” method: water thoroughly, then wait until the soil is completely dry before watering again.
  • Stick your finger into the soil. If it’s dry 1–2 inches deep, it’s time to water.
  • Avoid watering the leaves — always pour water directly into the soil.

Signs of overwatering:

  • Mushy or translucent leaves
  • Black spots near the base
  • Leaf drop

Signs of underwatering:

  • Wrinkled or shriveled leaves
  • Slower growth
  • Leaves becoming papery

Soil and Drainage: Your Succulent’s Foundation

Succulents need fast-draining soil to mimic their natural environment. Regular potting soil holds too much moisture and can cause root rot.

Best options:

  • Use a succulent or cactus-specific mix, available at most garden centers.
  • Or, make your own: combine 2 parts potting soil + 1 part coarse sand + 1 part perlite or pumice.

Always choose a pot with drainage holes — this is crucial for succulent health. Decorative pots without drainage should only be used with a plastic insert inside.

Temperature and Humidity: Warm and Dry Is Best

Succulents are desert plants — they don’t like high humidity or freezing temperatures.

Ideal conditions:

  • Temperature: Between 60°F and 80°F (15°C to 27°C)
  • Humidity: Low (they prefer dry air)
  • Keep away from cold drafts, heaters, and air conditioners

In winter, many succulents go dormant. Water less frequently during this time.

Fertilizing: Light Feed, Big Results

Succulents don’t need a lot of fertilizer, but a small boost can help them grow stronger and more vibrant.

  • Use a balanced, diluted liquid fertilizer (such as 10-10-10) once a month during the growing season (spring and summer).
  • Avoid fertilizing in the fall and winter when the plant is resting.

Too much fertilizer can cause leggy growth and weaken the plant.

Potting and Repotting

Succulents don’t need to be repotted often, but when they outgrow their container or the soil becomes compacted, it’s time to move them.

When to repot:

  • Roots are growing out of the drainage holes
  • Water isn’t soaking in properly
  • Soil smells musty or moldy

How to repot:

  1. Gently remove the plant from the old pot.
  2. Shake off excess soil and trim away any dead roots.
  3. Place it in fresh, dry succulent soil.
  4. Wait 3–5 days before watering to allow roots to heal.

Styling Succulents in Your Home

Succulents are so easy to decorate with! Here are a few ways to display them:

  • Mini succulent gardens in shallow bowls
  • Terrariums with rocks, moss, and sand (just make sure they’re open for airflow)
  • Macrame hanging planters for small trailing varieties
  • Succulent shelf displays with different sizes and colors
  • Desk decor — perfect for work-from-home setups

Pro Tip: Combine succulents with decorative stones or pebbles on top of the soil for a polished look.

Common Mistakes to Avoid

  • Overwatering (again — it’s worth repeating!)
  • Using the wrong soil or pot without drainage
  • Keeping them in low light for too long
  • Letting them sit in water
  • Not removing dead leaves from the base (which can attract pests)

Resilient Beauty, One Leaf at a Time

Succulents are more than just trendy home accents — they’re resilient, beautiful, and surprisingly easy to care for. By understanding their basic needs and adapting your care routine, you’ll enjoy healthy, vibrant plants that last for years.

So grab a sunny windowsill, pick your favorite pot, and start building your indoor succulent haven.

Flowers Every Day: Beauty That Never Fades

Flowers are one of nature’s wonders that captivate the world with their colors, shapes, and fragrances. They have the power to transform spaces and bring joy to daily life. But what if you could enjoy this beauty all year round, without depending on the seasons? Some flowers have the ability to bloom continuously, adding a special touch to your home, garden, or balcony, regardless of the climate. In this article, we will explore flowers that bloom year-round, the benefits of growing them, and how to keep them healthy. Discover how nature can be your ally in creating an inspiring and vibrant environment.

Why Choose Flowers That Bloom All Year Round?

Growing flowers that bloom all year round goes far beyond aesthetics. These plants offer a range of benefits that make their presence indispensable:

  1. Constant Beauty: They ensure a touch of color and vitality to your space throughout the year.
  2. Practicality: Ideal for those who want a garden or decoration always in bloom, without frequent plant replacement.
  3. Connection with Nature: Caring for flowers promotes moments of relaxation and well-being.
  4. Enhance the Environment: They beautify residential or commercial spaces, increasing their attractiveness.
  5. Sustainability: Many perennial flowers require fewer resources to stay healthy, contributing to conscious gardening practices.

The Secrets of Perennial Flowers

Perennial flowers are special for their ability to bloom continuously. Unlike seasonal flowers, which have limited flowering cycles, these plants adapt better to their environment and have unique characteristics:

  • Resilience: They are more robust and capable of enduring different climatic conditions.
  • Long Life Cycle: Most of them bloom for years with proper care.
  • Low Maintenance: They require fewer interventions compared to seasonal flowers, such as replacement and replanting.

Top 10 Flowers That Bloom All Year Round

Here is a selection of incredible flowers that can be cultivated throughout all seasons:

  1. Echeveria (Stone Rose): This succulent is perfect for indoor and outdoor environments. Highly drought-resistant, it requires sparse watering. Its rosette-shaped leaves create a charming ornamental effect, ideal for minimalist gardens.
  2. Ixora: Also known as flame of the woods, this tropical plant produces clusters of vibrant flowers. Its colors range from red to yellow and orange, making it excellent for hedges or borders.
  3. Hibiscus: Known for its large and showy flowers, the hibiscus is an icon in tropical regions. Besides beautifying, it is famous for its medicinal properties, such as tea that aids digestion.
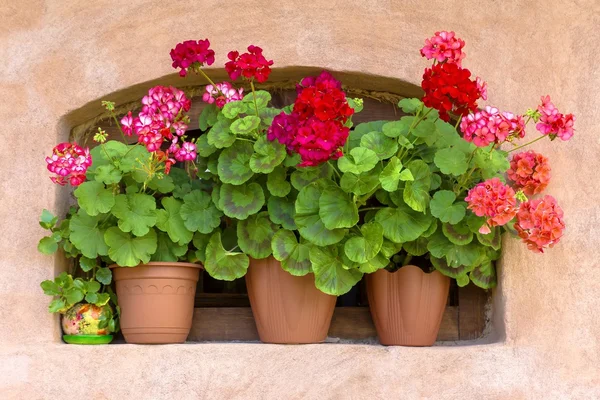
  4. Geranium: Available in a wide range of colors, the geranium is versatile and can be grown in pots or flower beds. It is also a natural insect repellent, especially for mosquitoes.
  5. Anthurium: With shiny, waxy flowers that can last for weeks, it is a sophisticated choice for indoor decorations. It adapts well to low-light environments.
  6. Verbena: A plant that blooms abundantly and attracts butterflies. It is ideal for hanging planters, creating cascades of colorful flowers.
  7. Vinca: Popular for its resistance and low maintenance, vinca is an excellent option for low-water gardens.
  8. Star Jasmine: In addition to its delicate flowers, it exudes an unmistakable fragrance. Perfect for covering trellises, creating a romantic and cozy effect.
  9. Bougainvillea: Famous for its colorful bracts that look like flowers. Resistant and easy to grow, it is one of the favorites for creating hedges.
  10. Lantana: Its small multicolored flowers are heat-resistant and attract pollinators like bees and butterflies. Ideal for borders or rustic gardens.

How to Plan a Garden or Decor with Perennial Flowers

Creating a space with perennial flowers requires planning and creativity. Here are some tips to help:

  • Choose the Space: Identify areas with the most sunlight exposure and protection against strong winds.
  • Mix Species: Combine flowers of different sizes, colors, and textures to create a harmonious visual effect.
  • Containers and Pots: Perennial flowers can also be grown in pots, adding beauty to balconies and interiors.

Common Mistakes When Growing Perennial Flowers (And How to Avoid Them)

  • Overwatering: Too much water can cause root rot.
  • Improper Pruning: Excessive cutting can harm growth.
  • Lack of Sunlight: Many perennial flowers need direct sunlight to bloom.

Sustainable Tips for a Perfect Year-Round Flower Garden

  • Save Water: Use efficient irrigation systems or reuse rainwater.
  • Natural Fertilizers: Opt for compost to enrich the soil.
  • Natural Pest Control: Plant aromatic herbs like basil and mint that repel insects.

Flowers That Match Your Style: Find Your Floral Identity

Choosing the right flowers depends on your style and the environment you want to create:

  • Minimalist: Go for anthuriums or stone roses.
  • Vibrant: Ixoras, hibiscus, and lantanas add color and energy.
  • Romantic: Star jasmine and geraniums are perfect for this style.

Flowers That Inspire and Transform

Having a blooming and pleasant garden goes far beyond aesthetics; it plays a fundamental role in mental health and well-being. The presence of flowers can reduce stress levels, promoting a sense of calm and tranquility. Studies show that contact with nature stimulates serotonin production, improving mood and helping combat anxiety and depression.

Observing a garden full of colors and life is also a form of mindfulness. This moment of connection with nature helps focus the mind on the present, driving away negative thoughts and promoting gratitude for the small wonders of everyday life.

Additionally, tending to a garden can be a therapeutic form of exercise. Gardening promotes physical movement, such as digging, planting, and watering, contributing to cardiovascular health and releasing endorphins, known as happiness hormones.

Another significant benefit is the sense of accomplishment. Seeing something flourish that you cultivated with dedication brings a profound sense of satisfaction and purpose. This process can also be shared with family, strengthening bonds and creating special memories.

Therefore, a blooming garden is more than a decorative space; it is a source of health, happiness, and inspiration. Cultivating flowers that bloom year-round is a way to enrich your life with color, fragrance, and serenity, constantly reminding us of nature’s beauty and renewing power.

Creating your secret garden

Amid increasingly urban landscapes dominated by concrete and the hustle of daily life, the creation of green spaces has become an essential need. Gardens not only transform environments but also offer an intimate connection with nature, improving both mental and physical well-being. However, for many, a lack of space seems like an insurmountable obstacle. After all, how can one create a garden in a small apartment, a narrow balcony, or a modest backyard?

The truth is that small spaces can become the perfect setting for a vibrant, personality-filled garden. With creativity, planning, and the right choices, it’s possible to transform any corner into a green oasis. This detailed guide will not only show you how this can be done but also inspire you to take the first step toward your own garden. After all, nature doesn’t need much space to thrive—just care and dedication.

In the following sections, we will explore everything from the benefits of cultivating a garden to the most effective practices for creating and maintaining a green space in limited areas. Whether you are a plant enthusiast or a curious beginner, this article has everything you need to turn your dream of a garden into reality. Let’s begin!

Benefits of Having a Garden in Small Spaces

Creating a garden in small spaces goes beyond improving the aesthetics of the environment. The benefits are diverse and encompass both personal and environmental aspects. Here are some of the main ones:

Improved Air Quality and Environmental Impact

Plants have the power to purify the air, removing toxins and releasing oxygen. In urban spaces, where pollution is a constant concern, even a small garden can make a difference. Additionally, cultivating plants contributes to local biodiversity by providing shelter and food for insects and small animals.

Reduced Stress and Connection with Nature

Studies show that contact with nature has positive effects on mental health, helping reduce stress and anxiety. Even in small spaces, a garden can become a tranquil retreat for relaxation and recharging. Caring for plants can also be a therapeutic activity, promoting feelings of achievement and well-being.

Enhanced Aesthetic and Emotional Value of the Home

A well-planned garden transforms any environment, making it more welcoming and harmonious. Furthermore, the presence of plants conveys a sense of freshness and vitality, creating a pleasant atmosphere for residents and visitors. Small green spaces can also become sites for meaningful and affectionate memories.

In the following sections, we will discuss how to plan and implement your garden efficiently, as well as explore creative ideas to make the most of every inch of available space.

Planning Your Garden: From Dream to Reality

Creating a garden in a small space requires good planning. Before starting, it’s essential to assess the conditions of the environment and define clear goals for your green space. Here are the main steps to turn your dream into reality:

Assessing Available Space

Carefully examine the area where the garden will be created. Ask yourself: Is it an indoor or outdoor space? Does it receive direct or indirect sunlight? What about ventilation? This information is crucial to determining the types of plants and structures that will work best.

Considering Light, Ventilation, and Soil Type

Light is one of the most important factors for plant growth. Identify areas with the most natural light and choose plants that adapt to the local conditions. Additionally, ensure good air circulation and evaluate whether the soil is suitable for planting or if pots and substrates will be needed.

Choosing the Garden Style

Define the style that best suits your space and personality. Examples include:

  • Minimalist: Focused on clean lines and few elements.
  • Tropical: Featuring lush, vibrant plants.
  • Vertical: Ideal for optimizing limited areas.

Having a defined style helps guide your choices, from plant types to decorative elements that will make up the space.

With these initial steps, you’ll be ready to start creating your dream garden, making the most of every inch of available space. In the next section, we will explore creative ideas to further inspire your green journey.

Creative Ideas for Compact Gardens

Transforming small spaces into vibrant gardens is a matter of creativity and planning. Here are some ideas to help you make the most of every inch of your environment:

Vertical Gardens

Vertical gardens are incredible solutions for those with walls or fences available. You can use:

  • Modular Panels: Ready-made structures for attaching plants.
  • Wooden Supports: Like pallets or trellises to hang pots.
  • Fabric Pockets: Ideal for smaller plants and herbs. These systems not only save space but also create a striking, modern aesthetic.

Using Pots and Containers

Planting in pots is a versatile option for small spaces. Use creative containers such as:

  • Repurposed cans
  • Wooden boxes
  • Colorful ceramics Mixing pot sizes and shapes adds dimension and visual interest to your garden.

Cultivating on Ladders and Shelves

A wooden ladder or wall-mounted shelves can be used to organize pots at different heights. This technique creates a “layered” effect, optimizing vertical space.

Urban Mini-Gardens

Even in reduced areas, you can grow herbs, spices, and even small vegetables. Use pots, planters, or small containers to plant rosemary, basil, chives, and other species useful in the kitchen. Besides being practical, these gardens add a functional touch to your space.

Multifunctional Elements

Furniture and accessories can serve multiple purposes. Benches with space for plants at the base or tables with built-in gardens are great examples of maximizing functionality without compromising style.

These ideas are just the beginning. The most important thing is to adapt the suggestions to your space and personal taste. In the next section, we’ll discuss how to care for and maintain your garden to ensure it remains healthy and beautiful over time.

Essential Care for Maintaining a Healthy Garden

Creating a garden is just the beginning. To keep it beautiful and healthy, regular attention and proper maintenance practices are necessary. Here are the essential care tips:

Proper Watering

Each plant has specific water needs. Overwatering or underwatering can harm growth. To avoid problems:

  • Check the Soil: Verify moisture before watering.
  • Use Drainage Containers: Pots with holes prevent water accumulation.
  • Adapt to the Climate: On hot days, watering may be needed more frequently.

Fertilization and Nutrients

Plants need nutrients to grow healthily. Use organic or chemical fertilizers according to each species’ specific needs. Remember to:

  • Fertilize Regularly: Typically every 15 days or once a month.
  • Avoid Over-Fertilization: This can have the opposite effect and harm the plant.

Pruning and Cleaning

Pruning helps maintain the garden’s shape and health by removing dead leaves and stimulating new growth. Additionally, cleaning the space prevents pests and diseases.

Pest Control

Even in small gardens, pests can appear. To prevent them:

  • Inspect Plants Regularly: Look for signs of insects or fungi.
  • Use Natural Solutions: Like neem oil or insecticidal soap.
  • Keep the Area Clean: Accumulated organic waste can attract pests.

Plant Rotation and Renewal

Some plants may need replacement over time. Rotation also prevents soil depletion and keeps the garden consistently vibrant and thriving.

With these care tips, your garden will have a better chance of prospering, offering a pleasant and lively space. In the next section, we’ll share inspirations and examples of small gardens to motivate you to continue your green project.

Inspirations for Small Gardens

To help you put the finishing touches on your project, here are some inspiring ideas showing how creativity can transform any corner into a green haven:

Balcony Gardens

A small balcony can become a cozy and green space. Try using:

  • Hanging Pots: Create a light effect and optimize space.
  • Folding Chairs: To create a relaxing corner.
  • String Lights: To highlight your plants at night.

Window Gardens

Window sills and grates can serve as bases for small planters. This option is ideal for those with little outdoor space and who want to grow flowers or aromatic herbs.

Green Reading Corners

Combine plants with comfortable furniture, such as an armchair or rug, creating the perfect spot for reading and relaxation. Plants of different heights help create a welcoming atmosphere.

Minimalist Gardens

With just a few plants and decorative objects, you can create an elegant and simple environment. Choose low-maintenance species like succulents and cacti for a modern look.

Functional Gardens

Turn your green space into something functional, such as a spice garden or aromatic garden with lavender and herbs. Besides being beautiful, it will be useful in daily life.

These examples show that regardless of the space available, it’s possible to create a charming and practical garden. Find the inspiration that best suits you and start bringing your green haven to life.

Get to work!

Throughout this article, we’ve explored the importance of creating a garden in small spaces, from the benefits it can bring to physical and mental health to the techniques and inspirations to make it a reality. However, more than just a decorative project, gardening is an act of care, patience, and connection with the natural world.

Cultivating plants, even in limited areas, offers a pause from the rush of modern life. It’s an opportunity to slow down, reconnect with yourself and the environment. Studies have already proven that contact with nature reduces stress, improves mood, and promotes a sense of well-being. Each blooming flower and growing herb is a reminder that life thrives even under challenging conditions, given care and attention.

Whether on a windowsill, apartment balcony, or small backyard, creating a garden is about welcoming beauty and serenity into your routine. It’s also an invitation to reflectn the positive impact we can have, not just in our homes but also on the surrounding environment. Start today, transform your space, and discover how gardening can bring more color, joy, and balance to your life. Green is life, and life deserves to flourish.