
Repotting might sound stressful — especially if you’re worried about hurting your plant. But with a little care, the process can be simple, stress-free, and even good for your green buddy.
In this article, you’ll learn how to repot a plant without damaging its roots, the best timing, tools, and techniques, plus how to help your plant thrive after its big move.
Why Repotting Matters
Repotting gives your plant the room and resources it needs to grow.
Key reasons to repot:
- 🌱 Roots are outgrowing the pot (rootbound)
- 🌱 Soil has lost nutrients or isn’t draining well
- 🌱 You want to upgrade the look or size of the planter
- 🌱 There’s a pest or mold issue in the current soil
Most plants need repotting every 12–24 months, depending on their growth rate and environment.
Signs Your Plant Needs a New Home
Look for these signals:
- Roots coming out of the drainage hole
- Water sits on top of the soil without soaking in
- Soil dries out very quickly
- Stunted growth or toppling plant
- You haven’t changed the soil in over 2 years
What You’ll Need
🧰 Supplies checklist:
- New pot (1–2 inches larger in diameter)
- Fresh potting mix (choose the right type for your plant)
- A trowel or spoon
- Gardening gloves (optional)
- Scissors or pruners (for trimming roots if necessary)
- Newspaper or a tarp (to keep things tidy)
- Watering can or spray bottle
Step-by-Step: How to Repot Gently
🪴 Step 1: Water the Plant the Day Before
Moist soil makes the roots easier to work with and helps reduce transplant shock.
🪴 Step 2: Choose the Right Pot
Pick a container that’s slightly larger, with proper drainage. Avoid going too big too fast — too much soil can lead to water retention and root rot.
Tip: Use a pot that’s only about 1–2 inches wider than the current one.
🪴 Step 3: Loosen the Plant Gently
Turn the plant sideways, support the base, and tap or squeeze the pot to loosen the root ball.
If it’s stuck:
- Run a butter knife around the edges
- Tap the bottom or roll the pot gently on a hard surface
Be patient — never yank!
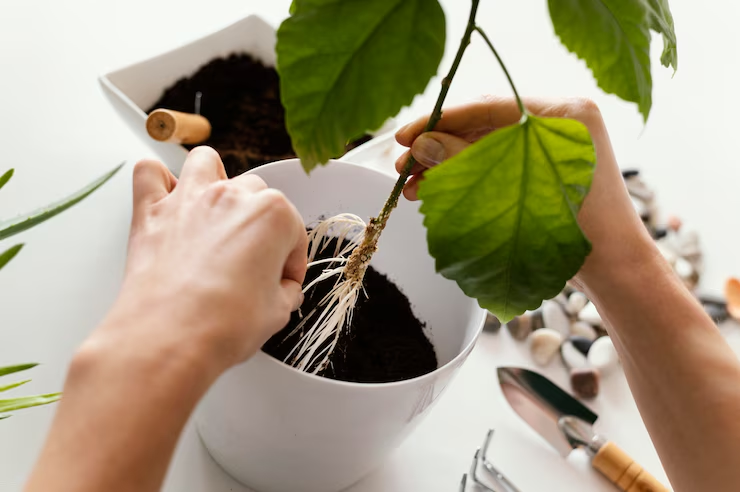
🪴 Step 4: Examine and Loosen the Roots
Once out, inspect the root system:
- White or tan roots = healthy
- Black, mushy, or smelly roots = rot — trim those away
If the roots are wrapped tightly in circles (rootbound), gently loosen or “tease” them outward with your fingers.
Optional: Trim 10–15% of overly long or circling roots to encourage fresh growth.
🪴 Step 5: Prep the New Pot
Add a layer of fresh soil at the bottom — just enough so the plant sits at the same height as it was in the old pot.
You don’t want it sinking too low or sitting too high.
🪴 Step 6: Place the Plant In
Center the plant in the new pot. Hold it steady as you begin filling soil around the sides. Lightly press the soil down — not too tight — to remove air pockets.
Leave about ½ inch at the top for easy watering.
🪴 Step 7: Water Thoroughly
Give your plant a nice soak to help the soil settle and reduce transplant shock. Wait until excess water drains out the bottom.
If the soil level drops after watering, just top it off lightly.
Aftercare: Helping Your Plant Settle In
Repotting can be a little shocking — but your plant will bounce back with the right care.
✅ Post-repotting tips:
- Keep the plant in indirect light for a few days (no harsh sun)
- Avoid fertilizing for 2–4 weeks (let roots adjust)
- Monitor water needs — repotted soil might hold more moisture
- Watch for wilting or drooping — this is normal for a few days
- Be patient — new growth will come!
Special Notes for Sensitive Plants
Some plants handle repotting better than others. Here’s how to approach a few:
| Plant Type | Repotting Tip |
| Succulents & Cacti | Let roots dry for a day before watering again |
| Ferns | Avoid disturbing roots too much — be gentle |
| Orchids | Use orchid bark, not regular soil, and trim dead roots |
| Fiddle Leaf Fig | Needs stability — stake if top-heavy after repotting |
| Snake Plant | Water very lightly after repotting — prefers dryness |
A Fresh Start = Healthy Growth
Repotting might feel intimidating, but it’s one of the best things you can do to rejuvenate and refresh your plant’s life. As long as you’re gentle, patient, and intentional, your plant will not only survive the move — it’ll thrive in its new home.
So go ahead. Give your green friend some fresh space and watch the growth unfold. 🌿💚