How to Safely Clean Indoor Plant Leaves (Without Damaging Them)

Dusty leaves aren’t just a visual bummer — they also block light, slow down photosynthesis, and invite pests. Just like windows need cleaning to let in sunshine, so do your plant’s leaves.

In this guide, you’ll learn how to clean your plants the right way — based on their leaf type — using gentle, effective methods that keep them shiny, healthy, and photosynthesizing like pros.

Why Clean Your Plants’ Leaves?

Over time, leaves collect:

  • 🧹 Dust and lint
  • 🕷️ Pests and webbing
  • 🦠 Mold spores
  • 🌫️ Pollution and cooking oils
  • 💧 Water spots and mineral buildup

This buildup blocks light and clogs the plant’s natural pores (stomata), which reduces airflow and hinders healthy growth.

Clean leaves = stronger, happier plants.

How Often Should You Clean Plant Leaves?

Every 2–4 weeks is ideal for most homes
✅ More often if your space is dusty or near a busy road
✅ After pest issues or treatment sprays
✅ Before applying any fertilizer or leaf shine

Make it part of your plant care routine — like a mini wellness check.

Step-by-Step: The Basic Leaf Cleaning Method

🧴 What you’ll need:

  • Soft microfiber cloth or sponge
  • Bowl of lukewarm water
  • Optional: mild natural soap (like castile soap)
  • Spray bottle (for misting)
  • Small soft brush or toothbrush (for textured leaves)
  • Cotton swabs (for hard-to-reach spots)

🍃 1. Dust First

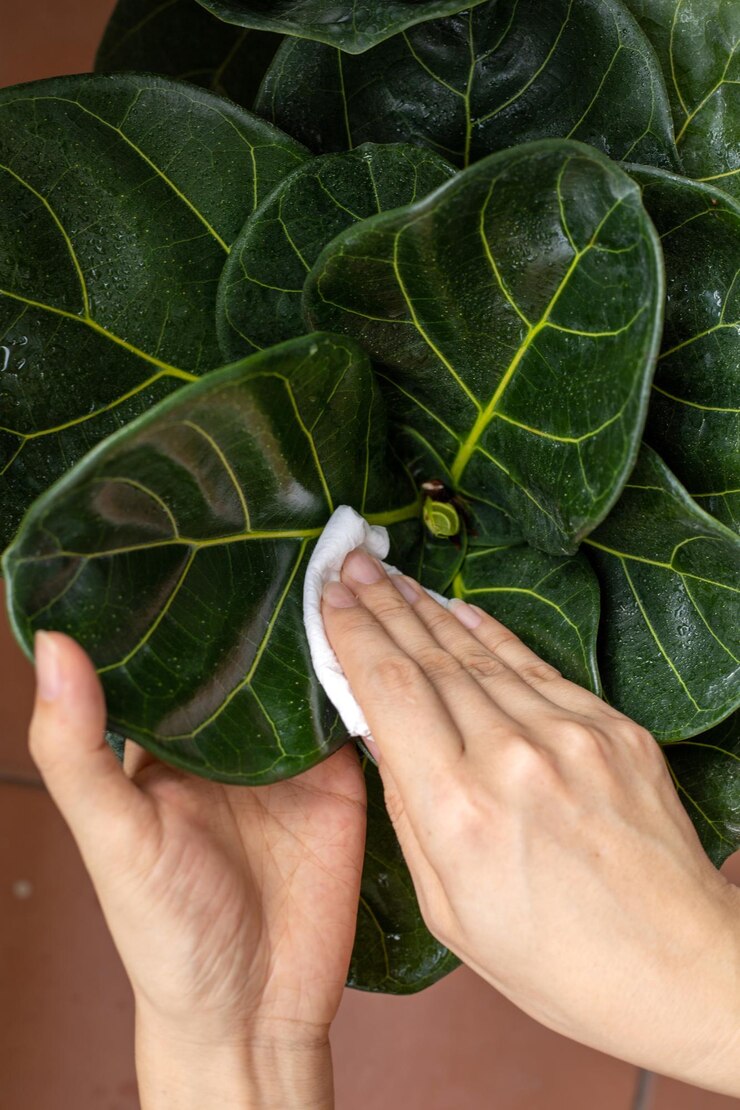
Use a dry microfiber cloth to gently wipe each leaf from base to tip. Always support the back of the leaf with your hand to avoid snapping it.

💦 2. Wipe With Water

Dampen the cloth or sponge and gently wipe both sides of each leaf. For small-leaved plants, use a soft makeup brush or spray-mist and shake gently.

Optional: Add 1–2 drops of mild soap to a liter of water if leaves are sticky or grimy.

🧽 3. Clean the Stems and Pots

Don’t forget the leaf bases, stems, and the outer pot — they collect dust too. Wipe with a damp cloth or brush.

🌬️ 4. Let It Dry

Place the plant in indirect light while drying. Avoid bright sun until the leaves are completely dry to prevent sunburn.

Special Cleaning Methods by Leaf Type

Not all leaves are created equal — here’s how to clean them based on texture and structure:

🌱 Smooth, broad leaves (Monstera, Fiddle Leaf Fig, Peace Lily)

  • Use soft cloth or sponge with water
  • Great candidates for the shower rinse method

🌿 Small or thin leaves (Ferns, Herbs, Spider Plants)

  • Mist with a spray bottle
  • Gently shake to dislodge dust
  • Use soft makeup brush for stubborn particles

🌵 Succulents & Cacti

  • Use a dry soft brush or paintbrush
  • Avoid misting — too much moisture causes rot
  • Gently blow dust away with a puff of air if needed

🌸 Hairy leaves (African Violets, Pilea, Begonias)

  • Do not wipe or get too wet — they’re prone to leaf damage
  • Use a dry, soft brush or cotton swab to dust gently
  • Use lukewarm air (like a hairdryer on cool setting) if needed

Can You Shower Your Plants?

Yes — for most tropicals and big leafy friends!

🚿 How to do it:

  • Use a gentle, lukewarm spray in the sink, tub, or shower
  • Let water run over leaves for 30–60 seconds
  • Let drain completely before returning to the planter spot
  • Avoid doing this too often — every 4–6 weeks is enough

Avoid showering:

  • Cacti and succulents
  • Hairy-leaved plants
  • Anything freshly fertilized or just repotted

Should You Use Leaf Shine Products?

Generally: no.

Leaf shine sprays may look pretty at first, but they often:

  • Block the leaf’s pores
  • Attract dust more quickly
  • Contain chemicals that irritate plants

Better alternatives:

  • Clean water
  • Diluted neem oil (bonus: pest protection!)
  • Aloe vera juice + water spray

Pest Prevention While You Clean

Leaf cleaning is the perfect time to inspect for trouble.

🔍 Check for:

  • Sticky residue (sign of aphids or scale)
  • Webbing (spider mites)
  • Leaf holes or yellowing
  • Mold or mildew around the base

Catch pests early = easier to treat!

Clean Leaves, Clean Vibes

Leaf cleaning is a simple, powerful way to boost your plant’s health, beauty, and energy. It takes just a few minutes — and your plants will reward you with vibrant growth and glossy, happy leaves.

So go ahead: turn on some music, grab a soft cloth, and give your leafy friends a little love. They deserve it. 🍃💧✨

How to Successfully Grow Indoor Plants in Low-Light Rooms

Not every room gets bathed in sunlight — and that’s totally okay. Whether you live in a cozy basement apartment, have a windowless bathroom, or just want to green up a shady corner, there are plenty of plants that thrive in low light.

In this article, you’ll learn how to grow happy, healthy indoor plants without much natural light, which varieties to choose, and how to adjust your care routine to help them flourish in the shadows.

What Is “Low Light,” Really?

Low light doesn’t mean no light — it refers to spaces that receive:

  • No direct sunlight
  • Minimal or indirect light from a north-facing window
  • Only ambient light from lamps or nearby rooms
  • Light that doesn’t cast strong shadows during the day

Think: corners, hallways, bathrooms, or rooms with small or shaded windows.

Can Plants Really Thrive in Low Light?

Absolutely — as long as you choose the right species and adjust your expectations.

Low-light plant truths:

  • Growth will be slower
  • Leaf size and color may vary
  • Watering and feeding needs decrease
  • Many low-light plants evolved to live under forest canopies — they’re built for it!

You just need to pick wisely and care gently.

Best Low-Light Indoor Plants

Here are the champions of shade:

🌿 Top low-light survivors:

  • ZZ Plant (Zamioculcas zamiifolia) – Practically unkillable, glossy, and sculptural
  • Snake Plant (Sansevieria) – Low maintenance and a nighttime oxygen booster
  • Pothos (Epipremnum aureum) – Fast-growing vine that thrives almost anywhere
  • Philodendron (Heartleaf or Brasil) – Great for hanging or trailing in dim corners
  • Cast Iron Plant (Aspidistra) – As tough as its name suggests
  • Chinese Evergreen (Aglaonema) – Variegated leaves and tolerant of most lighting
  • Peace Lily – Loves humidity and manages with little light (blooms better with more)
  • Parlor Palm – A classic that tolerates low light and neglect
  • Ferns (especially Boston or Bird’s Nest) – Do well in low, moist conditions like bathrooms

How to Help Low-Light Plants Thrive

They don’t need a lot of light, but they do need a little extra love in other ways.

💡 Light care:

  • Rotate plants weekly to ensure even growth
  • Dust leaves gently to help them absorb available light
  • Place as close as possible to any light source (without touching bulbs)
  • Use sheer curtains to soften harsh light, if needed

💧 Watering in low light:

  • Less light = slower evaporation → less frequent watering
  • Always check soil first — top 1–2 inches should feel dry
  • Avoid letting plants sit in soggy soil

Pro Tip: Use a moisture meter to avoid overwatering in dim rooms.

💨 Boost humidity:

Low-light areas (especially bathrooms and basements) are often dry or stagnant.

  • Mist plants weekly
  • Use a small humidifier nearby
  • Group plants together to create a microclimate
  • Place pots on a tray filled with pebbles and water (water line below the base)

Add a Little Artificial Boost (Optional)

If your space has no natural light, supplement with artificial light.

💡 Best low-light grow lights:

  • Full-spectrum LED bulbs with 4000–6500K color temp
  • Clip-on or desktop grow lights
  • Smart bulbs with timers (great for busy people)

Use for 8–12 hours per day to mimic natural cycles.

Styling Low-Light Spaces

Just because it’s dim doesn’t mean it can’t be beautiful! Use plants to brighten and elevate the vibe.

🛋️ Styling tips:

  • Use light-colored pots to reflect light
  • Hang pothos or philodendron from shelves or curtain rods
  • Pair plants with mirrors to bounce what little light you have
  • Add string lights or under-shelf LEDs for cozy ambiance
  • Mix plant heights for layered greenery in corners or hallways

Watch for Signs of Light Stress

Low-light plants can still get too little light. Here’s what to look out for:

SymptomCauseFix
Pale or yellowing leavesNot enough lightMove closer to window or add grow light
Leggy, stretched stemsReaching for lightRotate and reposition plant
Mushy or dark rootsOverwateringLet dry out; reduce watering frequency
No growth at allDormancy or stressBe patient or boost light gently

Let Shade Shine

You don’t need a sunroom to enjoy the benefits of indoor plants. With the right species, care, and styling, your low-light spaces can become lush, inviting, and totally alive.

So go ahead — green up your hallway, bathroom, or windowless corner. Even in the shadows, your plants can thrive. 🌑🌱✨

Create a Plant Watering Schedule That Actually Works

Watering your plants sounds easy — until you’re either drowning them or letting them dry into crispy sadness. Every plant has its own needs, and sticking to a one-size-fits-all schedule can do more harm than good.

But don’t worry — creating a personalized, realistic watering routine is completely doable. In this article, you’ll learn how to build a low-stress, plant-friendly watering schedule that helps your green friends thrive (without making you feel like a full-time gardener).

Why Watering Is Tricky (But Important)

Water is life — but too much or too little can quickly cause:

  • 🟡 Yellowing leaves
  • 🔄 Leaf curl or drop
  • 🟤 Root rot or dryness
  • 🐛 Pests like fungus gnats

The right watering routine prevents stress, supports growth, and keeps your plants looking vibrant year-round.

Step 1: Group Plants by Watering Needs

Don’t treat every plant the same. Group them by how often they like to drink.

💧High-Need Plants (Water Weekly or More)

  • Ferns
  • Calatheas
  • Peace Lilies
  • Fittonia
  • Herbs (indoors)

🌿 Medium-Need Plants (Every 7–10 Days)

  • Pothos
  • Philodendron
  • Rubber Plant
  • Fiddle Leaf Fig
  • Spider Plant

🌵 Low-Need Plants (Every 2–4 Weeks)

  • Succulents
  • Cacti
  • Snake Plant
  • ZZ Plant
  • Jade Plant

Tip: Create plant “care zones” in your home based on their needs to simplify your routine.

Step 2: Check Before You Water

Instead of watering on a fixed day no matter what, always check the soil first.

Easy methods:

  • Stick your finger 1–2 inches into the soil. If it’s dry, it’s time to water.
  • Use a moisture meter for more precise readings
  • Watch for clues: drooping, curling, or dry leaves can indicate thirst

If the soil is still moist, wait a day or two — it’s better to underwater than overwater in most cases.

Step 3: Choose the Right Watering Tools

Basic gear to keep handy:

  • A small watering can with a narrow spout
  • A spray bottle for misting humidity-loving plants
  • A moisture meter for consistent checks
  • A catch tray or saucer under every pot

Optional but helpful: A water reminder app like Planta, Greg, or a phone calendar alert.

Step 4: Create a Weekly Watering Plan

Now that you’ve grouped your plants and know how to check them, build a flexible schedule that fits your life.

Example weekly routine:

  • Monday: Check and water tropicals (calathea, peace lily)
  • Thursday: Check medium-needs plants (rubber plant, pothos)
  • Every other Sunday: Check low-needs plants (succulents, snake plant)
  • Daily or every 2 days: Mist humidity-lovers in dry climates

Pro Tip: Create a checklist and keep it near your plants, so you can track who’s been watered and when.

Step 5: Adjust for Seasons

Your plant’s watering needs change throughout the year.

🌞 Spring/Summer:

  • Faster growth
  • Warmer temps
  • More watering needed

❄️ Fall/Winter:

  • Dormant periods
  • Less sunlight
  • Cut watering in half or more

Always use the soil-check rule — never water on autopilot.

Step 6: Use Smart Watering Techniques

It’s not just when you water — it’s how you do it.

Watering do’s:

✅ Water thoroughly until it drains from the bottom
✅ Use room-temperature water
✅ Let excess water drain — never let plants sit in standing water
✅ Water the soil, not the leaves

Watering don’ts:

🚫 Don’t mist succulents or cacti
🚫 Don’t use cold tap water on tropicals
🚫 Don’t “top off” water frequently — this causes salt buildup

Step 7: Track and Tweak

No schedule is perfect from day one — but consistency helps you notice patterns.

Keep a simple watering log:

PlantLast WateredNext CheckNotes
Snake PlantApril 5April 20Soil still damp
PothosApril 8April 14Growing fast — added misting
Peace LilyApril 10April 14Needed more light

Tracking = less guessing = healthier plants.

Make Watering Easy, Not Stressful

You don’t need to memorize a million plant rules — just follow these basics:

  • Group plants by needs
  • Check soil before watering
  • Create a flexible, seasonal routine
  • Adjust and learn over time

Soon, watering will become second nature — a calming habit instead of a chore. And your plants? They’ll thank you with lush leaves, happy blooms, and serious jungle vibes.

Create a Mood-Boosting Indoor Plant Arrangement

Plants do more than beautify a room — they shift your mood, boost creativity, reduce stress, and promote well-being. With the right arrangement, you can turn any corner of your home into a calming, energizing, or joy-filled green escape.

In this guide, you’ll learn how to build an indoor plant setup designed specifically to improve your mental and emotional health using light, color, texture, and thoughtful placement.

How Plants Affect Mood (According to Science)

It’s not just in your head — studies show that being around plants can:

  • 🧘 Reduce anxiety and stress
  • 🧠 Improve focus and memory
  • 🫀 Lower blood pressure
  • 🛏️ Promote relaxation and better sleep
  • 😊 Spark happiness and emotional well-being

Plants tap into our connection to nature — and that’s powerful medicine for the modern world.

Step 1: Choose a Mood to Cultivate

Before you grab your pots, define how you want to feel in the space.

🎯 Common mood goals:

  • Calm & Relaxation → Soft foliage, cool tones, minimalism
  • Joy & Uplift → Bright blooms, vibrant greens, fun shapes
  • Focus & Clarity → Clean lines, structured plants, symmetry
  • Cozy & Grounded → Earthy tones, layered textures, warmth
  • Energized → Bold colors, upright plants, sunny spots

Matching plants to a feeling makes your space more intentional and effective.

Step 2: Pick the Right Plants for the Mood

🌿 Calming Plants:

  • Peace Lily – Soft leaves and elegant shape
  • Fern (Boston or Maidenhair) – Gentle, flowing foliage
  • Aloe Vera – Structured yet soothing presence
  • Bamboo Palm – Lush and light-filtering
  • Lavender – Calming scent and soft purple blooms

🌼 Uplifting Plants:

  • Geranium – Colorful blooms and uplifting scent
  • Sunflowers (mini indoor varieties) – Bright, bold energy
  • African Violets – Compact, floral, and joyful
  • Croton – Multicolor leaves that pop
  • Calathea – Dramatic patterns and movement

💡 Focus-Friendly Plants:

  • Snake Plant – Structured and low maintenance
  • Rubber Plant – Deep green, grounding energy
  • ZZ Plant – Clean lines and resilient
  • Succulents – Compact and contained

Step 3: Think in Layers and Textures

Texture affects how we feel in a space — smooth leaves feel sleek and focused, while fluffy or trailing foliage invites softness and calm.

Mix it up with:

  • Bold leaves (e.g., monstera or rubber plant) for structure
  • Trailing vines (e.g., pothos, ivy) for movement and flow
  • Soft, frilly ferns for comfort and grounding
  • Small blooms or patterned leaves for a visual lift

Rule of thumb: Combine tall + mid-height + trailing plants for visual harmony.

Step 4: Use Color Psychology with Your Plants

Plants come in more than green! Use foliage and flower color to evoke emotional responses.

ColorMood EffectPlant Examples
GreenBalance, calm, healthMost indoor plants
YellowHappiness, optimismLemon balm, kalanchoe
RedPassion, stimulationAnthurium, coleus
PurpleCreativity, luxury, calmLavender, purple heart
WhitePurity, peace, minimalismPeace lily, white orchid

Use pots and accessories to enhance these effects too!

Step 5: Let Light Set the Tone

Natural light boosts serotonin — and helps plants thrive.

Lighting ideas:

  • Use south-facing windows for energizing brightness
  • Sheer curtains for gentle, diffused calm
  • Add warm LED grow lights for a cozy, golden glow
  • Place a mirror nearby to bounce natural light and enhance the mood

Plants that move gently in the breeze and catch light add to a calming ambiance.

Step 6: Arrange with Flow and Feeling

Your layout matters just as much as your plant choice.

Arrangement tips:

  • Create plant clusters in odd numbers (3 or 5) for natural flow
  • Use plant stands, stools, or risers to add height and dimension
  • Let trailing plants cascade from shelves or baskets
  • Place calming plants near your bed, reading chair, or bathtub
  • Add vibrant ones to entryways, desks, or kitchen windows for an energetic start to your day

Avoid clutter — let your arrangement breathe.

Step 7: Add Meaningful Accents

Complete the mood with decor that speaks to you.

🕯️ Candles, salt lamps, or fairy lights
📚 Books, journals, or affirmations
💎 Crystals, stones, or wood decor
🎨 Art prints with nature or inspirational quotes
💧 Water features (small fountains or bowls)

Plants That Lift Your Spirits, Naturally

Your home is your sanctuary — and with a little intention, your plant arrangement can do more than decorate. It can heal, energize, and inspire you daily.

Let your plants reflect your emotions, support your wellness, and remind you that growth — just like peace and joy — is always within reach. 🌿💚😊

Create a Relaxing Indoor Garden Corner for Meditation or Reading

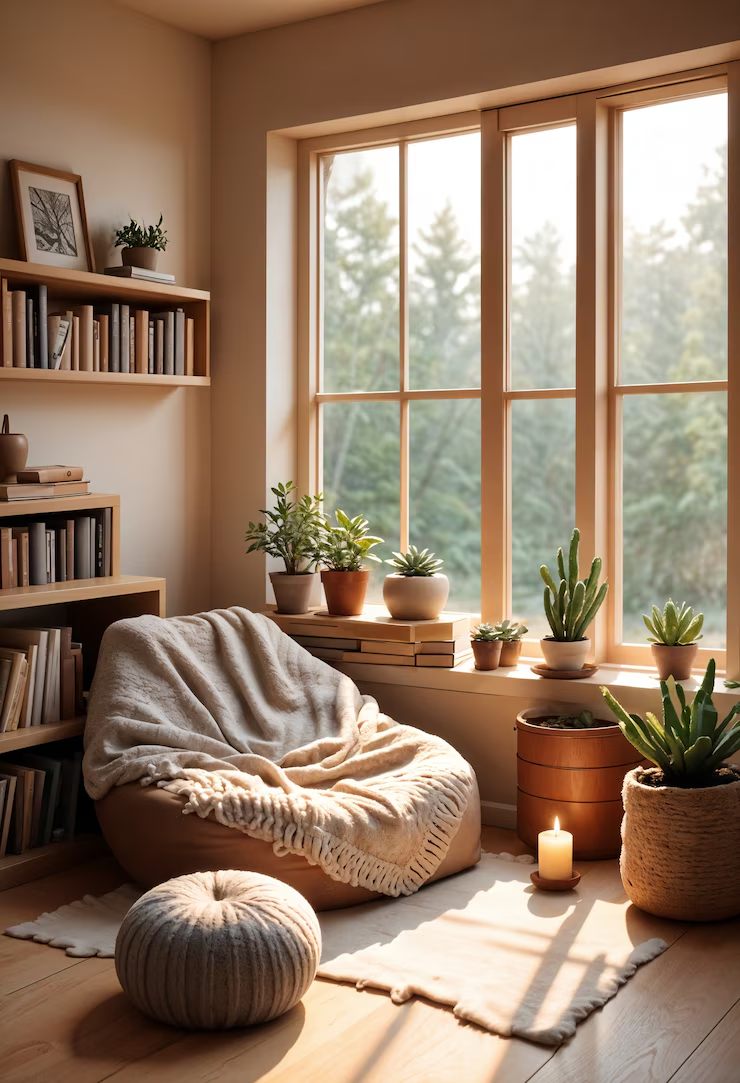
In a busy world, having a peaceful space to breathe, think, or just be is a game changer. And when you bring plants into the mix? Even better. A thoughtfully designed indoor garden corner can become your personal sanctuary — ideal for meditation, journaling, reading, or quiet reflection.

In this article, you’ll learn how to create a cozy, calming corner with plants, natural elements, and intentional design — even if you’re working with limited space.

Why You Need a Green Escape

A dedicated chill zone in your home offers more than just aesthetics:

  • 🌿 Boosts mood and reduces stress
  • 🧠 Enhances mental clarity and focus
  • 🪴 Connects you with nature
  • 🪔 Encourages mindfulness and presence
  • 📵 Creates a screen-free zone for recharging

Whether it’s for morning rituals or evening wind-downs, a green corner helps you unplug and rebalance.

Step 1: Choose the Right Spot

You don’t need an entire room — just a quiet corner with decent light and low traffic.

Look for:

  • A spot near a window for natural light
  • A corner of your bedroom, living room, or office
  • An unused nook, like near a bookshelf or beside a reading chair
  • Any space you can claim as your own, even just a 3×3 ft zone

Tip: If natural light is limited, consider adding a soft lamp or LED grow light with warm tones.

Step 2: Pick Calming, Easygoing Plants

Plants help create a natural, grounded atmosphere. Choose varieties that are:

  • Easy to care for
  • Visually soothing (lush, soft, flowing)
  • Tolerant of indoor conditions

🌿 Best plants for meditation corners:

  • Peace Lily – Air-purifying and graceful
  • Snake Plant – Low-maintenance and grounding
  • ZZ Plant – Deep green and low light tolerant
  • Parlor Palm – Gentle movement adds zen energy
  • Pothos or Philodendron – Easy to grow and great for hanging
  • Calathea – Beautiful patterns and soft textures
  • Lavender or Rosemary (near windows) – Naturally calming scent

Mix upright and trailing plants for depth and movement.

Step 3: Add Comfort and Softness

This is your cozy zone — comfort is key.

Must-have elements:

  • Cushions or a meditation pillow
  • A soft throw blanket
  • A floor rug (jute, cotton, or shag for warmth)
  • A small side table or stool for tea, books, or crystals
  • A comfortable chair, pouf, or yoga mat, depending on your needs

Keep it low to the ground for a grounded, natural feeling.

Step 4: Use Natural Materials and Neutral Colors

Your senses are part of the experience — calm them with earthy tones and organic textures.

Ideas:

  • Woven baskets or clay pots
  • Wood shelves or driftwood accents
  • Linen or cotton fabrics
  • Neutral color palette: greens, browns, creams, soft grays

Avoid harsh patterns or bright colors in this space — simplicity is soothing.

Step 5: Style Your Plants with Intention

This isn’t a jungle — it’s a sanctuary. Focus on intentional placement over volume.

Layout tips:

  • Place a tall plant (like a snake plant or palm) in the back for structure
  • Use a plant stand or stool to elevate mid-sized plants
  • Hang a trailing plant in the corner to soften edges
  • Keep one plant at eye level where you sit or meditate
  • Add a small terrarium or bonsai for a mindful focal point

Leave space for breathing — don’t overcrowd.

Step 6: Set the Mood with Senses

Your indoor garden corner should feel like a gentle exhale. Add extras that support mindfulness and relaxation.

Ideas to enhance the vibe:

  • Scent: Essential oil diffuser (lavender, eucalyptus, sandalwood)
  • Sound: Soft background music, nature sounds, or silence
  • Light: Salt lamp, soft LED strip light, candles (real or flameless)
  • Touch: Soft rugs, smooth pebbles, or textured fabrics
  • Sight: Books, art, or affirmations that inspire calm

Make it a multi-sensory escape that welcomes you in.

Step 7: Keep It Clean and Peaceful

This space should feel fresh, simple, and uncluttered. Make tidying part of the ritual.

Weekly care checklist:

  • Dust leaves gently
  • Refresh water in nearby vases or diffusers
  • Tidy up books or items on your table
  • Water plants mindfully
  • Replace any fading or dried-out elements

Pro Tip: Use this corner as a screen-free zone — no phones, no laptops. Just you, your breath, and the green energy.

Your Green Sanctuary Awaits

In a fast-moving world, your indoor garden corner becomes a gentle pause — a space that invites you to slow down, breathe deeply, and reconnect. With the right plants, textures, and intention, even the smallest space can become a powerful place of peace.

Whether you use it to stretch, sip tea, meditate, or read — this space is for you. 🌿🧘‍♀️

How to Grow and Care for Indoor Herbs Year-Round

There’s something incredibly satisfying about snipping a few fresh basil leaves for your pasta or mint for your tea — especially when they come from your own windowsill. Indoor herb gardening is one of the most rewarding (and delicious) ways to enjoy plants at home.

The best part? You don’t need a backyard or fancy setup. With the right herbs, containers, and care, you can grow your own mini herb garden year-round, no matter where you live.

Why Grow Herbs Indoors?

Growing herbs inside isn’t just practical — it’s a lifestyle upgrade. Here’s why:

  • 🌱 Fresh flavor on demand
  • 🪴 Compact and space-saving
  • 🧘‍♀️ Therapeutic and rewarding
  • 💵 Budget-friendly (no more buying wilted bunches)
  • 🌿 Beautifies your space with natural fragrance and greenery

And with the right routine, your herbs can thrive all year, even through winter.

Step 1: Choose the Right Herbs for Indoors

Some herbs are better suited for indoor environments than others.

🌿 Easiest herbs to grow indoors:

  • Basil – Loves warmth and light; great in bright kitchens
  • Mint – Hardy and fast-growing (keep it in its own pot — it spreads!)
  • Parsley – Slow grower, but very rewarding
  • Chives – Mild onion flavor; easy and compact
  • Oregano – Great for Mediterranean dishes; loves sun
  • Thyme – Low-maintenance and flavorful
  • Cilantro – Needs cooler temps; best in spring and fall indoors
  • Rosemary – Woody herb that prefers bright light and drier soil

Pro Tip: Start with 3–5 herbs you use often — you can always expand later!

Step 2: Pick the Perfect Spot

Your herbs need light — lots of it.

🪟 Best placement:

  • South-facing window: Ideal for sun-loving herbs like basil and rosemary
  • East- or west-facing: Works well for parsley, mint, and chives
  • Under a grow light: Great for rooms with low natural light

Aim for at least 6 hours of bright light per day. Supplement with a grow light during winter or in shady homes.

Step 3: Use the Right Containers

Choose pots that are:

  • 6–8 inches wide (perfect size for herbs)
  • ✅ Made from ceramic, plastic, or terra cotta
  • ✅ Have drainage holes (this is a must!)
  • ✅ Placed on a tray or saucer to catch water

You can also grow herbs in:

  • Window boxes
  • Hanging planters
  • Mason jars (with pebbles and limited watering)
  • Small raised beds for indoor greenhouses

Step 4: Choose the Best Soil

Use a high-quality potting mix — never garden soil, which is too heavy and can hold too much moisture indoors.

For best results:

  • Choose a mix labeled for indoor plants or vegetables
  • Add a bit of perlite for drainage
  • For rosemary or thyme, mix in a little sand to mimic their native dry conditions

Step 5: Water Correctly (Not Too Much!)

Overwatering is the #1 herb killer indoors. Herbs generally like their soil to dry slightly between waterings.

Watering tips:

  • Stick your finger into the soil — water only if it feels dry about an inch down
  • Water in the morning, so roots absorb moisture during the day
  • Avoid letting herbs sit in soggy soil or standing water
  • Mist occasionally if air is very dry (especially during winter heating season)

Step 6: Harvest Often (and Properly)

Harvesting helps herbs grow bushier and healthier — just don’t go overboard!

How to harvest:

  • Use clean scissors or snip with your fingers
  • Always cut just above a leaf node (where two leaves meet the stem)
  • Don’t remove more than one-third of the plant at a time
  • For fast growers like basil and mint, pinch off the top regularly to prevent flowering

Step 7: Feed Your Herbs — But Sparingly

Indoor herbs do need nutrients, but overfeeding can lead to leggy growth or weak flavor.

Fertilizer tips:

  • Use a balanced, organic liquid fertilizer
  • Dilute to half strength
  • Feed once every 4–6 weeks during spring and summer
  • Skip or reduce feeding in winter, when growth slows

Troubleshooting Common Herb Issues

ProblemCauseFix
Yellow leavesOverwatering or lack of lightLet soil dry; move to brighter spot
Leggy stemsNot enough lightMove closer to window or add grow light
No growthPot-bound roots or poor soilRepot or refresh soil
Mold on soilPoor airflow or too much waterImprove air circulation; water less
Wilting after harvestOverharvesting or shockGive time to recover; water and feed gently

Fresh Herbs, Fresh Joy

Growing herbs indoors gives you a constant supply of fresh flavor, calming scents, and green beauty — all in arm’s reach. With the right spot, some sunlight, and just a little attention, your indoor herb garden can thrive 365 days a year.

So whether you’re cooking dinner, sipping tea, or just admiring the view — your herbs will be right there with you. 🌿🍽️💚

How to Build a Budget-Friendly Indoor Plant Collection

Want to fill your home with plants but don’t want to spend a fortune? You’re not alone. Creating a beautiful, thriving indoor jungle doesn’t have to be expensive. With a little creativity, patience, and know-how, you can build an impressive plant collection without draining your wallet.

In this article, we’ll show you how to grow your plant family on a budget — from finding free or low-cost plants to using DIY tools and making the most of what you already have.

Why Plants Don’t Have to Be Pricey

While some rare houseplants can go for hundreds of dollars, most of the beauty you see in plant-filled homes comes from common, accessible species, smart styling, and a little plant parent magic.

Building your collection affordably also means:

  • 🌿 Less pressure if a plant doesn’t survive
  • ♻️ More sustainable practices
  • 💡 More creativity and personal satisfaction
  • 🎁 The joy of trading and sharing with others

Step 1: Start With Easy, Inexpensive Plants

Begin with low-cost, hardy plants that are easy to find and grow well in a variety of conditions.

💸 Budget-friendly favorites:

  • Pothos – Fast-growing and easy to propagate
  • Spider Plant – Grows “babies” you can replant
  • Snake Plant – Very resilient and widely available
  • Peace Lily – Common and often discounted
  • Aloe Vera – Useful and multiplies with time
  • Philodendron – Lush and affordable
  • Succulents – Sold individually or in bundles for cheap

Tip: Buy small starter plants — they’re cheaper and grow quickly with care!

Step 2: Get Plants for Free (Yes, Really!)

There are more ways than you think to find free or nearly-free plants:

🌱 Try these tricks:

  • Propagate from friends’ plants (with permission!)
  • Join local plant swap groups on Facebook or Meetup
  • Check online marketplaces like Craigslist, OfferUp, or local Freecycle pages
  • Visit local gardening clubs or community centers — some offer giveaways
  • Ask at local nurseries or hardware stores if they have discarded or clearance plants

Pro Tip: Even a single leaf or stem can become a full plant through propagation — totally free!

Step 3: Learn to Propagate

Propagation is the budget plant lover’s best friend. Many common houseplants are easy to multiply with water or soil propagation.

Easiest plants to propagate:

  • Pothos – Cut below a node and place in water
  • Spider Plant – Remove and pot the baby “pups”
  • Succulents – Let leaf cuttings dry, then plant
  • Snake Plant – Cut leaves into sections and root in water
  • Philodendron – Snip and place in soil or water until roots form

With time, your collection can double or triple — for free!

Step 4: Repurpose Containers and DIY Planters

No need to buy expensive pots — many items you already own can become stylish plant homes.

🪴 DIY planter ideas:

  • Coffee mugs
  • Glass jars
  • Tin cans (spray-painted or wrapped in rope)
  • Old teapots or bowls
  • Plastic food containers with holes added
  • Woven baskets with plastic liners

Bonus: Get creative with paint, fabric, or twine for a custom look.

Step 5: Shop Smart at the Right Places

When you do spend money, shop strategically:

Where to find cheap plants and supplies:

  • Big-box stores (Walmart, Home Depot, IKEA)
  • Local farmer’s markets or plant fairs
  • Discount or dollar stores for pots and decor
  • End-of-season sales at nurseries
  • Online bulk deals — but check shipping costs

And always check the clearance rack at garden centers — slightly sad plants can often be revived with love.

Step 6: Focus on Quality Over Quantity

It’s tempting to buy every plant you see, but building a budget-friendly collection means choosing plants that suit your space and lifestyle.

Ask yourself:

  • Do I have the right light for this plant?
  • Can I meet its watering needs?
  • Will it thrive in my home’s climate?

Start slow. A few healthy plants are better (and cheaper) than a dozen struggling ones.

Step 7: Style Smart, Not Expensive

Create the look of a full jungle without needing a ton of plants — just style them wisely.

Styling tricks:

  • Use plant stands or crates to add height
  • Cluster 3 plants together for visual impact
  • Use mirrors to reflect greenery and double the visual effect
  • Add fairy lights, stones, or moss for a custom touch
  • Place plants near shelves, frames, or windows to blend with decor

Small plants can look like designer pieces when styled well.

Optional: Start a “Plant Budget” Envelope

If you want to keep your spending under control, use the envelope system:

  • Set aside a small amount monthly (even $5–$10)
  • Use it for pots, plants, or soil only
  • Celebrate small wins — like getting three new plants for under $15

Grow More, Spend Less

Building an indoor plant collection doesn’t require a big bank account — just a little patience, resourcefulness, and a willingness to get creative. With the right choices and a DIY spirit, your home can become a lush, green haven without spending much at all.

So start where you are, grow what you love, and let your collection expand naturally. 🌱

Low-Maintenance Plants Perfect for Busy People

You love the idea of plants — the way they brighten a room, purify the air, and bring calm to your space. But let’s be real: between work, errands, and everything else, not everyone has time to water, prune, and pamper. The good news? There are plenty of low-maintenance plants that thrive on minimal care — and still look amazing.

In this article, you’ll discover the best plants for busy lifestyles, how to care for them with ease, and tips to keep your space looking fresh with hardly any effort.

What Makes a Plant Low-Maintenance?

Low-maintenance plants are:

  • 🌵 Drought-tolerant (they store water and don’t need constant attention)
  • 🌥️ Adaptable to different light levels
  • 💪 Resilient to neglect or inconsistent watering
  • 🧼 Naturally pest-resistant
  • 🪴 Slow-growing (less trimming and repotting required)

These plants are perfect for:

  • People with busy schedules
  • Frequent travelers
  • Beginners or forgetful waterers
  • Offices or commercial spaces

Top 10 Low-Maintenance Plants You’ll Love

1. Snake Plant (Sansevieria)

  • Tolerates low light, dry air, and long gaps between watering
  • Only needs water every 2–3 weeks
  • Air-purifying and nearly indestructible
  • Great for bedrooms, offices, or dark corners

2. ZZ Plant (Zamioculcas zamiifolia)

  • Glossy leaves and architectural shape
  • Survives on very little light and water
  • Water once every 2–4 weeks
  • Can go months without fuss

3. Pothos (Epipremnum aureum)

  • Grows quickly in almost any light (except full sun)
  • Forgives missed waterings
  • Great for shelves, hanging pots, or trailing from furniture
  • Just trim when it gets too long

4. Aloe Vera

  • Succulent with healing gel inside its leaves
  • Loves bright light, but tolerates indirect light too
  • Water once every 2–3 weeks
  • Minimal pest issues and super durable

5. Jade Plant (Crassula ovata)

  • Thick, coin-like leaves store water
  • Lives for decades with very little care
  • Water once soil dries completely
  • Add to a sunny desk or windowsill

6. Cast Iron Plant (Aspidistra elatior)

  • Named for its toughness
  • Tolerates low light, neglect, and dust
  • Rarely needs repotting
  • Great for offices and shaded rooms

7. Spider Plant (Chlorophytum comosum)

  • Grows well in indirect light
  • Water when the top inch of soil dries
  • Produces “babies” that you can repot
  • Tolerates occasional forgetfulness

8. Peace Lily (Spathiphyllum)

  • Adds elegance with lush leaves and white blooms
  • Only needs medium light and weekly watering
  • Droops dramatically when thirsty — easy to read!
  • Good air purifier too

9. Cactus (Various Types)

  • Requires bright light and almost no water
  • Perfect for hot, sunny spots
  • Only needs watering once a month or less
  • Choose from endless shapes and sizes

10. Rubber Plant (Ficus elastica)

  • Low watering needs and striking dark green foliage
  • Enjoys indirect light
  • Wipe leaves occasionally to keep them shiny
  • Can grow large over time with minimal care

Bonus: Pet-Safe Low-Maintenance Options

Got furry roommates? Try these easy-going, non-toxic choices:

  • Calathea
  • Areca Palm
  • Bamboo Palm
  • Prayer Plant (Maranta)
  • Peperomia varieties

(Still, always double-check toxicity before introducing a plant near pets.)

Care Tips for the Super Busy

Even the most low-maintenance plants need some love. Here’s how to set it and forget it:

1. Group plants with similar needs

Keep drought-tolerant plants together to avoid overwatering one and underwatering another.

2. Use self-watering pots

These clever containers store extra water at the bottom, reducing watering frequency.

3. Add a watering reminder

Set a monthly calendar alert or use a plant care app like Planta or Blossom.

4. Choose the right soil

Use well-draining mixes — especially for succulents and cacti.

5. Keep plants in the right spot

Match the plant’s light needs to the room. A snake plant in a sunny window? Great. A cactus in a dark hallway? Not so much.

Low Effort, High Impact Styling Ideas

Want your plants to look amazing with zero stress?

  • Use matching pots for a clean, styled look
  • Group 3–5 plants in one corner for a “mini jungle” vibe
  • Elevate one or two on plant stands to create height
  • Add one plant per room for a pop of life — even a bathroom or hallway
  • Stick to green foliage for a calm, low-fuss aesthetic

Green Without the Grind

Loving plants doesn’t mean you have to spend hours watering, pruning, and tending. With these low-maintenance superstars, you can enjoy the calming, stylish presence of indoor greenery — no matter how full your schedule is.

So go ahead and green up your home — even if your thumb isn’t exactly green (yet).

How to Safely Move Your Indoor Plants to a New Home or Apartment

You’ve packed the boxes, labeled the kitchen gear, wrapped your mugs — but what about your plants? Moving with houseplants takes a little extra thought, but with the right steps, you can keep your leafy companions happy, healthy, and intact from Point A to Point B.

In this guide, you’ll learn how to safely move your indoor plants, whether you’re going across town or across the country, with tips for prep, packing, transport, and post-move care.

Why Moving Plants Requires Special Care

Plants are living organisms that don’t love sudden change. Moving can expose them to:

  • 🌡️ Temperature swings
  • 🌀 Drafts or dry air
  • 🏗️ Rough handling or tilting
  • 🌫️ Lack of light
  • 💧 Interrupted watering schedules

With gentle handling and a little planning, you can minimize shock and keep your green friends thriving in their new environment.

Step 1: Plan Ahead

Start preparing 1–2 weeks before moving day.

Things to check:

  • Will your new home have similar light conditions?
  • Are you traveling in hot or cold weather?
  • How long will your plants be in transit?

If you’re moving far or shipping plants, check if there are regulations or restrictions (especially when crossing state or country lines).

Step 2: Prep Your Plants for the Move

7–10 Days Before:

  • Prune dead leaves or leggy stems
  • Check for pests and treat if needed
  • Stop fertilizing — you don’t want new, vulnerable growth during the move
  • Repot if necessary — but only if the plant is rootbound and struggling
  • Give them a good watering 2–3 days before the move (not the night before — soggy soil = spills)

Step 3: Choose the Right Containers for Transport

Leave fragile decorative planters at home — use lightweight, safe pots for the ride.

Best transport options:

  • Original plastic nursery pots
  • Temporary grow bags
  • Small plants in boxes with dividers
  • Larger plants in plastic tubs with towels for padding
  • Remove tall plants from stands or ceramic pots before loading

Pro Tip: Group small plants in a shallow open box to keep them upright and together.

Step 4: Pack Your Plants Securely

How to pack:

  1. Place pots in boxes or tubs lined with towels or newspaper
  2. Stuff any gaps to prevent tipping or sliding
  3. Use bubble wrap or socks to protect fragile leaves
  4. Leave the tops open — your plants need airflow
  5. If traveling in a cold or hot car, insulate with blankets (but avoid heat buildup)

Avoid taping anything directly to your plants — it can damage leaves and stems.

Step 5: Transport Smart

Ideal plant moving conditions:

  • Bring them in your car, not the moving truck
  • Keep inside the cabin if it’s too hot or cold outside
  • Avoid placing them in trunks or on top of heavy boxes
  • Park in shade whenever possible
  • Never leave plants in a parked car for long periods

For long trips:

  • Let tall plants lie flat, supported by soft material
  • Open windows occasionally for air
  • Mist delicate plants during long rides

Step 6: Unpack Promptly and Gently

Once you arrive:

  1. Unpack plants first, especially in extreme weather
  2. Place them in a similar light environment to what they had before
  3. Check for damage, soil spillage, or snapped stems
  4. Give them a day or two to adjust before watering
  5. Avoid repotting for 2–3 weeks unless absolutely necessary

Expect some wilting or yellowing — it’s normal after a move and usually temporary.

Optional: Reintroduce Slowly

For plants that are sensitive to change (like calatheas, fiddle leaf figs, or ferns), ease them into new conditions.

  • Move them to a shaded area at first, then back into light
  • Skip fertilizing for 4 weeks
  • Keep them away from vents or drafts
  • Resume normal watering once they seem settled

What If You’re Moving Without a Car?

Options for car-free moves:

  • Use a rolling suitcase with plants upright inside
  • Pack in sturdy shopping bags with handles
  • Ask a friend to help with transport
  • Use a bike basket or backpack for small plants
  • Ship plants in boxes with biodegradable packing material (short distance only!)

Note: If shipping across state or national lines, check local agricultural rules to avoid delays.

Plants Can Move Too — Just Take It Slow

Your plants have been growing right alongside you — so it’s only natural to want them to come along for the next chapter. With patience, padding, and a little TLC, they’ll adapt to your new space and help make it feel like home.

And once you’re all moved in?
Give your plants a shower, a little sunlight, and a warm “welcome home.” 🪴🏡

Natural Fertilizer Ideas for Indoor Plants

Your indoor plants are living, growing beings — and like all living things, they need nourishment. While synthetic fertilizers are widely available, they often come with harsh chemicals and long-term soil damage. The good news? You can boost your plant’s health with safe, effective, and eco-friendly natural fertilizers using ingredients you probably already have at home.

In this guide, you’ll learn why natural fertilizers are a smart choice, the best DIY options, and how to use them correctly for lush, happy plants.

Why Use Natural Fertilizers?

Natural fertilizers come straight from nature and provide a slow, steady release of nutrients, unlike synthetic versions that can overwhelm plant roots.

Benefits of going natural:

  • 🌱 Gentler on plants and less likely to cause fertilizer burn
  • 🌎 Better for the environment — no chemical runoff
  • 💵 Budget-friendly — most ingredients are already in your kitchen
  • 🪴 Improves soil health over time, not just feeds the plant
  • 💧 Safer for kids and pets

Signs Your Indoor Plants Need Fertilizing

Before you add anything, look for signs that your plants are ready for a nutritional boost:

  • Pale or yellowing leaves
  • Stunted or slow growth
  • Small new leaves
  • Soil that looks depleted or dry despite watering
  • Fewer flowers or leggy stems

If your plant is showing these signs (and it’s not a seasonal dormancy), it might be time to feed naturally.

Best Natural Fertilizer Options for Indoor Plants

1. Banana Peel Water

Banana peels are rich in potassium, phosphorus, and calcium — great for strong root and flower development.

How to use:

  • Chop 1 banana peel and soak it in 2 cups of water for 24–48 hours.
  • Strain and use the water to water your plants once every 2–3 weeks.

Best for: Flowering plants, peace lilies, and monsteras.

2. Coffee Grounds

Used coffee grounds are slightly acidic and provide nitrogen, which boosts leafy growth.

How to use:

  • Mix dried grounds into potting soil (1 tbsp per pot).
  • Or brew weak “coffee tea” by soaking grounds in water, then watering your plants with it once a month.

Best for: Ferns, philodendrons, snake plants.

Caution: Don’t overdo it — too much can compact soil or increase acidity.

3. Crushed Eggshells

Eggshells are packed with calcium, which helps strengthen cell walls and prevent diseases like blossom end rot (especially in fruiting plants like tomatoes).

How to use:

  • Rinse and dry shells, then crush into a fine powder.
  • Sprinkle on top of soil or mix into the potting mix.

Best for: Tomatoes, herbs, succulents, pothos.

4. Aquarium Water (Freshwater Only)

If you have a freshwater fish tank, the water contains ammonia, nitrogen, and beneficial microbes from fish waste — a mild, free fertilizer!

How to use:

  • Use it as-is to water your indoor plants during regular tank cleanings.

Best for: Most houseplants — especially leafy greens and herbs.

5. Green Tea Leaves or Tea Bags

Green tea adds tannic acid and small amounts of nitrogen, helping to balance soil pH and encourage growth.

How to use:

  • Brew a weak tea from one used tea bag in 2 cups of water. Let it cool.
  • Use every 2–4 weeks as a watering supplement.

Best for: Ferns, calatheas, spider plants.

6. Vegetable Cooking Water

Don’t toss the water you used to boil veggies — it’s full of trace minerals like magnesium, potassium, and phosphorus.

How to use:

  • Let the water cool completely before using.
  • Use unsalted, unseasoned water only.

Best for: General houseplants and herbs.

7. Molasses

Molasses is a sweet source of potassium, iron, and calcium, and it feeds beneficial microbes in the soil.

How to use:

  • Mix 1 tsp of unsulfured blackstrap molasses into 1 liter of water.
  • Use once a month during the growing season.

Best for: Blooming plants, like African violets or peace lilies.

8. Compost Tea

If you compost, you can create a rich liquid fertilizer by steeping finished compost in water.

How to use:

  • Add a handful of compost to a bucket of water.
  • Let it steep for 1–2 days, then strain and use to water your plants.

Best for: All-purpose houseplant nutrition.

How Often Should You Fertilize?

Indoor plants are more sensitive than garden plants — so less is more!

General guidelines:

  • Growing season (spring and summer): Feed once every 2–4 weeks.
  • Dormant season (fall and winter): Stop or reduce to once every 6–8 weeks.
  • Seedlings and new transplants: Wait a few weeks before feeding.

Tip: Always observe your plant. If it looks healthy, you may not need to feed it as often.

A Few Natural Fertilizer DOs and DON’Ts

DO:

  • Mix well with water when needed
  • Use clean tools and containers
  • Label homemade fertilizers and store properly
  • Start with small amounts to avoid overfeeding
  • Water normally between feedings

DON’T:

  • Use too frequently — even natural fertilizers can build up
  • Apply to dry soil — water first, then feed
  • Use anything spoiled or moldy
  • Fertilize sick or pest-infested plants until they recover

Nourish Naturally, Grow Beautifully

Feeding your indoor plants doesn’t have to mean chemicals and store-bought solutions. With simple, natural ingredients and a little care, you can give your green companions the nutrients they need — while saving money and reducing waste at the same time.

Your plants (and the planet) will thank you. 🌍💚